Replace the Print Head Window
Glowforge Basic/Plus/Pro
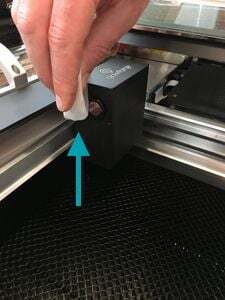
A protective window on the left side of your print head shields the mirrors and optics from harmful dust and dirt. This black-ringed orange window screws into the printer head. If it's scratched, damaged or has residue that won't come off with cleaning, it may affect your printing and will need to be replaced.
Here are the steps to replace your print head window:
- Turn off your Glowforge
- Follow the instructions in this article ("Cleaning your Glowforge," under the heading "Cleaning the cameras, laser lens, and windows") to remove the printer head.
- Unscrew the printer head window. If it's difficult to turn, use a rubber glove for extra grip.
- Screw in the new window.
- Wipe the new window with a Zeiss Wipe or similar lens cleaning wipe.

- Follow the instructions in this article ("Unboxing and Setting Up Your Glowforge," under the heading "Snap in the printer head) to return the printer head to its usual position.
- Turn your unit back on and try a print!
If you run into any trouble or have questions, please contact our team and we'll be happy to assist you!