Align & Distribute
With the Glowforge App's alignment tools, it’s easy to align and arrange your artwork in the app.
With a new addition to the Precision Toolbar, all users can now align objects like artwork and text to the top, middle or bottom of one object to the top, middle or bottom of another object. You can do the same with lefts, centers, and rights!
For Glowforge Premium members, it’s even easier with our smart alignment snapping. Move any object close to another to get teal alignment guides that help you keep everything neat & tidy.
Smart snapping includes:
- Alignment snaps: Teal guidelines help you align one object to another. Objects can be aligned to the tops, middles, and bottoms of other objects. You can do the same with lefts, centers, and rights.
- Distribution snaps: Teal guidelines help you place an object between two other objects that are already aligned with a snap. That means if you are moving an object in between two others, your object will snap neatly between the other two.
For more precise movements, you can temporarily disable snap guidelines by holding down the Control Key (or Command on Mac).
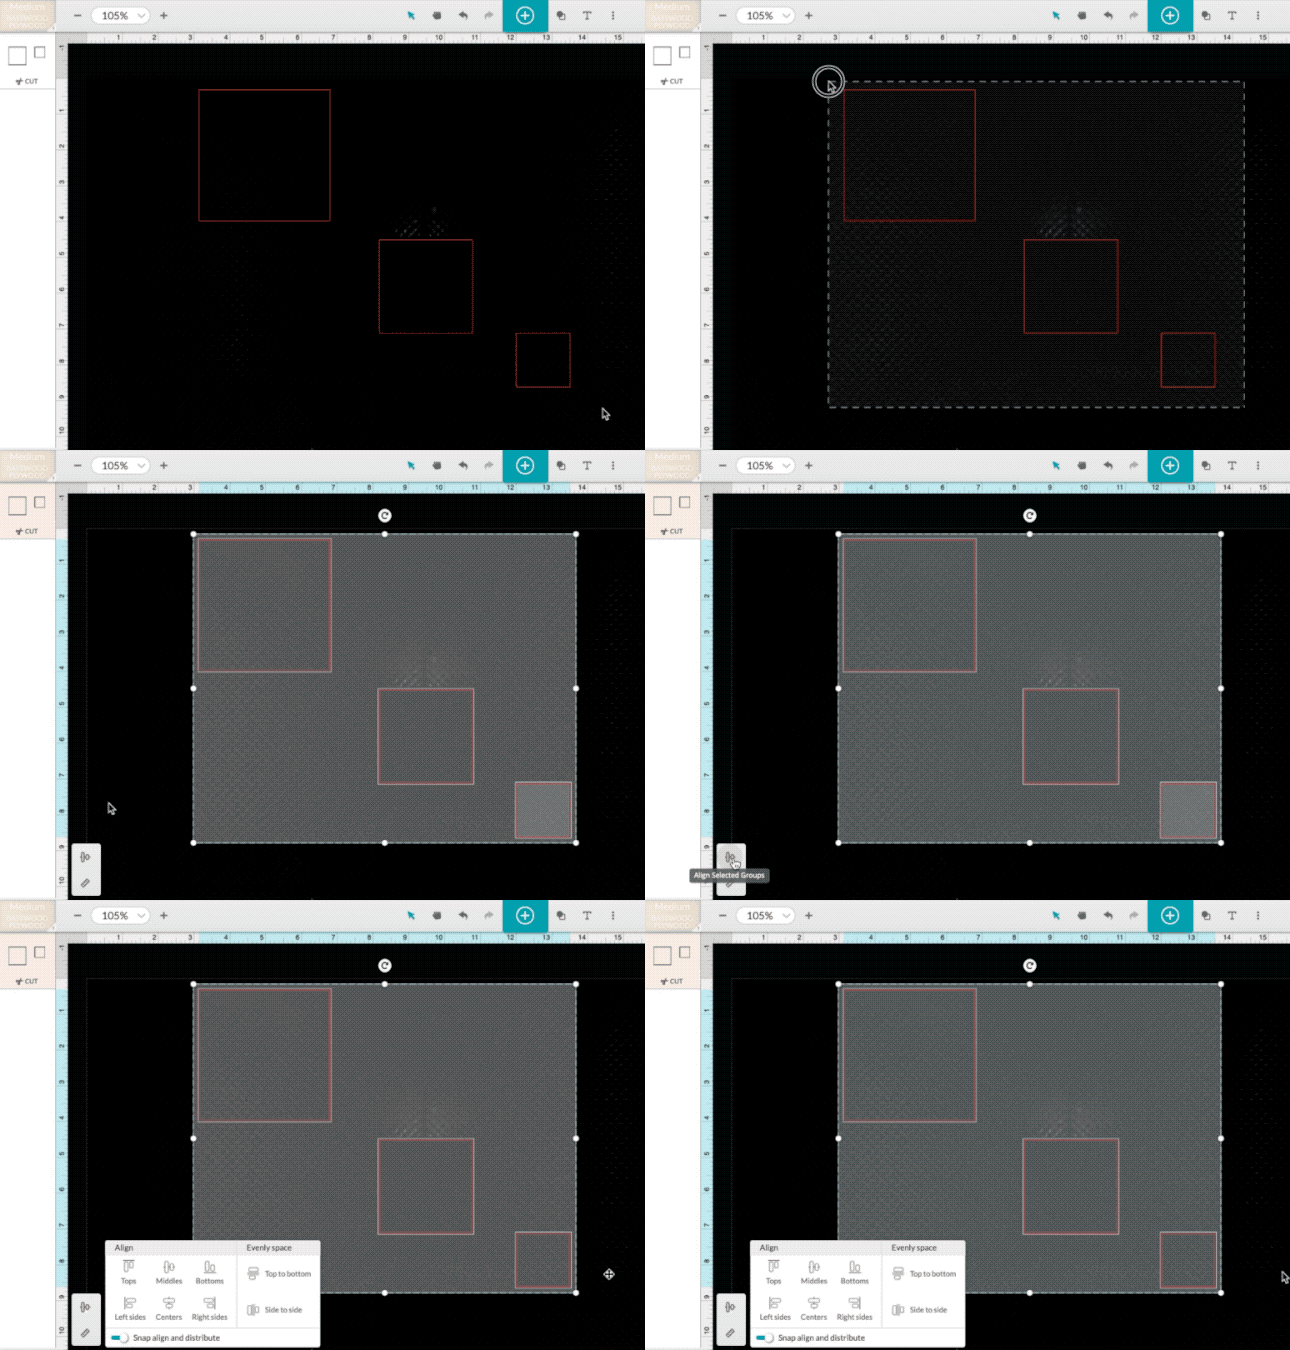
The align and distribute menuYou can find the align and distribute menu by selecting any artwork, and then clicking on the align icon in the bottom-left corner of the workspace:

Once the menu is open, if you have more than one design element selected, you'll see these options for alignment and spacing:

(Premium members will see an additional option for the Snap align and distribute tool)
Align options:
Tops: Aligns the selected artwork along the top edges
Middles: Aligns the selected artwork along the horizontal centerline
Bottoms: Aligns the selected artwork along the bottom edges
Left sides: Aligns the selected artwork along the left edges
Centers: Aligns the selected artwork along the vertical centerline
Right sides: Aligns the selected artwork along the right edges
Evenly space options:
Top to bottom: Evenly distributes the selected artwork vertically
Side to side: Evenly distributes the selected artwork horizontally
Aligning by clicking and dragging
For premium members, the align and distribute tool has a feature that automatically snaps design elements into alignment with each other as you click and drag to move them. This can be a fast way to accurately arrange your designs!
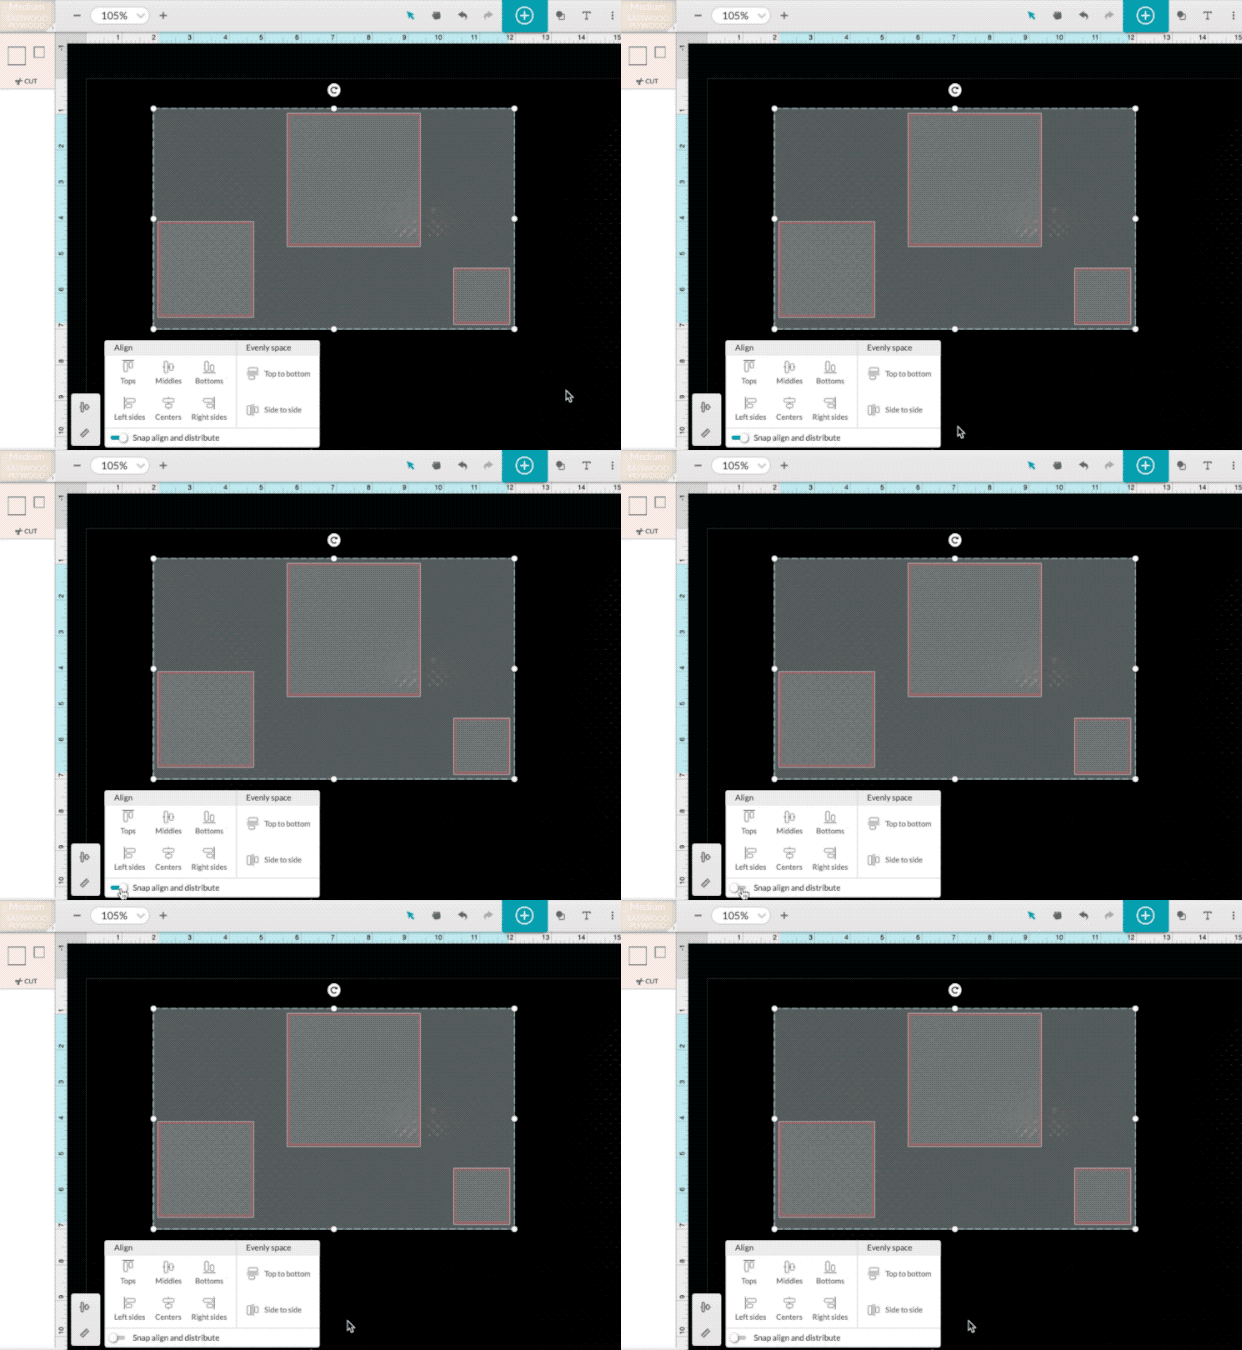
You can turn the snap align and distribute feature on or off by clicking the the toggle in the align and distribute menu:

Or you can temporarily disable snap guidelines by holding down the Control Key (or Command on Mac).
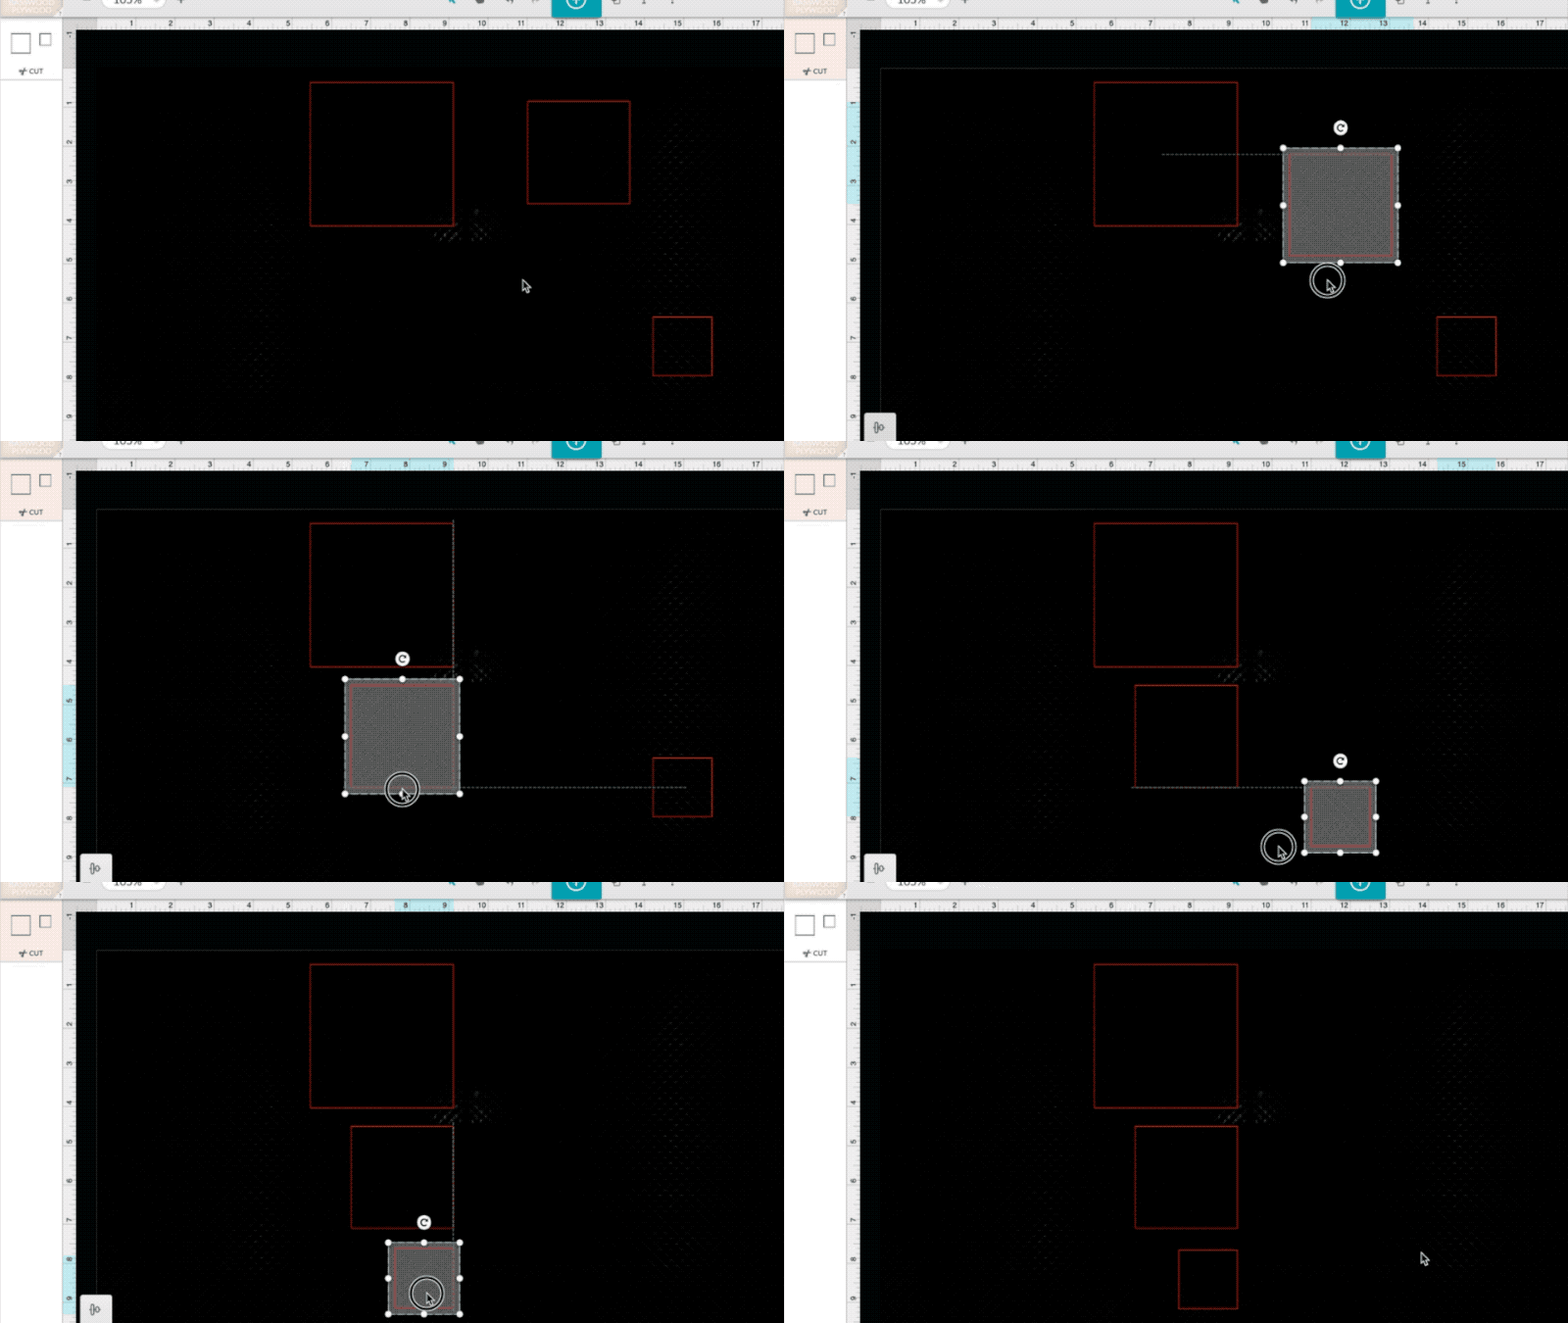
With the snap align and distribute feature turned on, when you click and drag part of your design, you'll notice it snap into position to be aligned or centered with other design elements, and a dotted line displays what the object is being aligned to. Here's a quick example showing clicking and dragging shapes to align them along their right edges:

Aligning by using the buttons in the menu
With more than one design element selected, you can use the buttons in the align and distribute menu to arrange your artwork precisely.
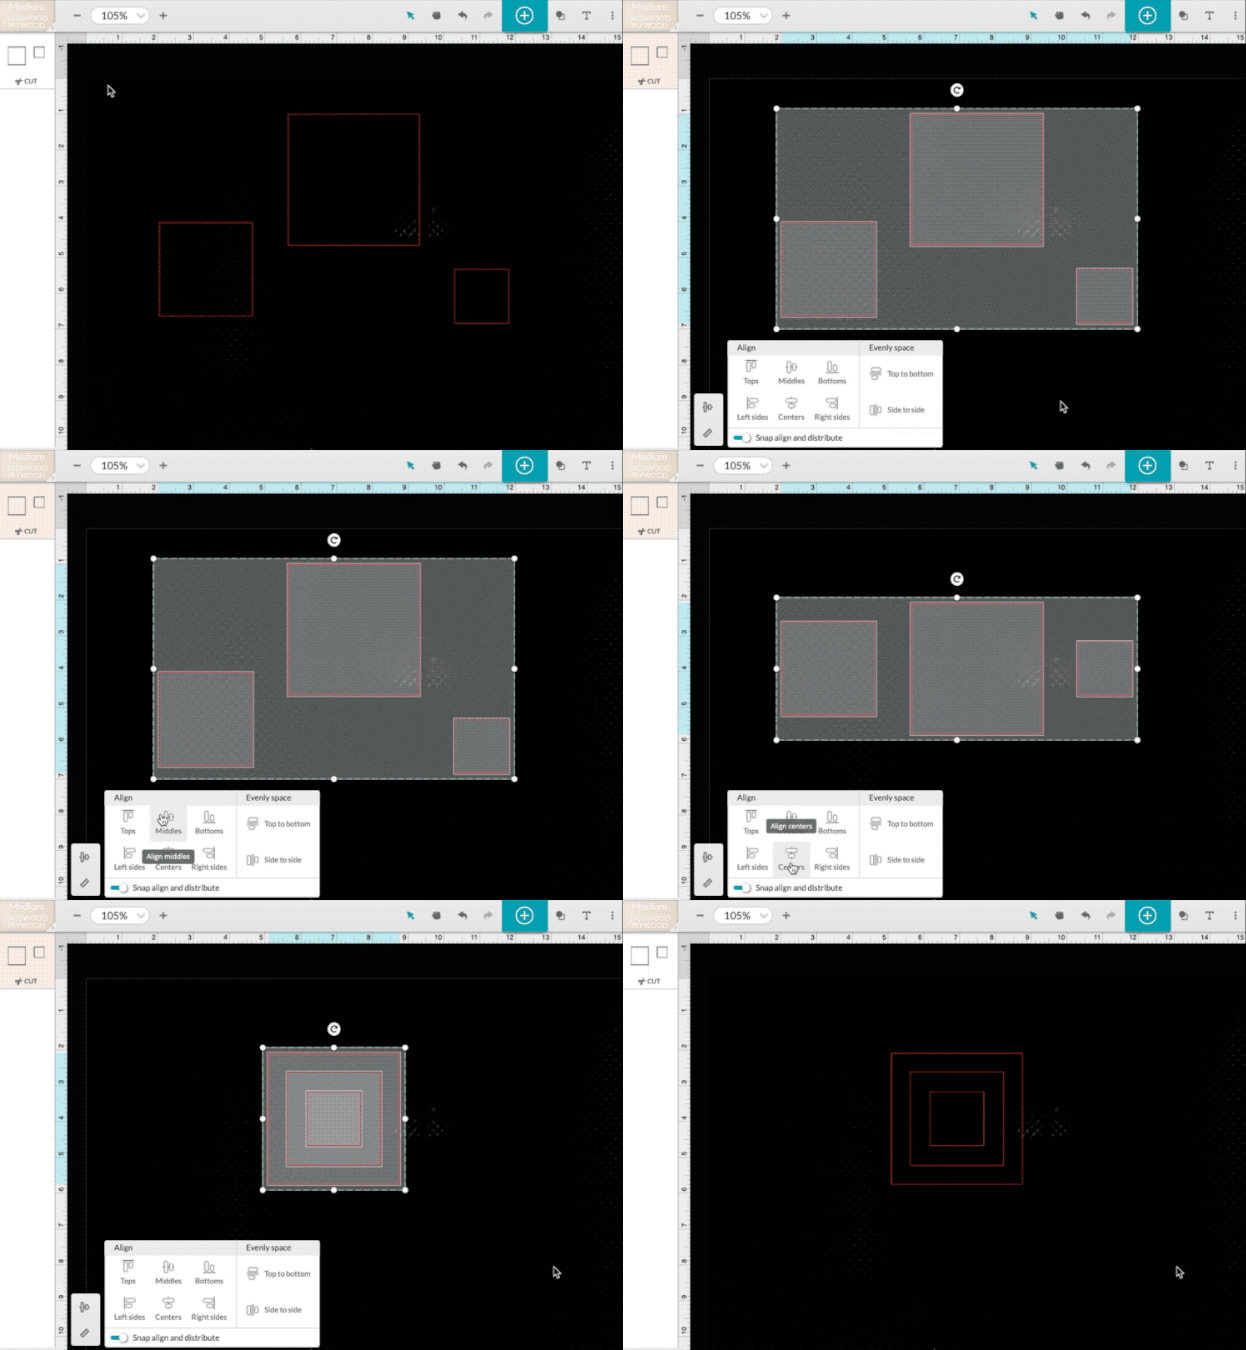
To get started, hold shift and click on multiple objects, or click and drag a selection box around what you want to align. Then, choose which alignment or distribution method you want to use. Here is an example showing how to align multiple objects along their middle and center:

If you run into trouble along the way, or have questions about how to use this tool, please contact our team and we'll be happy to help!