Replace the Carriage Plate
Glowforge Basic/Plus/Pro
The carriage plate attaches to the laser arm and holds the printer head as it moves back and forth while printing.
You may need to replace the carriage plate if it's damaged, if you have trouble with your print results, (such as distortion), if the printer head homing calibration doesn’t complete, or if one of our support team members has recommended a new one.
Before you begin- You’ll need a new carriage plate, and a 3mm L-shaped hex key.
- It’s also helpful to read all of the instructions before you begin.
Remove the carriage plate
- First, turn off your Glowforge.
- To give yourself some room to maneuver, open the lid and the door, and then remove the crumb tray.
- Remove the printer head. Holding only the finished black surfaces, grasp the printer head as shown. Pull gently up and back to disengage the magnets and remove the head.
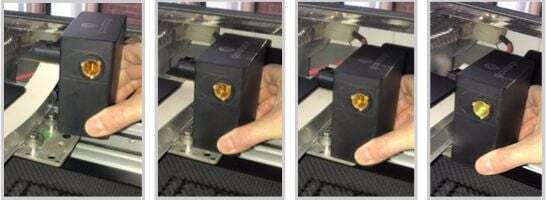
-
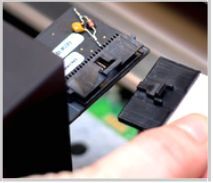
Unplug the wire ribbon. Push down fully on the wire ribbon tab to unplug the wire ribbon from the printer head. Pull the wire ribbon gently away and tuck it into the laser arm, and then set the old printer head aside.
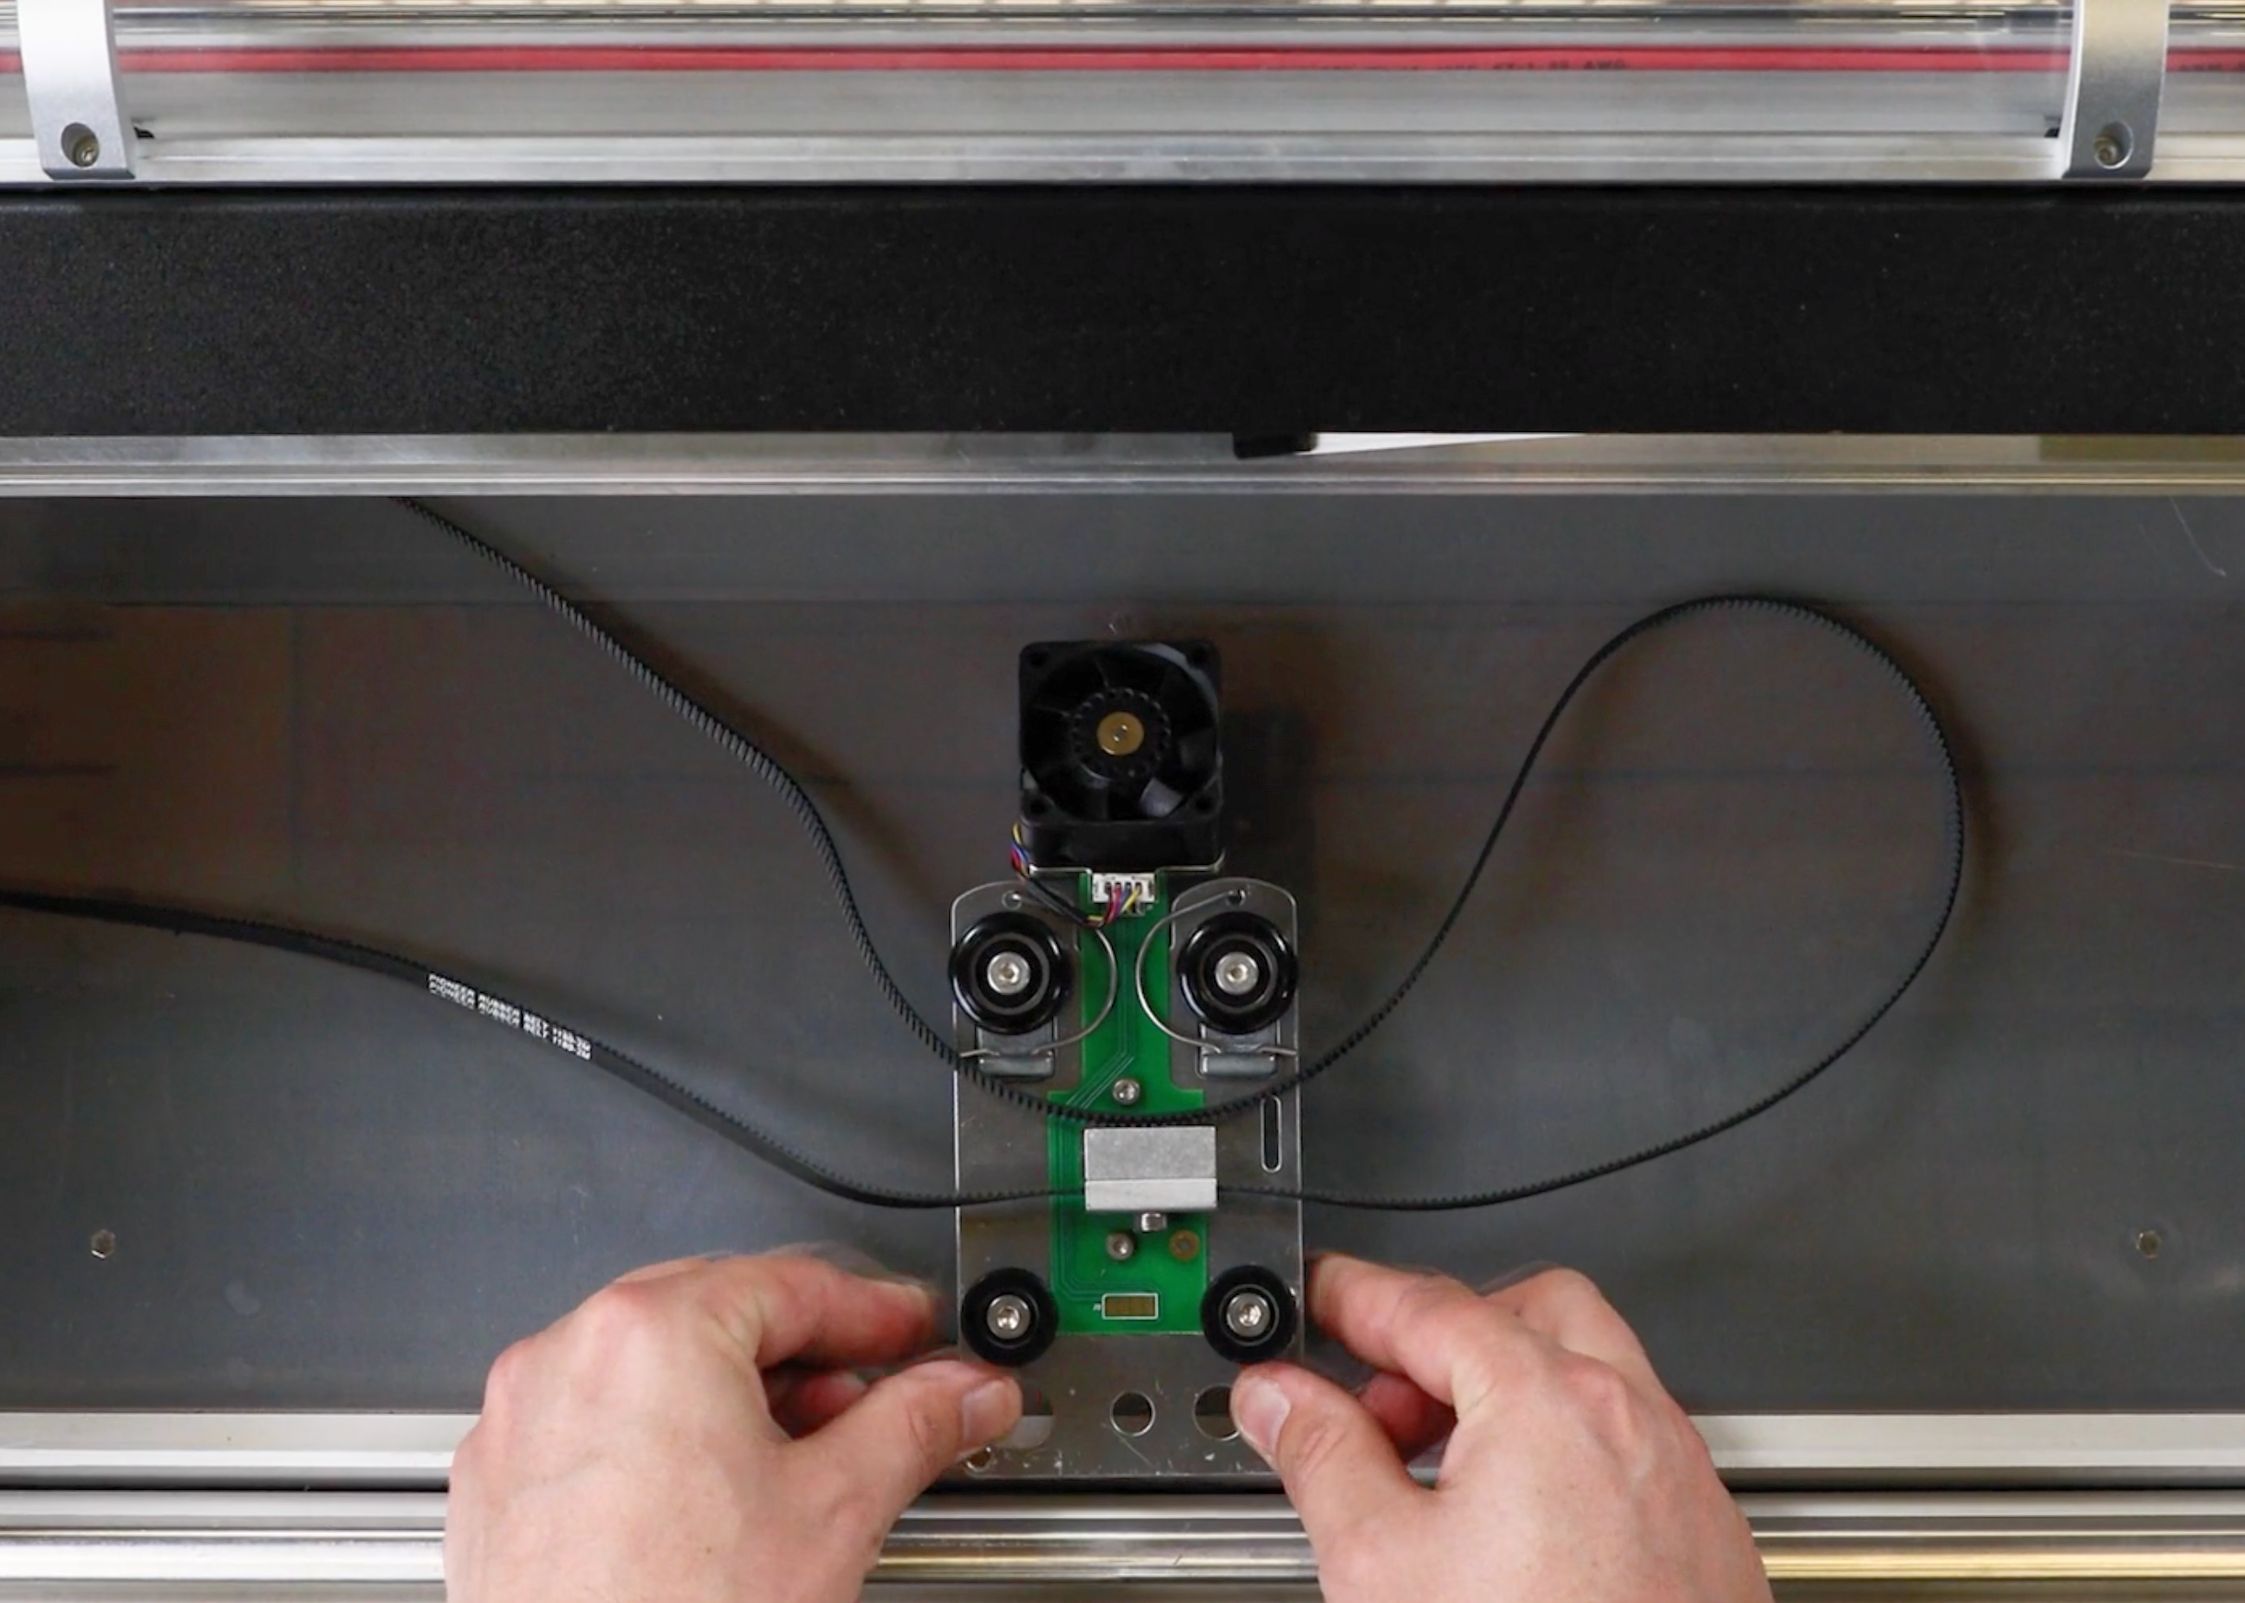
- Unhook the belt that moves the carriage plate back and forth.
-
- Slide the carriage plate gently to the center of the laser arm.
- Place your thumb between the belt and the laser arm near the pulley on the right side.
- Gently push down on the belt while sliding the carriage plate towards your hand and the pulley. This will guide the belt down and off of the pulleys.
-
- The carriage plate is held to the laser arm with 4 v-shaped wheels, called (surprisingly enough) v-wheels. The front pair are fixed in place and the rear pair use springs to create a snug fit. Using steady slow pressure, pull the carriage plate forward. This will compress the springs in the back wheels and allow the front wheels to clear the front rail.

- To replace the carriage plate, first make sure the belt is laid out smoothly. The loose part of the belt should lie between the front and back wheels and the belt should have no twists or kinks.
- Make sure your belt is laid out the same way. You’ll have the loose side of the belt between the back v-wheels and the metal clamp that attaches the belt to the carriage plate. Your fingers should be placed the same as before, when you pulled the plate out.
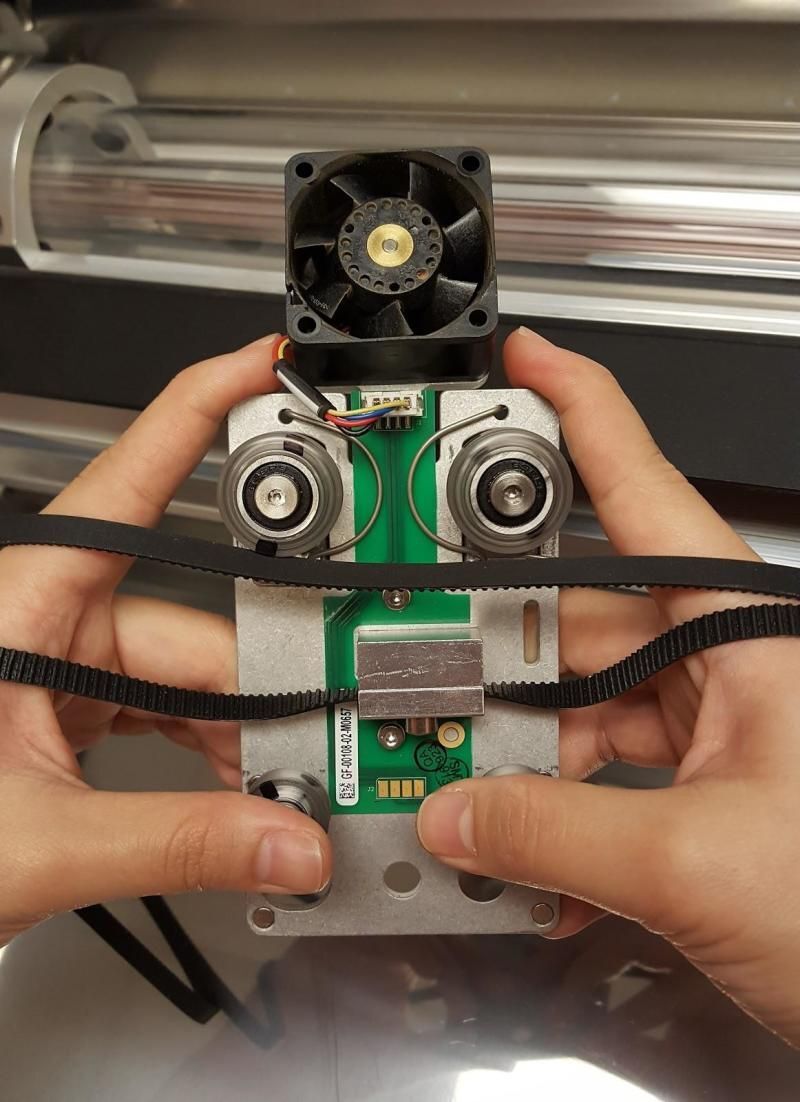
Note: If the loose part of the belt is looped under the carriage plate, your printer head won’t be able to move properly. - Hook the rear wheels on the groove under the laser arm. You’ll know you are in the correct spot by feeling the rear v-wheels grasp the rail. The front wheels should be mostly visible.
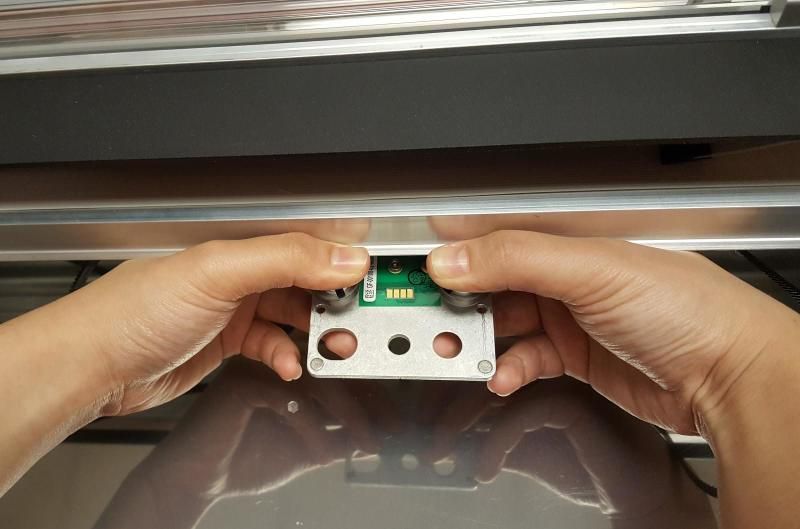
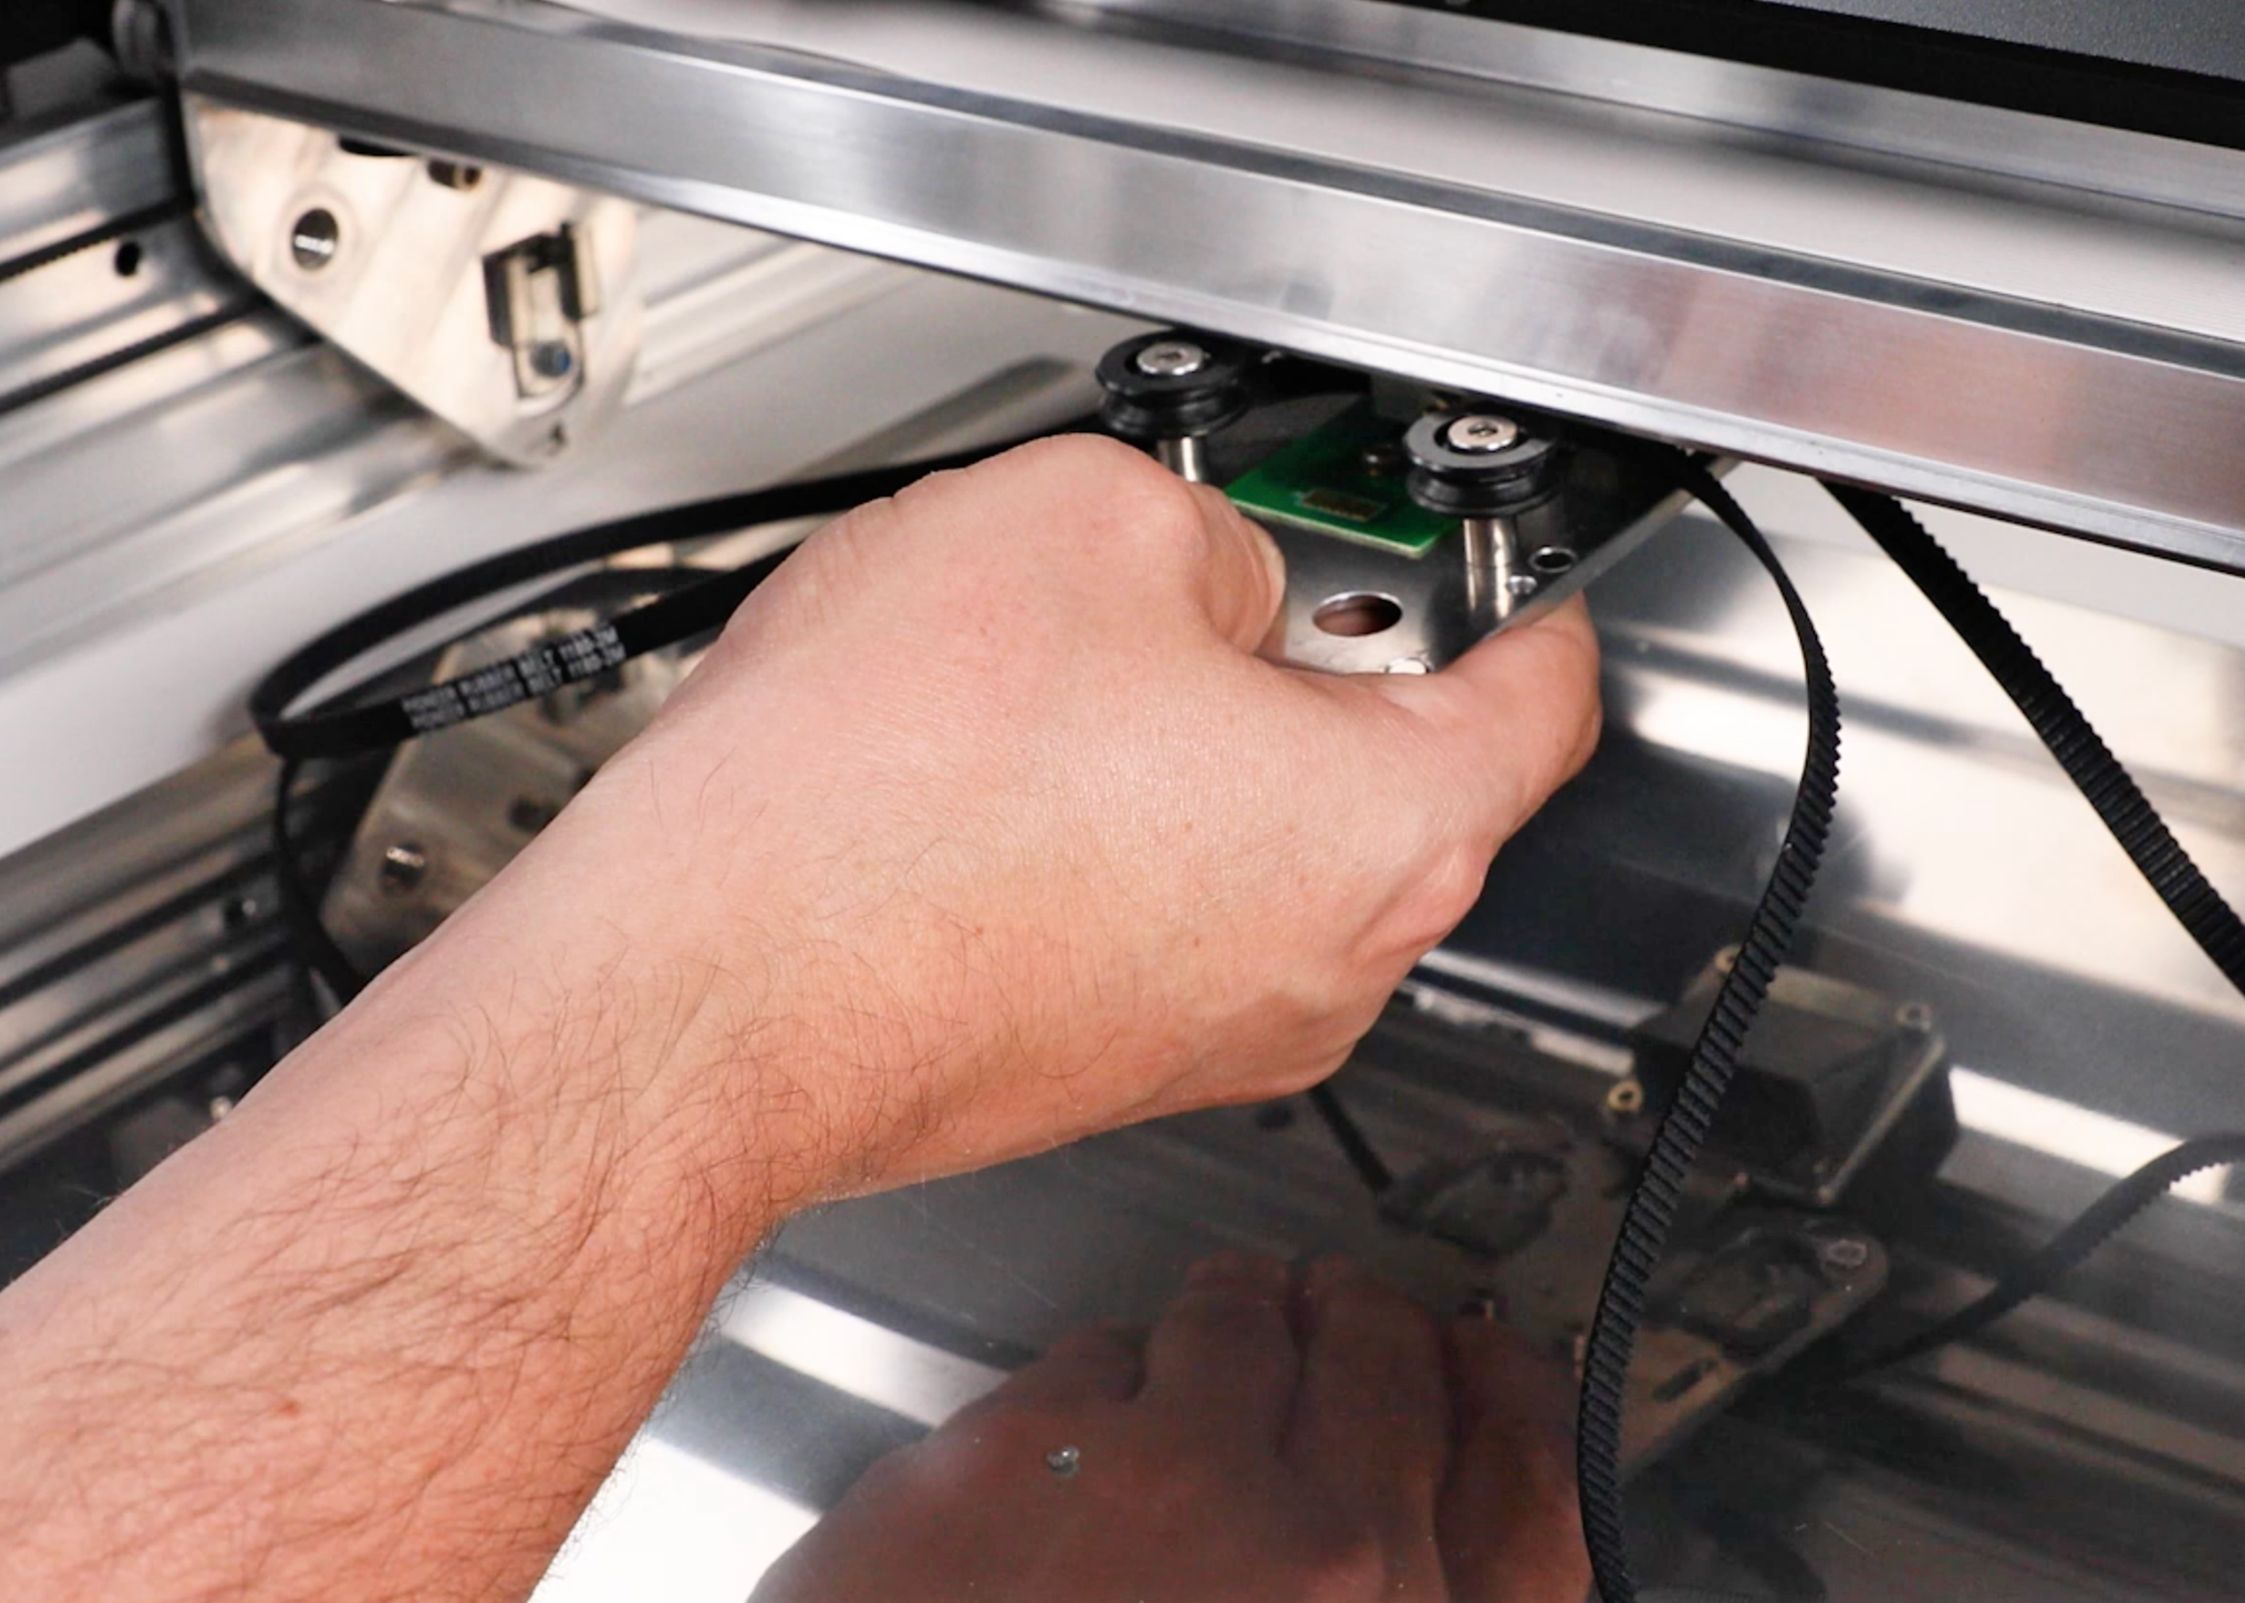
- Using slow steady pressure, pull the plate forward until the front wheels clear the laser arm and then angle the plate up until the wheels are in line with the rail. Release the plate – it should grasp the rail firmly.
- Now, hook the belt onto the pulley on the left side. The inside of the belt has ridges, while the outside is smooth. Using your right hand, hold the inside of the belt to the front of the right pulley. While keeping tension on the belt, slide the carriage plate to the right as you guide the belt onto and around the pulley.
- If the belt seems too tight to roll onto the pulley or the belt is loose, you will need to loosen the pulley as well.
- Now that the carriage plate has been installed, and the belt tension is correct, give the plate a gentle slide to the left and right to ensure that it travels smoothly.
- You’ll want to try a test print. But before you do, of course, you’ll put back the crumb tray, reinstall the printer head, close the door, and turn on your Glowforge.
Hopefully, that gets you back to printing. If so, yay!
If not, we have a wonderfully talented and knowledgeable support team -- many of them fellow artists, makers, and crafters -- who want nothing more than to help you figure out and fix the trouble. For help or questions, please contact us and we'll get you the help that you need.