Personalize Your Holiday Table with Premium Creative Tools & Proofgrade® Hardwood
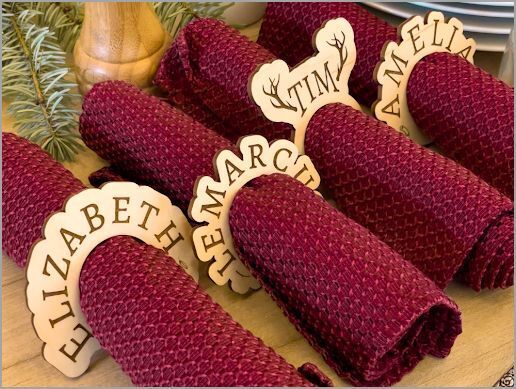
In this tutorial, we'll show you how to put everyone in their place during your autumn feast, with personalized napkin rings! You’ll use the graphics library, outline tool, and the brand new text Styles feature in Premium Creative Tools.
Start with a circle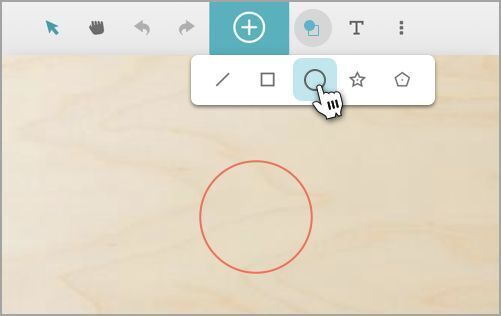
First, make the hole for your napkin ring.
- You’re creating this design from scratch, so on the Dashboard, click Create a New Design, then click Create a blank design.
- On the top menu bar, click Insert shape.
- Click Insert circle for the hole of your napkin ring.
- Resize the circle to about 1.5” (38mm).
Tip: Once you’ve completed your design, you can do a test print in cardboard to make sure the size you pick fits your napkins!
Add artwork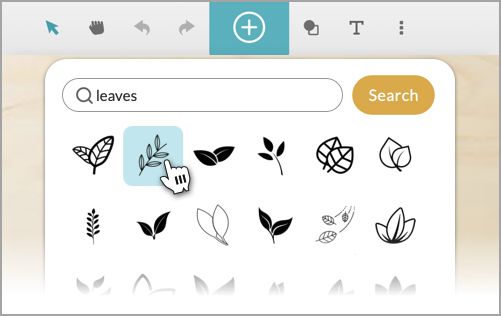
Now, let’s add some artwork to your design to make it festive.
- On the top menu bar, click Import artwork.
- Search to find some art you like or use one of the featured illustrations.
Tip: Something thin and curved to follow the curve of the ring is a good option. Leaves are always a classy choice for autumn!
Don’t worry about resizing or rearranging your elements yet – you'll do that in a few steps.
Add text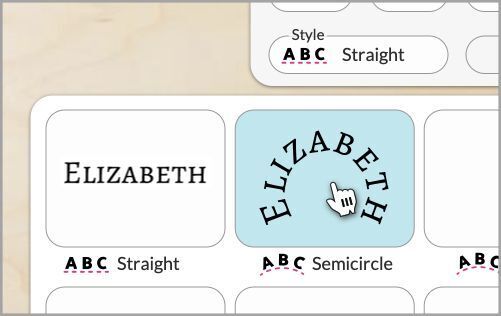
Next, add the text for your first guest and apply one of the fun text styles.
- On the top menu bar, click Insert text.
- In the text box, type the name of your first guest.
- Select the font you want from the dropdown menu. For this project, we used the font Alegreya SC.
- Click the Style menu, and then choose one of the Arc styles.
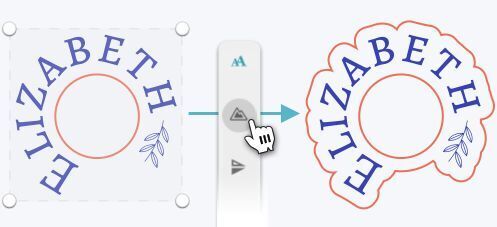
Next, let’s arrange and resize everything.
- Resize and rotate your text and graphic so that both follow the curve of the circle.
- Click and drag a selection box around all of your art and text elements.
- On the right toolbar, click the Outline button.
Tip: If you’d like a perfectly round napkin ring instead of shaped to the text, in Step 2, rather than creating an outline, just add another circle to surround the outside of your text.
Check settings and print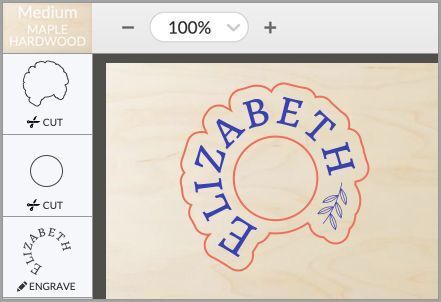
Finally, we'll make sure your Glowforge knows what to do with each of the shapes in your design.
Tip: Before you finalize, now is a good time to do a test print on cardboard to make sure that the napkin ring size fits your napkins. If you need to resize, you can use the Group feature to easily resize your design while keeping the relationships among the elements intact. When you’re happy with the size, follow these steps.
- Place a piece of Medium Proofgrade® hardwood or plywood in your print bed.
- Your Glowforge will read the QR code for the Proofgrade material, or you can click the materials menu in the upper left and select your material.
- Make sure the inner circle and outline are set to Cut.
- Make sure your graphic and text are set to Engrave.
- If everything looks good, it's time to print! Click the PRINT button in the upper right corner.
- When you’re ready, press the start button on your Glowforge.
- Now make the personalized napkin rings for the rest of your guest list!
Your guests will be blown away by your thoughtful, personal touch at the dining table, and they’ll have a lasting keepsake of the event. They can even run a string through the middle and turn it into a festive ornament!