Connect Your Glowforge Performance Filter
Glowforge Basic/Plus/Pro
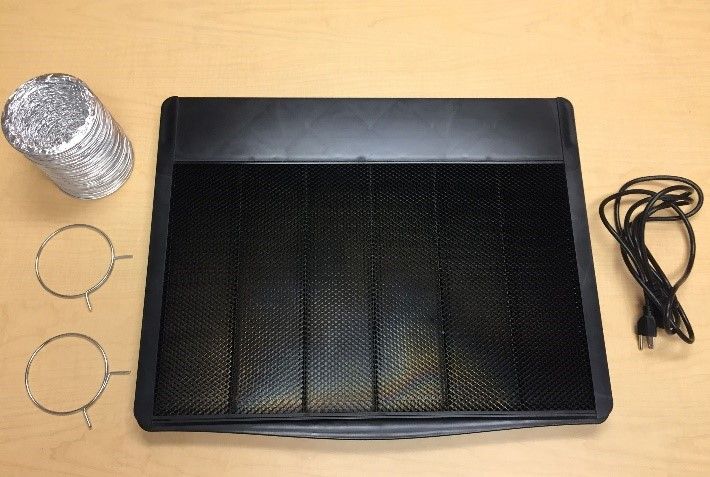
Your Glowforge printer came with an accessory pack that includes the exhaust hose and two ring clamps (shown on the left side)
To connect your Glowforge Performance Filter, start by gathering the exhaust hose and two ring clamps that came with your Glowforge. (If you want a new hose, you can purchase one in the Glowforge shop.)
It's also helpful to read through these instructions before starting.
- Double-check that your Glowforge is turned off and unplugged.
-
Connect the hose to the printer
First you'll connect the hose to your Glowforge. (If you're already using an exhaust hose to vent to the outside, you can reuse that hose and skip this step since the hose is already connected to your Glowforge.)Slide the ring clamp around the silver 4-inch-diameter hose provided. Squeeze the two ends of the clamp together to fit the hose and clamp over the exhaust connection on the back of your Glowforge printer. Let go, then check that the clamp is settled over the white ring around the exhaust and will not come off with a gentle tug.
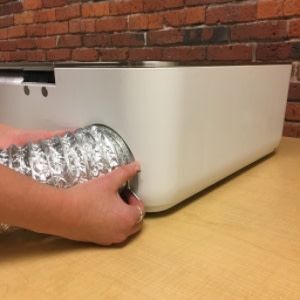
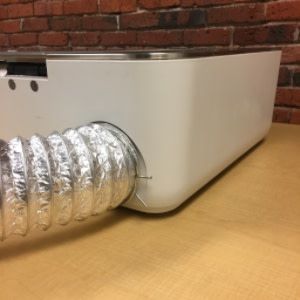
- Connect the hose to the Glowforge Performance Filter
Put the other clamp around the other end of the hose. Repeat the procedure above to attach the exhaust hose to the top of the Glowforge Performance Filter with the ring clamp.
Keep the hose as straight as you can, with no more than three turns of 90 degrees or less. Make sure the hose isn’t twisted, pinched, kinked, punctured, or flattened. If there is extra hose, do not let it sag; wrap it tightly with duct tape to keep the hose length as short as possible.
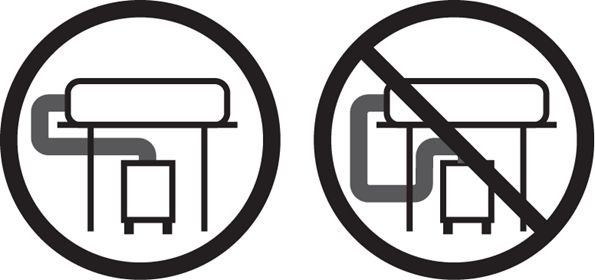
- Connect your Glowforge Performance Filter to electrical power
Verify that the power switch is “Off” (the 0 side depressed, as shown).
Verify the filter is installed and the lid is firmly closed.
Plug the power cord into the back of the Glowforge Performance Filter, then plug the power cord into an electrical socket. A standard grounded household socket works well.
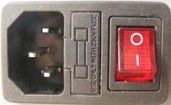
With your hardware set up, it's time to turn to the software, by telling the Glowforge App that you're using a filter.
Enable the Glowforge Performance Filter in the Glowforge UI
- Go to Glowforge App (https://app.glowforge.com) and sign in, if needed.
- On the Dashboard, click Create a new design, and then click Create a blank design.
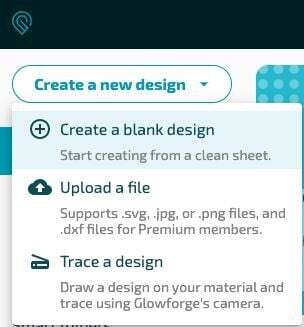
- On the top menu bar, click the three-dot More menu, and then click the gear icon, and then turn on the Glowforge air filter attached option.
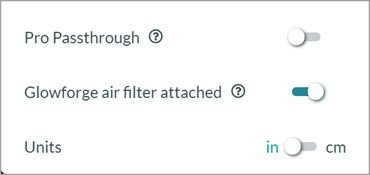
That's it! You'll notice a difference in exhaust sound as the fans on your printer will now run slower to match the speed of the fan in the air filter.
Adjust the Glowforge Performance Filter dial
The dial on the Glowforge Performance Filter controls the power to the fan. When it is too high or too low, your Glowforge Performance Filter will not work properly.
When you first use your Glowforge Performance Filter, turn it to NEW. The fan will use its lowest power setting, which is the best setting for a new filter. Do not use a higher setting, as more power will move air too quickly, and smoke and fumes may not be completely removed.
After you have used the filter for a while, the filter cartridge will start to fill. More power will be required to move the air through the Glowforge Performance Filter, and the NEW setting will no longer reduce smoke and fumes. If you see smoke and fumes on the lowest setting, use the middle setting, halfway between NEW and FULL.
Finally, when the filter cartridge is almost full, it will again stop reducing smoke and fumes, and more power will be required to fully eliminate smoke and fumes. When that happens, turn the dial to FULL.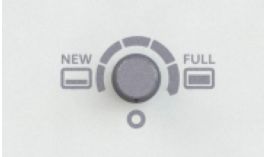
The bottom setting is off; the dial turns clockwise.
To begin, set your Glowforge Performance Filter dial to NEW. Your Glowforge Performance Filter is now ready for use.