Make a Leather Luggage Tag using Premium Creative Tools
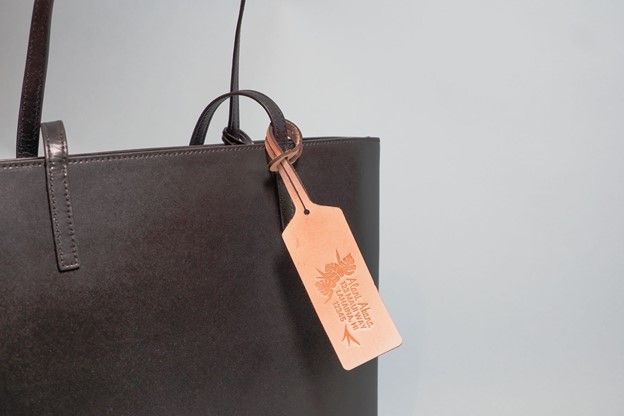
In this tutorial, we'll show you how to make a custom leather luggage tag. You'll use Proofgrade® Acrylic and deboss leather with the text, artwork, and stamp features in Premium.
Tip: To get started on this project, use this Customizable Luggage Tag from the catalog (it's free with Glowforge Premium).
With the luggage tag design open in your workspace, you're ready to get started. Or, you can follow along with the steps to create your own design from scratch.
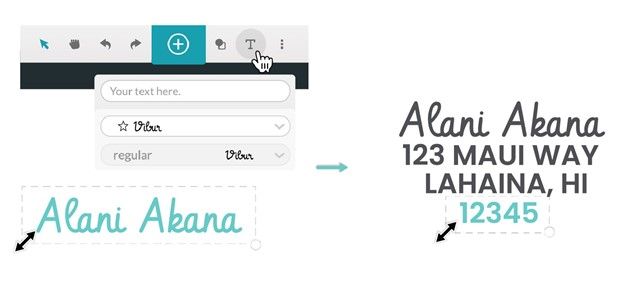
First, add the text for your address.
- On the top menu bar, click Insert text.
- In the text box, type the first line of your address.
- Select the font you want from the dropdown menu. For this project, we used Vibur and Poppins.
- If you want to add any bold or italic variations for your font, click the bottom dropdown menu and select from the options.
- Repeat steps 1-4 to create a text box for each line of your address.
- You can resize, rotate, or drag your text as you like.
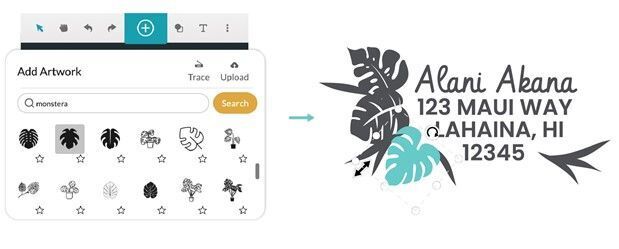
Now, let’s add some artwork to your design.
- On the top menu bar, click Import artwork.
- Search for art you like, or click one of the featured illustrations.
Tip: To make your design even more interesting, you can insert and overlap multiple artwork elements as we did in the example above. - Resize, rotate, or move your artwork to align it and make it look great.
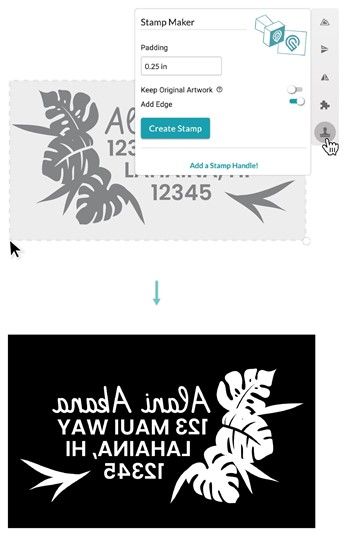
Next, it’s easy to make your design stamp-ready using Stamp Maker.
- Click and drag a selection box around all of your art and text elements.
- If you are using this stamp for the Customizable Luggage Tag catalog design, resize the artwork to fit within a 4” x 1-¾” rectangle.
- On the right toolbar, click the Stamp Maker button.
- Set the padding (the blank space around your stamp artwork) to 0.50.”
- Turn on the Add Edge option to add a cut border around your stamp.
- If you want, turn on the Keep Original Artwork option to retain an editable version of your design.
- When you have the settings you want, click Create Stamp.
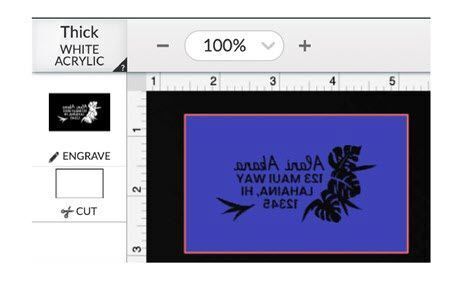
Finally, we'll make sure your Glowforge knows what to do with each of the shapes in your design.
- Place a piece of Thick Proofgrade® Acrylic in your print bed. If not using Proofgrade, click the materials menu in the upper left and select your material.
- Make sure the edge layer is set to Cut.
- Click the print step for your stamp artwork and make sure it is set to Engrave.
- If everything looks good, it's time to print! Click the PRINT button in the upper right corner.
- When you’re ready, press the glowing button on your Glowforge.
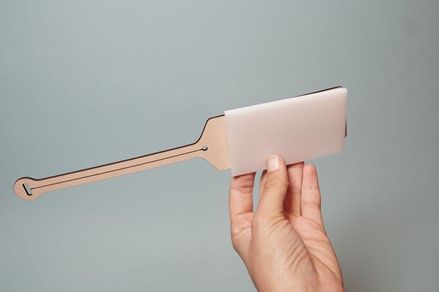
- First, soak your leather fully submerged in water for up to 60 seconds.
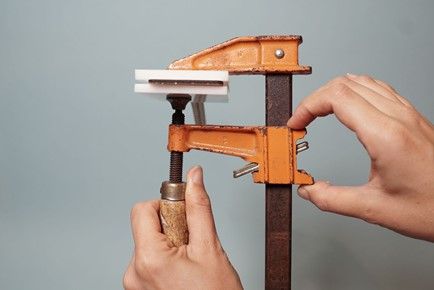
- Sandwich the saturated leather between the stamp and a piece of scrap material that’s about the same size. This will help to support the leather during stamping and spread the force from the clamp across the entire stamp design.
- Using a heavy-duty clamp, squeeze your leather and acrylic sandwich for a minimum of two hours. We’d suggest using a screw-type clamp for this job, as a squeeze clamp is unlikely to provide enough pressure.
- After a couple of hours, remove the clamps to reveal your custom luggage tag.
Wait for the leather to dry before attaching your new tag to your luggage. Then pack your bags, and get ready for your friends to request their own!
See also
Learn more about Glowforge Premium.