Copy-and-paste makes it even easier for you to create great Glowforge designs, without having to keep creating the same shape. You can also group objects together, making it easy to move or resize the group without affecting the relationship of individual shapes. It makes placing your shapes much easier.
Here's how to use these tools.
Copy
- To select what you want to copy, click on the object or artwork, or click and drag a selection box around it.
-
Mouse
Keyboard shortcuts
Right-click, and then select Copy.
Press Control+C for Windows or Command+C for Mac.
Tips (desktop and mouse only):
- To select multiple objects, hold the Shift key while clicking on the objects you want to select.
- To select everything in your design, press Ctrl+A for Windows or Command+A for Mac.
Paste and keep copies in the same print step
Once you’ve copied your selected objects or artwork, use this option if you want to set the original and copies to run as a single print step.
-
Mouse
Keyboard shortcuts
Right-click, and then select Paste.
Press Control+V for Windows or Command+V for Mac.
- In the print steps sidebar on the left, you’ll only see one print step for the objects you’ve pasted, and those objects will all have the same print settings.
Paste and create a new print step
Once you’ve copied your selected objects or artwork, you can set up different print settings for each copy you paste. Maybe you want one shape to be a cut, for example, while the other is a score.
-
Mouse
Keyboard shortcuts
Right-click, and then select Paste as new step.
Press Control+Shift+V for Windows or Command+Shift+V for Mac.
Here’s an example of a copied circle with a new print step:

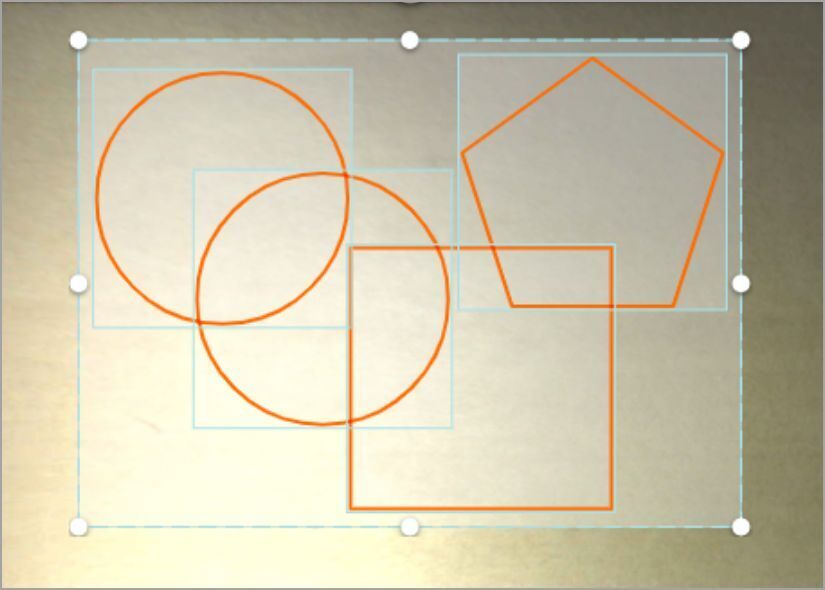
Use grouping to easily move and resize a collection of objects without altering their relationship to one another.
Group- To select what you want to group, click on the object or artwork or click and drag a selection box around it.
- Now, when you click on any shape from the group you’ve made, the entire group will be selected. You can move and resize the arrangement while keeping the relationships between objects consistent.
Here’s an example of grouped objects that have been selected to move or resize:
When you're working within a group, you can make fine adjustments to just one of the items without having to ungroup everything.
- Right-click (or double-click) on the group.
- In the menu, click Edit in Group.
- Select, drag, resize, or delete individual elements to get your design just how you want it.
- When you're ready to save, click Back.
It's easy to break up a group, if, for example, you want to move individual items.
- Right-click (or double-click) on the group.
- In the menu, click Ungroup.
See also
Learn more about Glowforge Premium