Replace the Black Lid Cable
Glowforge Basic/Plus/Pro
If you need to replace the black lid cable, they're available for purchase in our shop here.
Once you have your new cable, follow these instructions to install it. It’s helpful to read these instructions all the way through before you begin the process.
- Turn off and unplug your Glowforge.
- Open the connectors.
The cable attaches in 3 spots, and is also connected to the glass, as shown below.
- First, gently open the left connector, like a hinge, as shown below.

- Repeat for the right and middle connectors.
- Disconnect the cable.
Slide the end of the cable straight out of the slot, and then repeat for the right and middle connectors.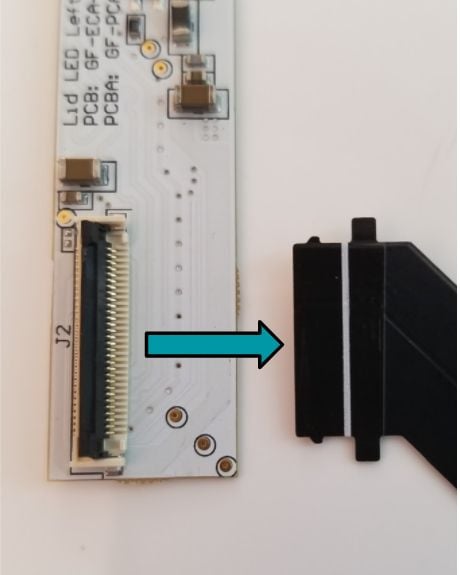
- Peel the cable off the lid.
Once all three ends are disconnected, peel the cable off of the lid.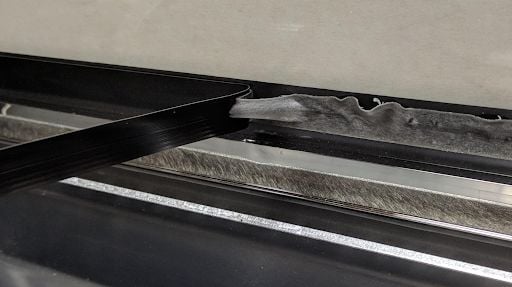
- Remove the remaining adhesive.
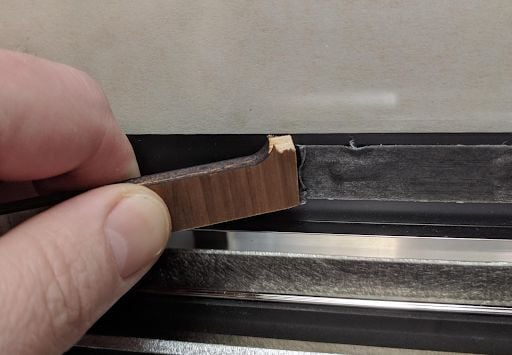
This may take a few minutes. We’ve found it works well to use a piece of Proofgrade® scrap to scrape away the adhesive, then wipe the surface clean with a dry cloth. The surface does not need to be perfectly clean for the new cable to adhere properly.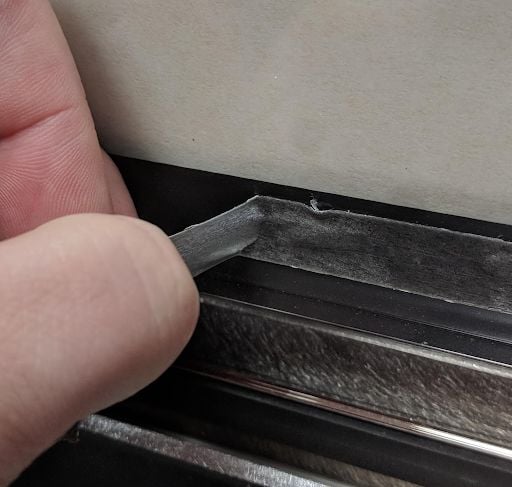
- Plan the cable location.
Before you remove the adhesive backing of the new cable, determine the correct location for the cable. The top of the cable should be about 1/8 in (.3 cm) below the black paint on the lid glass. - Verify the cable location.
Locate the flat notch in the metal strip at the bottom of the lid, near the right hinge. This is where the middle connection sits. The black cable should cross at that point.
- Remove the long strip of backing
Once you're confident of the placement, remove the long strip of backing (leaving the small square on for now). - Apply the new cable to the lid.
- Hold on to the edges and carefully apply the cable into the position you just planned. Remember the top of the cable should be about 1/8 in (.3 cm) below the black paint on the lid glass.
- To start, stick the cable down where the vertical part of the cable is positioned across the flat notch, and then smooth outwards to the right and left.
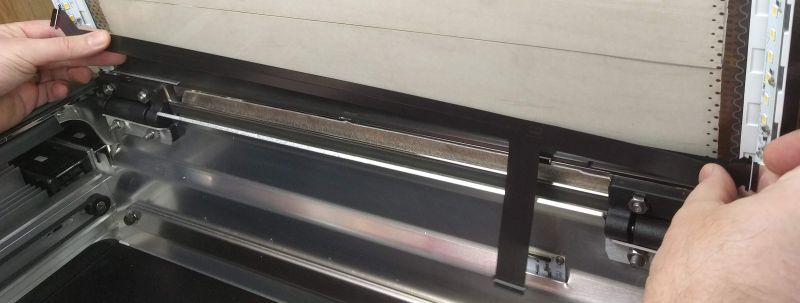
- Connect the left end of the cable.
Carefully slide the end of the cable into the slot on the left side.
Note: Insert the end of the cable into the slot as straight as possible. Be careful not to insert the end at an angle, as this could damage the cable or your Glowforge.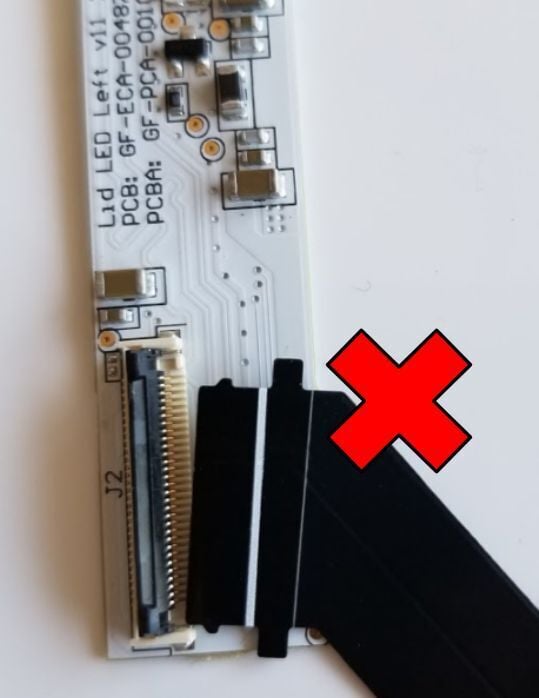
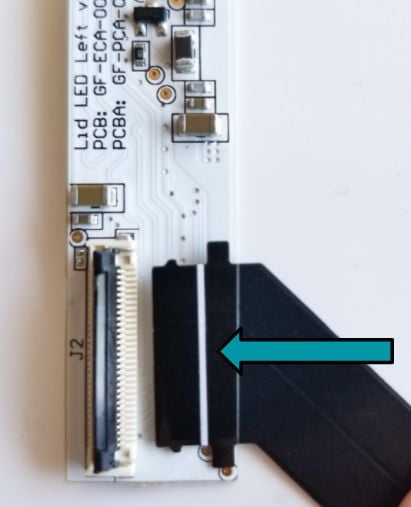
- Check the left side installation.
Check that the left side is correctly installed. The small black tabs should fit into their groove in the connector, as shown in the image below.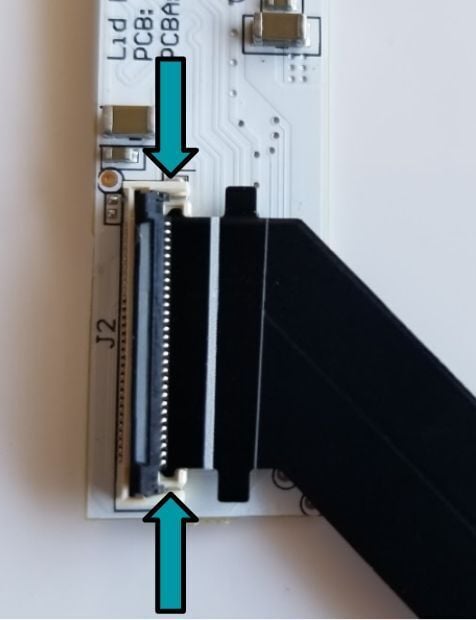
- Close the connector and connect the right side.
Gently close the connector, like a hinge, to secure the end of the cable, and then repeat steps 10-12 for the connector on the right side.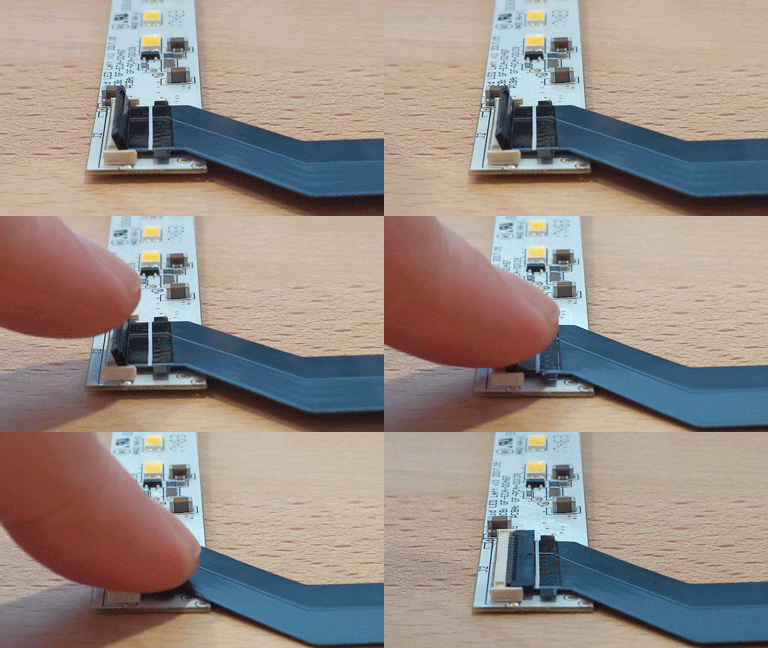
- Secure the middle connection.
Once both sides are connected, clip in the middle connector, still leaving the adhesive backing on. The second image below shows the completed middle connection.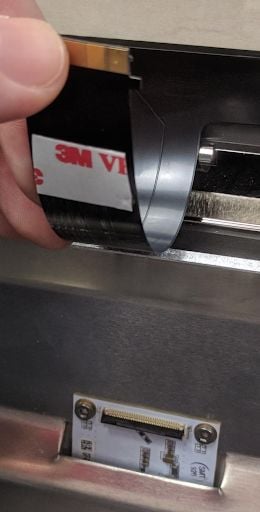
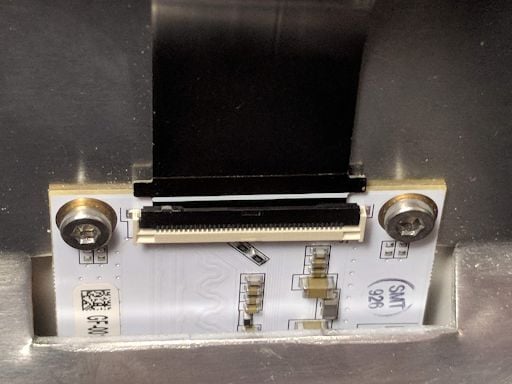
- Remove the small adhesive strip from the middle connector.
- Once the clip is connected, carefully reach in and remove the backing. You can use tweezers to make this easier.
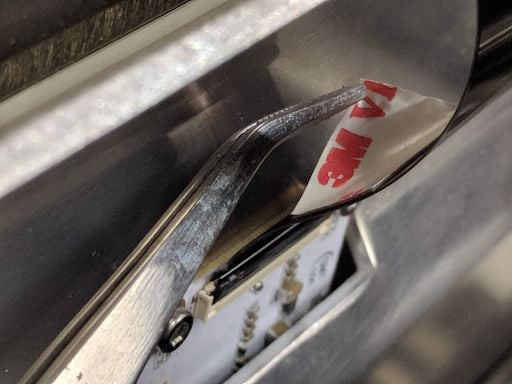
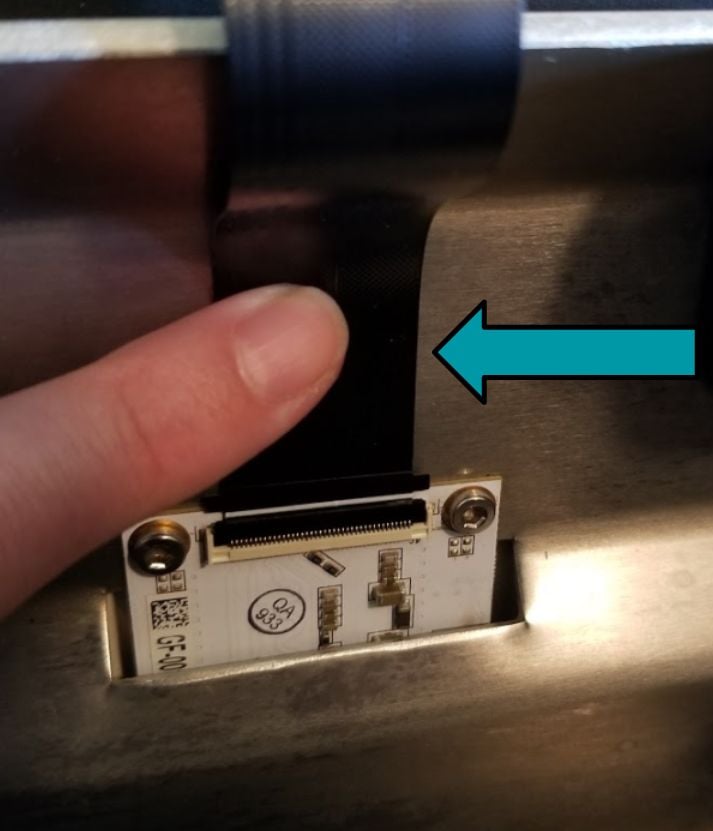
- To secure the adhesive, press and rub just above the clip as shown in the image below.
- Check the installation.
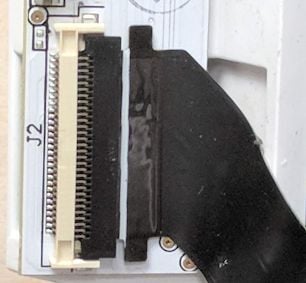
- Look again at each clip to be sure they match the photos of properly closed clips. The white line should be parallel to the edge of the black clip, like in this example:
- Make any necessary adjustments.
- When everything looks correct, plug in your Glowforge and turn it on.
- If the LED strips light up along both sides of the lid (as they should), run a test print.
If you run into any trouble, contact Glowforge Support with a detailed description of what happened. We’ll be happy to help!