Additional Wi-Fi Information for Advanced Network Configurations
Finding the MAC Address For Your Glowforge
For some networks, it may be necessary to whitelist the Glowforge in order to add it to your network. To do this, you’ll need the Glowforge printer’s MAC address. Your Glowforge has two different network interfaces, and you can follow these steps to find the MAC address that's needed for filtering:
-
Reboot your Glowforge.
-
Wait about 30 seconds.
-
Open your browser and go to setup.glowforge.com.
-
Open the Javascript Console (in Chrome, this can be found under View > Developer > Javascript Console. In Firefox, it is found under Tools > Web Developer > Web Console).
If you're using Chrome version 101 or later, you may be prompted to download and run an app to complete Wi-Fi setup. Once the app is open, you can access the developer tools by pressing Ctrl+Shift+I in Windows, or Command+Shift+I in Mac OS -
Follow the Wi-Fi Setup steps until you are connected to the Glowforge Wi-Fi access point. The page will say "Connect Your Glowforge to Wi-Fi".
-
In the Console, paste the following code:
fetch('http://192.168.192.1:3000/setup/connection_status').then((response) => { return response.json() }).then((data) => {console.log(data.address)}) -
This should return a bit of code that looks something like the following:
Promise {, nr@context: r}

a1:b2:c3:d4:ee:f5
The second line in this response, a1:b2:c3:d4:ee:f5, is the MAC address.
Exit the webpage, reconnect to your usual Wi-Fi network, and reboot your Glowforge.
Enterprise Wi-Fi
1. Turn off your Glowforge
2. Sign In
Using a device that connects to the internet via Wi-Fi, go to setup.glowforge.com and sign in.
3. Power up
Turn on your Glowforge and wait until all motion has stopped for 30 seconds. (Your unit may reboot. If it does, wait for it to come back on and stop moving for 30 seconds.)
4. Start Wi-Fi Setup
Hold down the button on your Glowforge for ten seconds, until it glows with a teal color.
5. Connect Your Glowforge to Wi-Fi
Follow the instructions on screen to connect your Glowforge to Wi-Fi, making sure to select your Enterprise network. The instructions on screen will vary depending on your network - the picture below is an example.
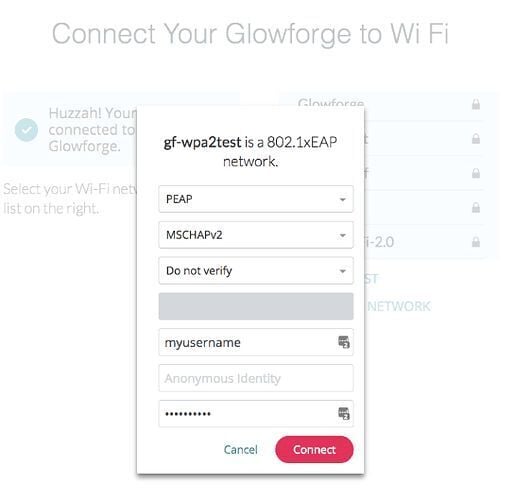
Having trouble connecting to your Enterprise Wi-Fi network?
Please note that your network needs to use one of the following authentication methods supported by our Enterprise Wi-Fi update:
- EAP-PEAP
- EAP-PEAP/MSCHAPv2
- EAP-TTLS/PAP
- EAP-TTLS/CHAP
- EAP-TTLS/MSCHAP
- EAP-TTLS/MSCHAPv2
Our Enterprise WiFi support is still in beta, so the support team can’t help with troubleshooting yet, but if you still need help getting set up on an Enterprise network please reach out in our community topic here.
Port Information
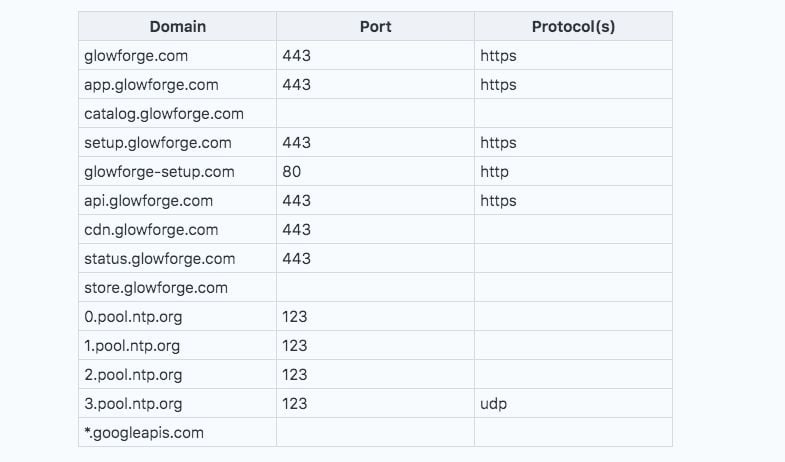
Your Glowforge communicates with Glowforge servers and external services via http, udp, and websockets, on ports 443 and 123. Your internet connection will need to be able to access the following URLs:
Can I Assign a Static IP?
There is no method to assign a static IP address to the Glowforge.
Factory Reset
Performing a factory reset of your Glowforge will return the unit to a factory-stable version of the Glowforge firmware. Fortunately, since almost everything is stored in the cloud, this procedure is quick and painless. The only thing you’ll have to restore is your Wi-Fi connection.
Please note that a factory reset deletes troubleshooting information from your Glowforge that we can use to help you, so we want to make sure that we have everything we need before a customer resets. Therefore, we recommend that if you’re running into a technical issue you contact our support team before performing a factory reset.
Here’s how to reset. Please do not turn off your Glowforge until the reset process is complete.
- Turn on your Glowforge
- Open the lid
- Press and hold the Glowforge button. The button will glow teal and eventually blink teal
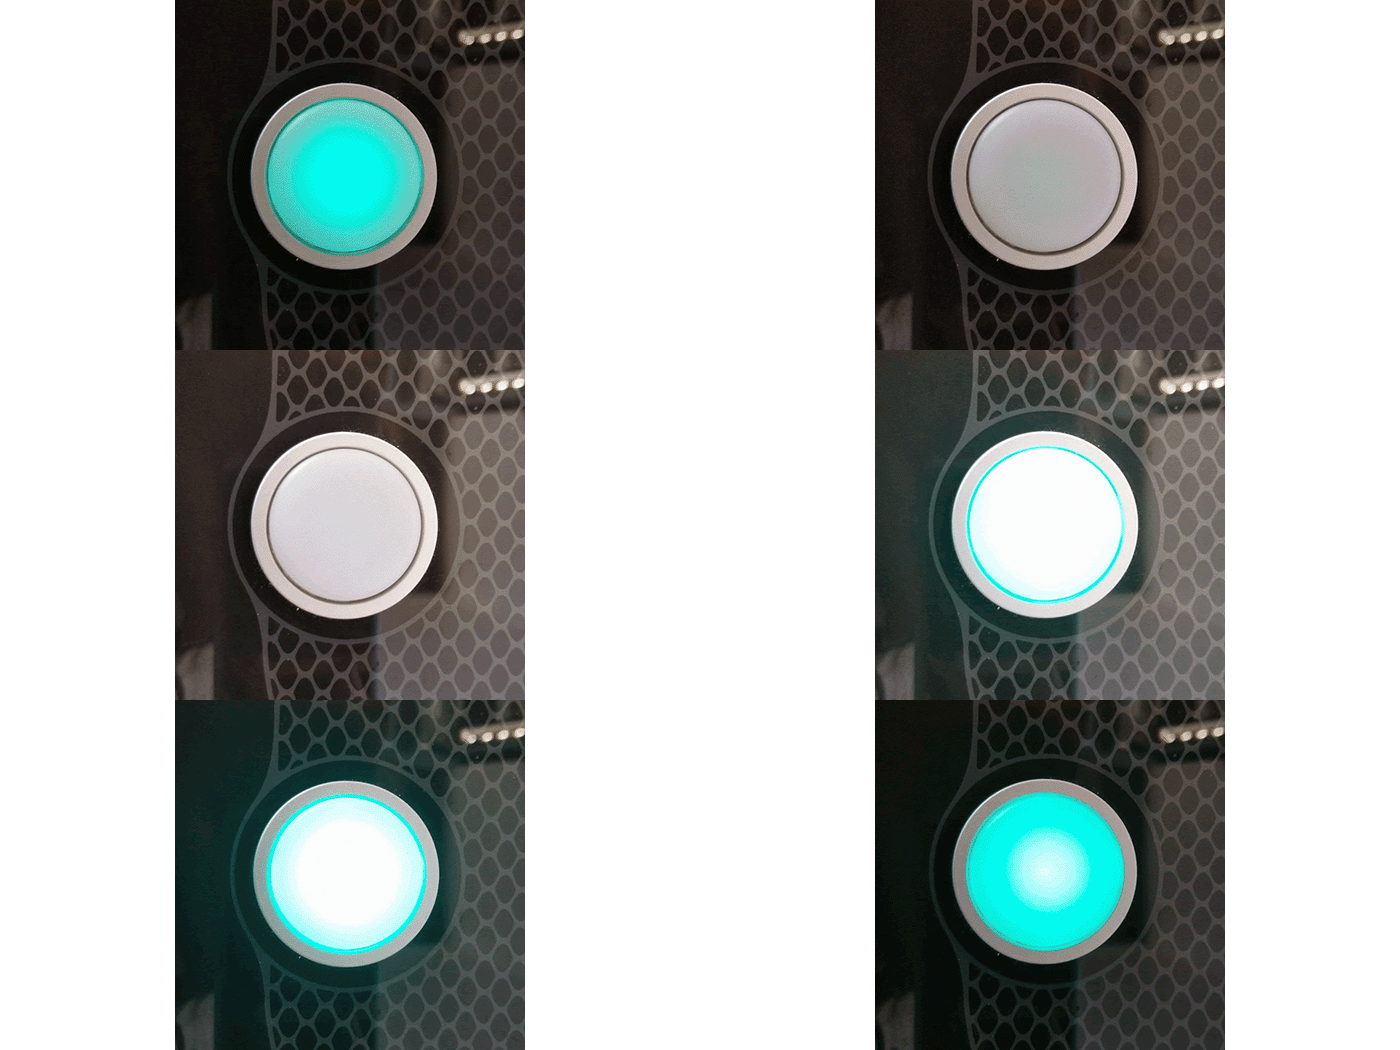
- Release the button when it begins to blink teal.
- Press and hold the blinking teal button again until the button begins to blink blue.
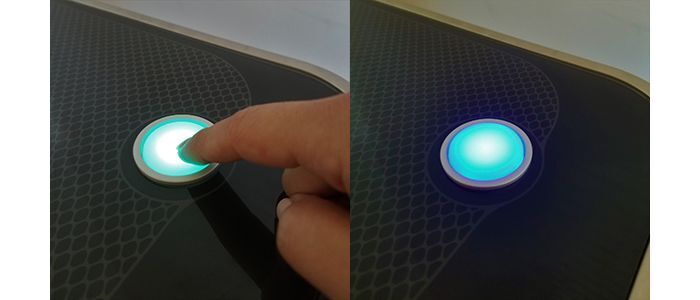
- The button will eventually turn solid green on its own, and your Glowforge will reboot automatically. Please contact us if the button does not turn solid green.
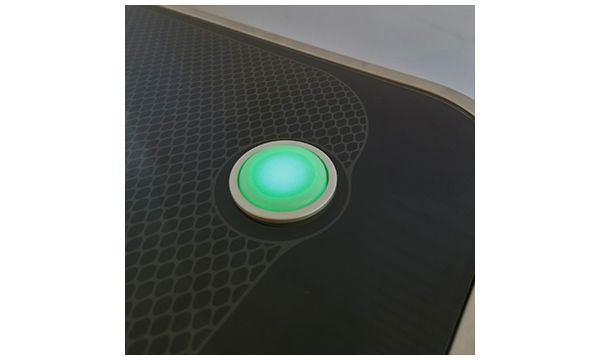
- After your Glowforge reboots, the button should glow solid teal again, and your Glowforge will be in Wi-Fi setup mode. Navigate to setup.glowforge.com and follow the on-screen instructions to reconnect your Glowforge to your Wi-Fi network.
If you run into trouble while working through these steps, or have questions along the way, please contact our team and we'll be happy to help!