Cleaning Your Air Assist Fan (Performance Series)
Getting started
The air assist fan is a black plastic fan on the underside of the carriage plate, below the printer head. It needs occasional cleaning, but all you need is a can of compressed air and these instructions!
Cleaning your air assist fan requires these four steps:
- Remove the printer head
- Unhook the driver belt
- Remove the carriage plate
- Spray the fan with compressed air
We’ll walk you through it.
Start by removing the printer head so you can access the carriage plate.
-
Before you clean anything, turn off your Glowforge and unplug it.
-
Remove the printer head
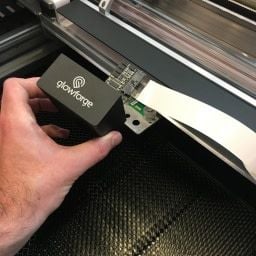
Holding only the finished black surfaces, grasp the printer head as shown. Pull gently up and back to disengage the magnets and remove the head.
-
Unplug the wire ribbon
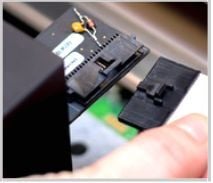
Push down fully on the wire ribbon tab, then gently pull the wire ribbon to unplug it. Tuck the wire ribbon into the laser arm.
-
Place the printer head aside. You won't need it for the rest of this process.
Next, unhook the driver belt so the carriage plate and belt come off as a unit.
-
Center the carriage plate
Gently slide the carriage plate to the center of the laser arm so it’s out of the way.
-
Locate the laser arm pulley
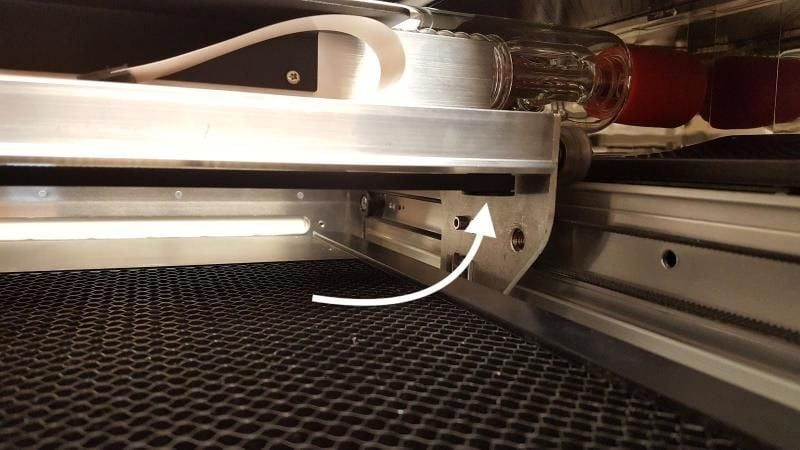
Reach under the laser arm on the right side and find where the black belt engages a round pulley beneath the laser arm.
-
Remove the belt from the laser arm
Place your thumb between the belt and the laser arm, near the pulley. Push down on the belt while sliding it to the right towards the pulley. The belt will slide off of the pulley. Don’t be afraid to use pressure.
-
Unhook the belt from the motor on the left side
You’re now ready to remove the carriage plate and access the air assist fan.
-
Grasp the carriage plate as shown
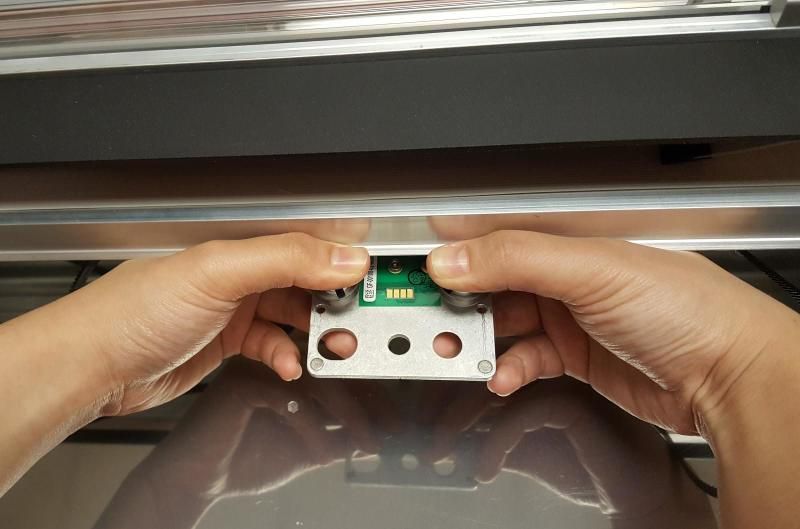
Place both index fingers on the rear corners of the plate and both thumbs on top of the front wheels. Use your other fingers to support the plate.
-
Pull the plate toward you
While keeping the laser arm stable with your thumbs, use your index fingers to pull the plate towards you as far as it will go.
-
Push the plate down and back to disengage
Push down with your thumbs to angle the plate down and toward the back of the Glowforge until the plate pops off of the laser arm.
See the black plastic fan on the underside of the carriage plate? This is the air assist fan.
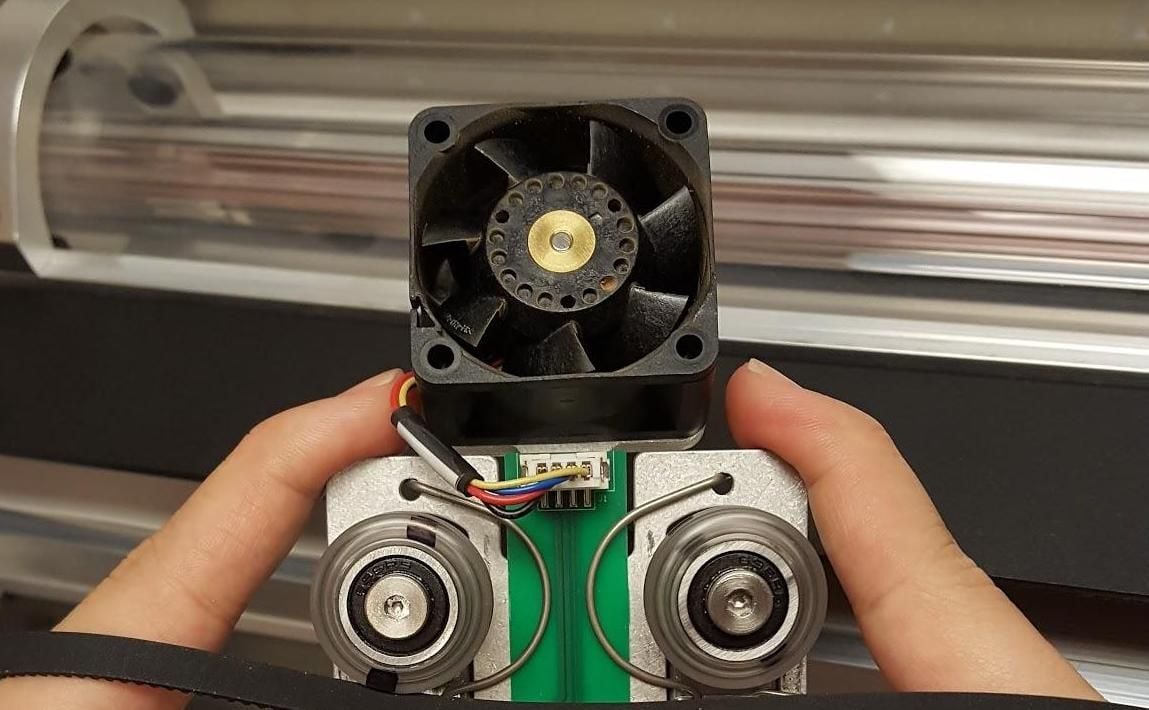
You can clear debris or build-up with a can of compressed air.
If the fan is damaged, has build-up that can't be removed, or doesn't spin freely, we recommend replacing it. The fan is part of the carriage plate assembly, which is available in our shop here.
Once you’re finished, replace the carriage plate and try a test print. This takes three steps:
- re-attach the carriage plate
- re-attach the driver belt
- replace the printer head and crumb tray
Start by re-attaching the carriage plate.
-
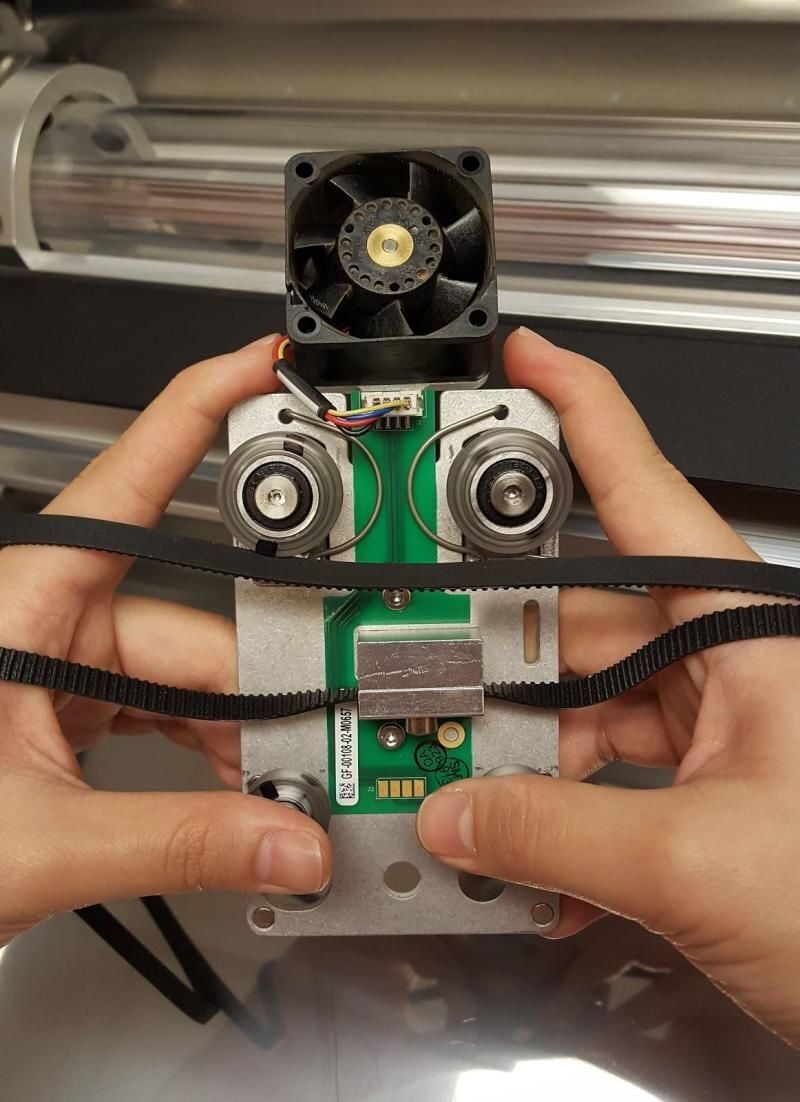
Unwrap the belt and hold the carriage plate as shown
Place your index fingers on the back corners of the carriage plate and your thumbs on top of the front wheels (the same position you used earlier).
-
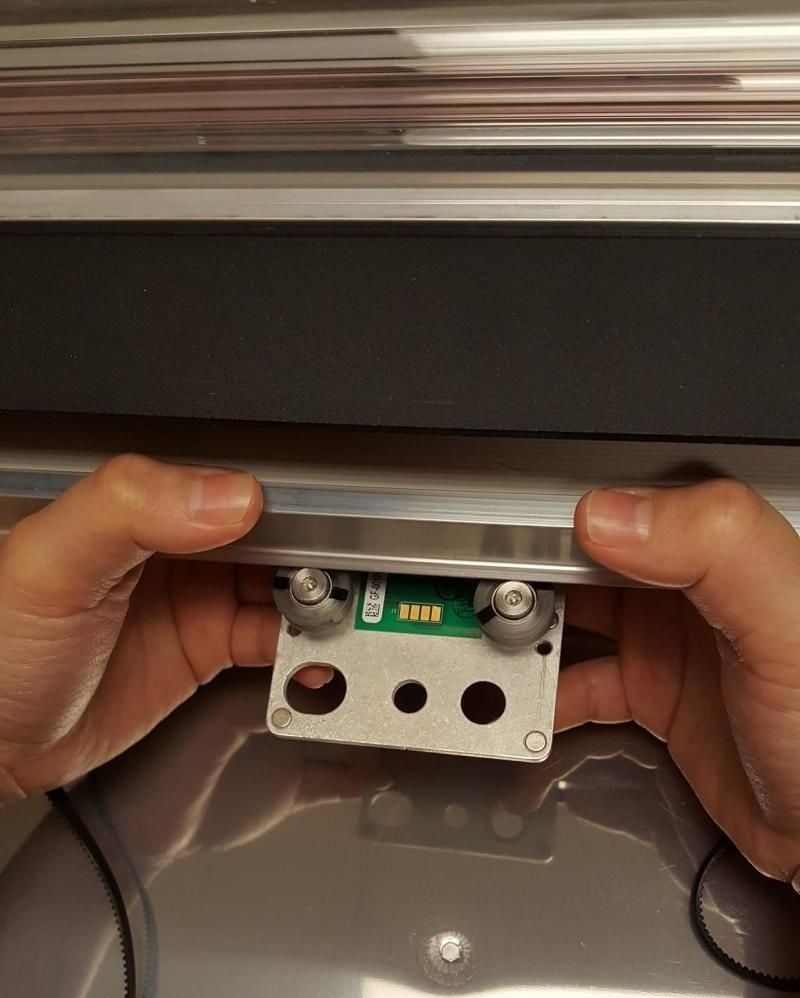
Hook the plate back on the laser arm
Hook the rear wheels on the groove under the laser arm. The front wheels should be mostly visible.
-
Pull the plate forward and up to engage
Pull the plate forward until the front wheels clear the laser arm, then angle the plate up until the wheels are in line with the rail. Release the plate. It should firmly grasp the rail.
Next, you'll re-attach the driver belt to the left and right sides of the laser arm.
-
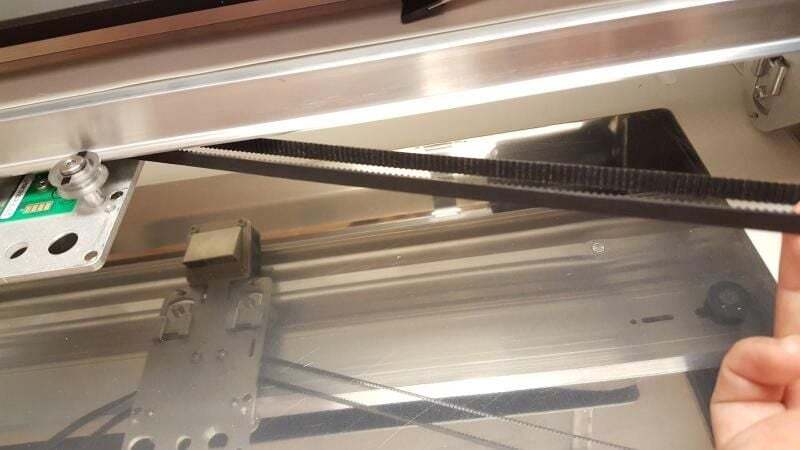
Pick up the right side of the belt
Make sure the belt is not twisted or inside-out. The outside of the belt should be smooth and the inside should have ridges.
-
Re-attach the right side
Hook the belt onto the pulley located on the laser arm's right underside.
-
Attach the belt on the left side of the laser arm
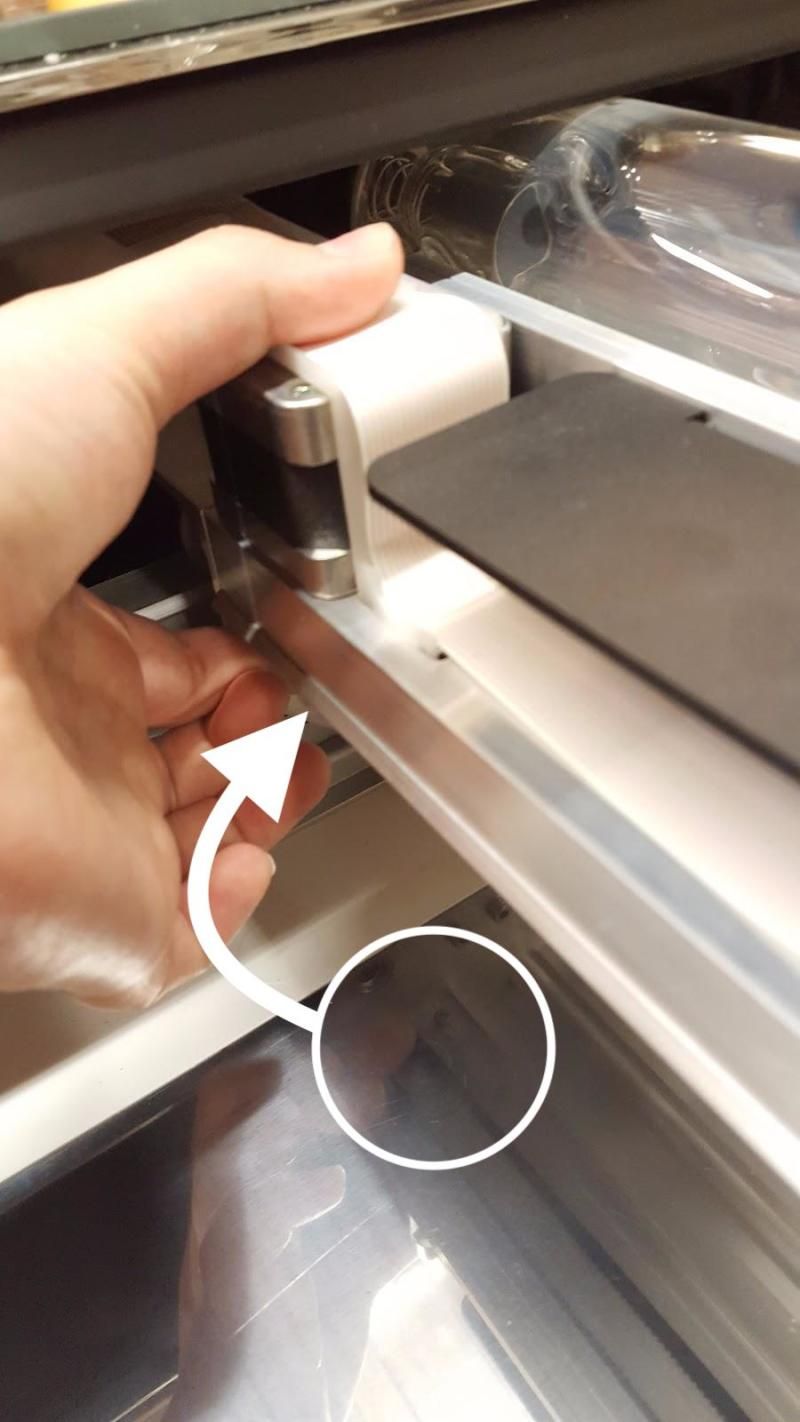
Using your left hand, set the belt on the front half of the motor (the silver piece on the left-hand side below the laser arm). Use your fingers to support it by placing them under the motor. The belt will not be fully on the motor. Use your left thumb and fingers to clamp the belt firmly in place and apply pressure.
-
Guide the belt around the pulley
Still holding the belt and motor firmly with your left hand, use the pressure from your left fingers to guide the belt clockwise around the pulley as your right hand slowly pushes the carriage plate to the left. The belt should roll onto the pulley until it is secure.
-
Check the range of motion
Gently slide the carriage plate back and forth on the laser arm to ensure that it travels smoothly. If it doesn’t, remove the plate and try again.
Return the printer head and crumb tray to their locations so you can run a test print.
-
Carefully pick up the printer head
Do not touch any part of the printer head that is not flat-black metal. Again, be especially careful of the yellow window on the side of the head and the lens on the underside.
-
Slide the ribbon into the printer head
Take the ribbon end from where you tucked it into the laser arm. Make sure the tab on the wire ribbon is facing up. Slide the ribbon into the printer head connector until it clicks.

-
Attach the printer head to the laser arm
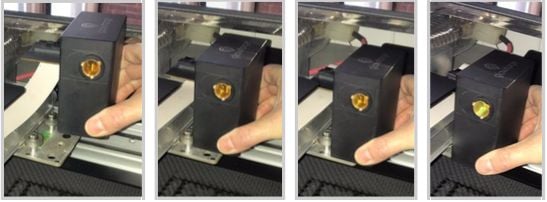
As shown, lower the printer head over the metal plate so that it rests next to the two round posts. Then push it gently away from you – you’ll feel a “click” as magnets attach the printer head snugly atop the metal plate.
-
Gently push the laser arm all the way to the back of the bed
-
Slide the crumb tray back in
Be careful not to bump the laser head. Little feet on the bottom of the crumb tray should slide into corresponding dimples in the base of the Glowforge, to keep the crumb tray from sliding. If the feet don’t sit in those dimples, the Glowforge camera may not be able to focus correctly, and the camera will be out of alignment.
-
Close the front door and lid of your Glowforge, plug it in, and turn it back on
-
Run a test print
If you can, record a video of your test print so we have as much information as possible if you still have questions or concerns.
If you run into trouble, or if you have any questions for our team, please contact our team with as much detail as possible and we'll be happy to help!