Engrave and Cut Out a Photo
Make a photo print
Here’s a quick look at how to engrave a photo.
To learn how to prepare and print a file, see Make a Gift Tag from Scratch.
To learn how to prepare a photo for printing, see these tutorials for Photoshop and Gimp.
- In your photo editing software (Photoshop or Gimp, for example) convert your image to black and white, increase the contrast, and sharpen it. Save your file as JPG, PNG, SVG, or PDF.
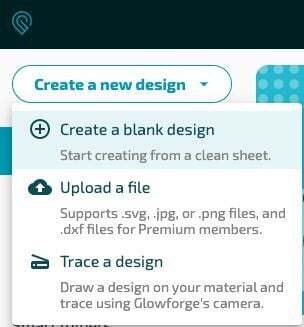
- On the Dashboard, click Create a new design, then click Upload a file and upload your photo to the app.

- When the design opens, click the + button in the menu bar, and then click Upload and choose a file with a cut shape. You can also add a cut shape by using the Insert shape button if you're a Premium subscriber.
- Click and drag your cut shape to place it over your photo.
- Click either your photo or your outline, then drag the corners to resize.
- For an extra-detailed creation (that will take a little longer) click the square on the left that shows the photo on the left. Under Engrave, select HD Graphic.
- Drag your artwork where you want it on your material. Leave a little room between your artwork and the edge.
- Click Print, then press the button when it flashes.