Make a snap and store box with your personal touch
It's time to customize a print with your very own artwork. Not one for artwork, you say? Don't worry — even simple doodles look good when laser-cut. It's easy. You'll draw something on paper, convert it to a digital file, and then add your drawing to a design to create a box that's uniquely yours.
Laser design basics
Before you continue, it’s useful to understand the three things your laser does.
-
Cut: The laser moves slowly along a path, at full power, to cut all the way through the material.
-
Score: The laser moves quickly along a path, at lower power, to draw a line that does not go all the way through the material.
-
Engrave: The laser moves quickly back and forth, turning on and off thousands of times per second, to create an image on the surface.
You have a host of options to create your unique box lid. Here are a few ideas to choose from. Pick whichever one inspires you, or create your own!
-
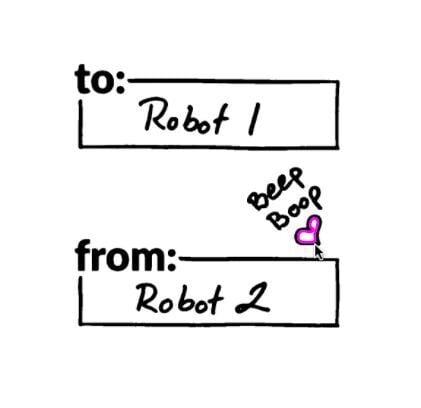
The Artist Draw a picture with a black marker on a white piece of paper. Stay away from the edges so there’s some white on every side of your drawing. Tip: Leave room for the handle in the middle of your drawing.
-
The Poet Using a black marker, write a favorite quote or song lyric, or sign your name on a blank white piece of paper.
-
The Good Friend Print this template out on an paper printer (not your Glowforge!) and use a black marker to fill in the blanks.
-
The Shadow Master Grab something nearby: a shoe, a leaf, a doll, your other hand - and plunk it on a blank white piece of paper. Trace around the edges with a black marker.
We’ll use The Good Friend option for our example:

- Go to https://app.glowforge.com and sign in.
- On the Dashboard, click on the Snap and Store Box design to open.
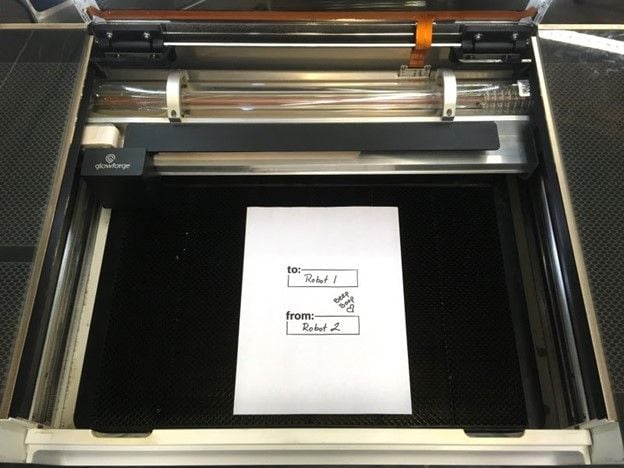
- Lift the lid of your Glowforge, place your artwork in the center of the printer bed, and close the lid.
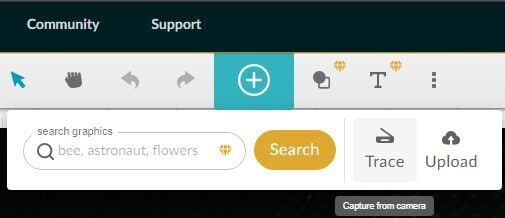
4. In the middle of the app, click the + button, and then click Trace.
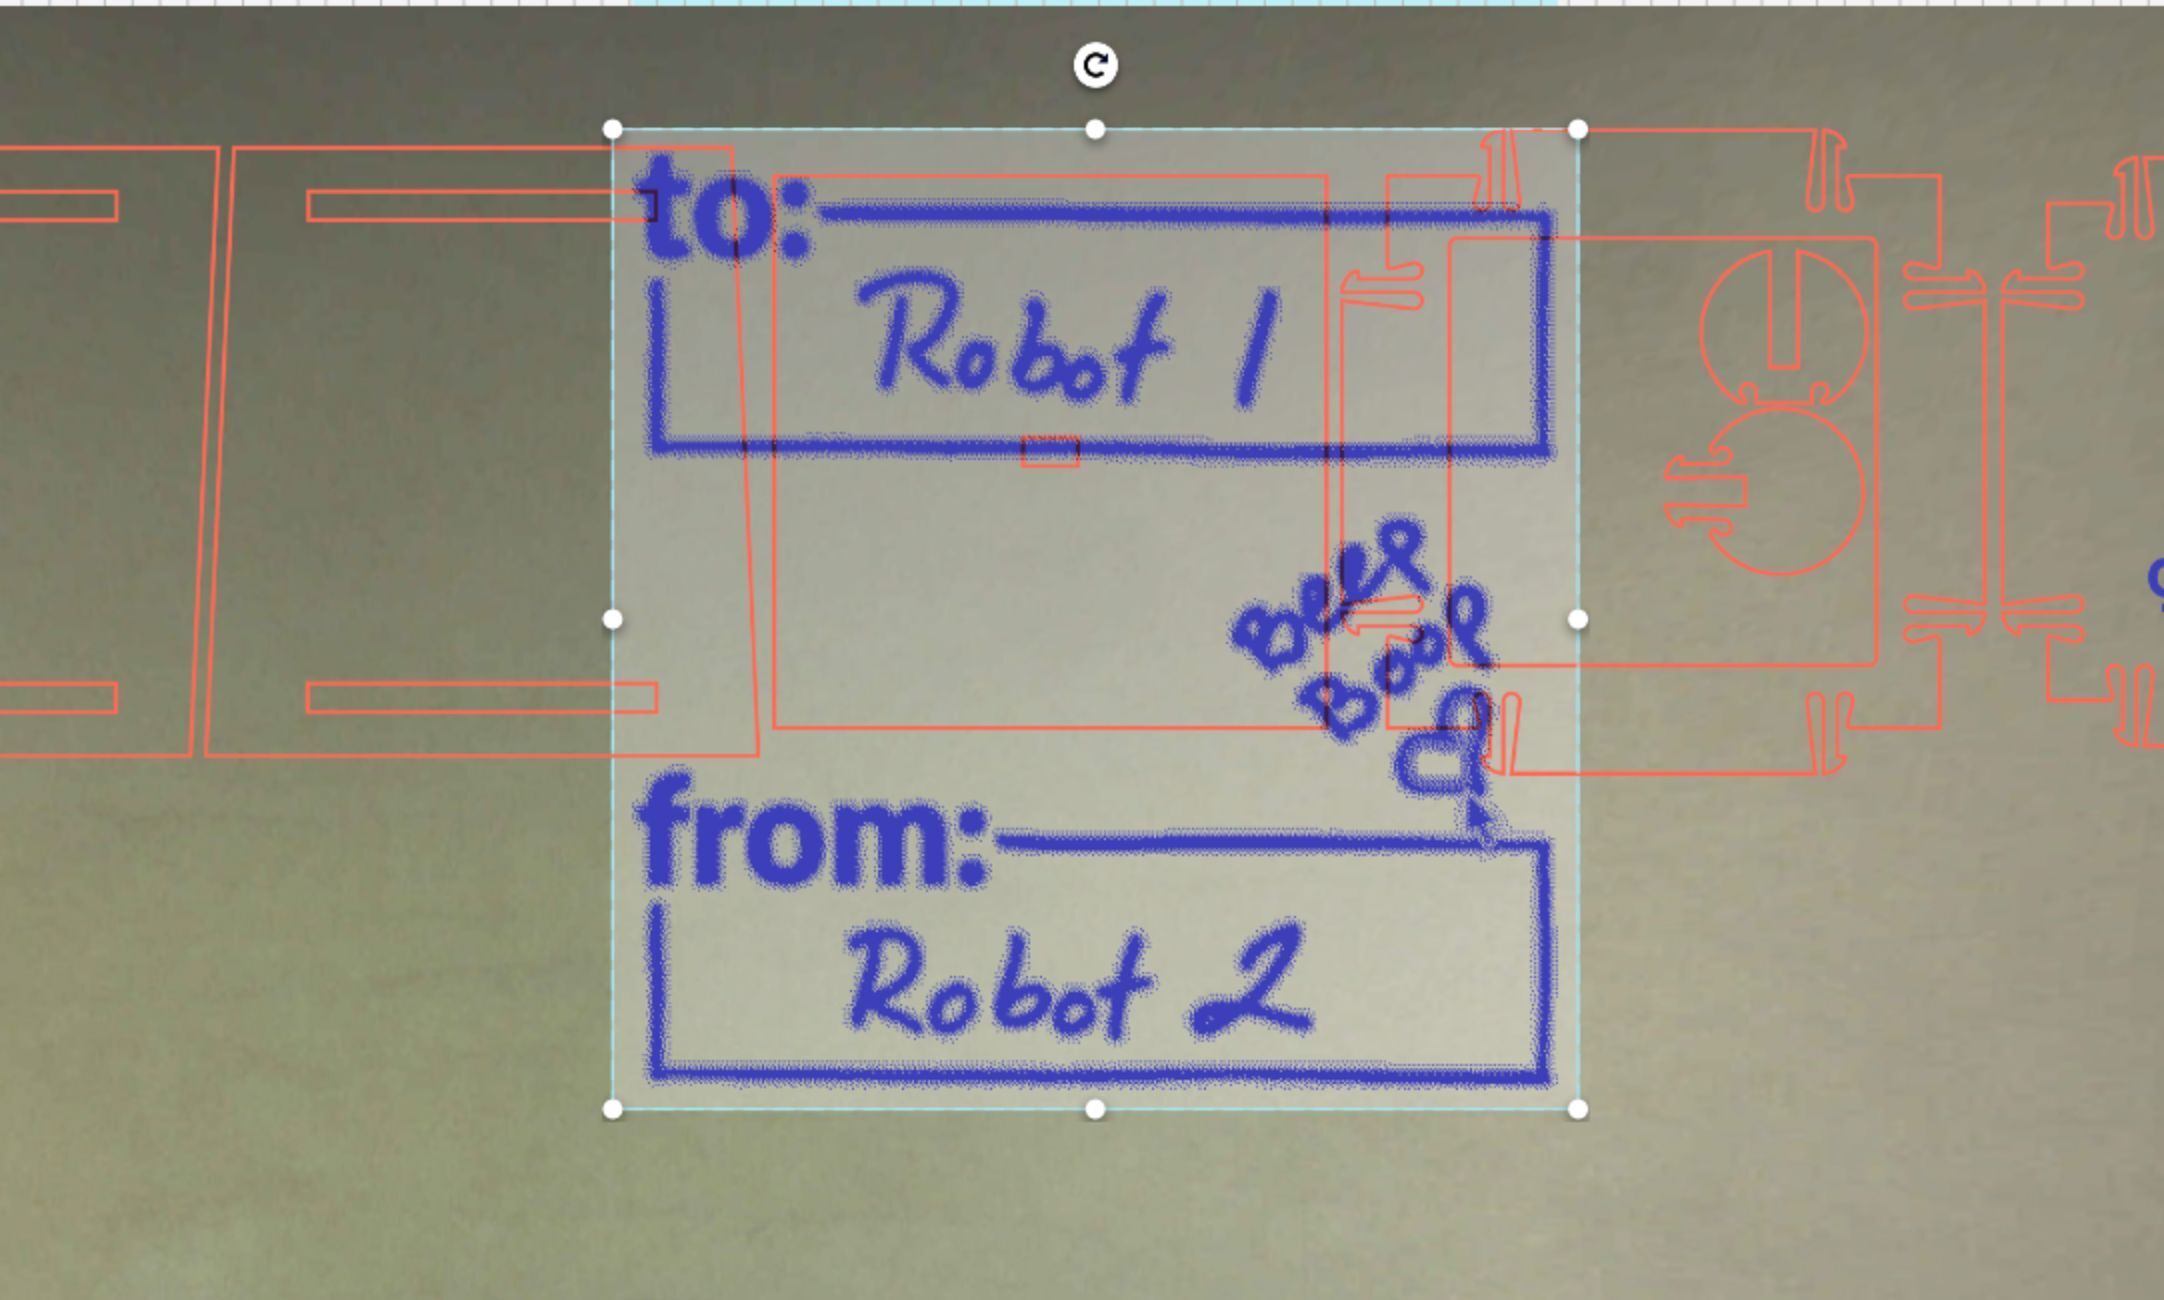
5. In the app, when the workspace loads, you'll see the box design and a picture of the bed of your Glowforge, including your drawing.
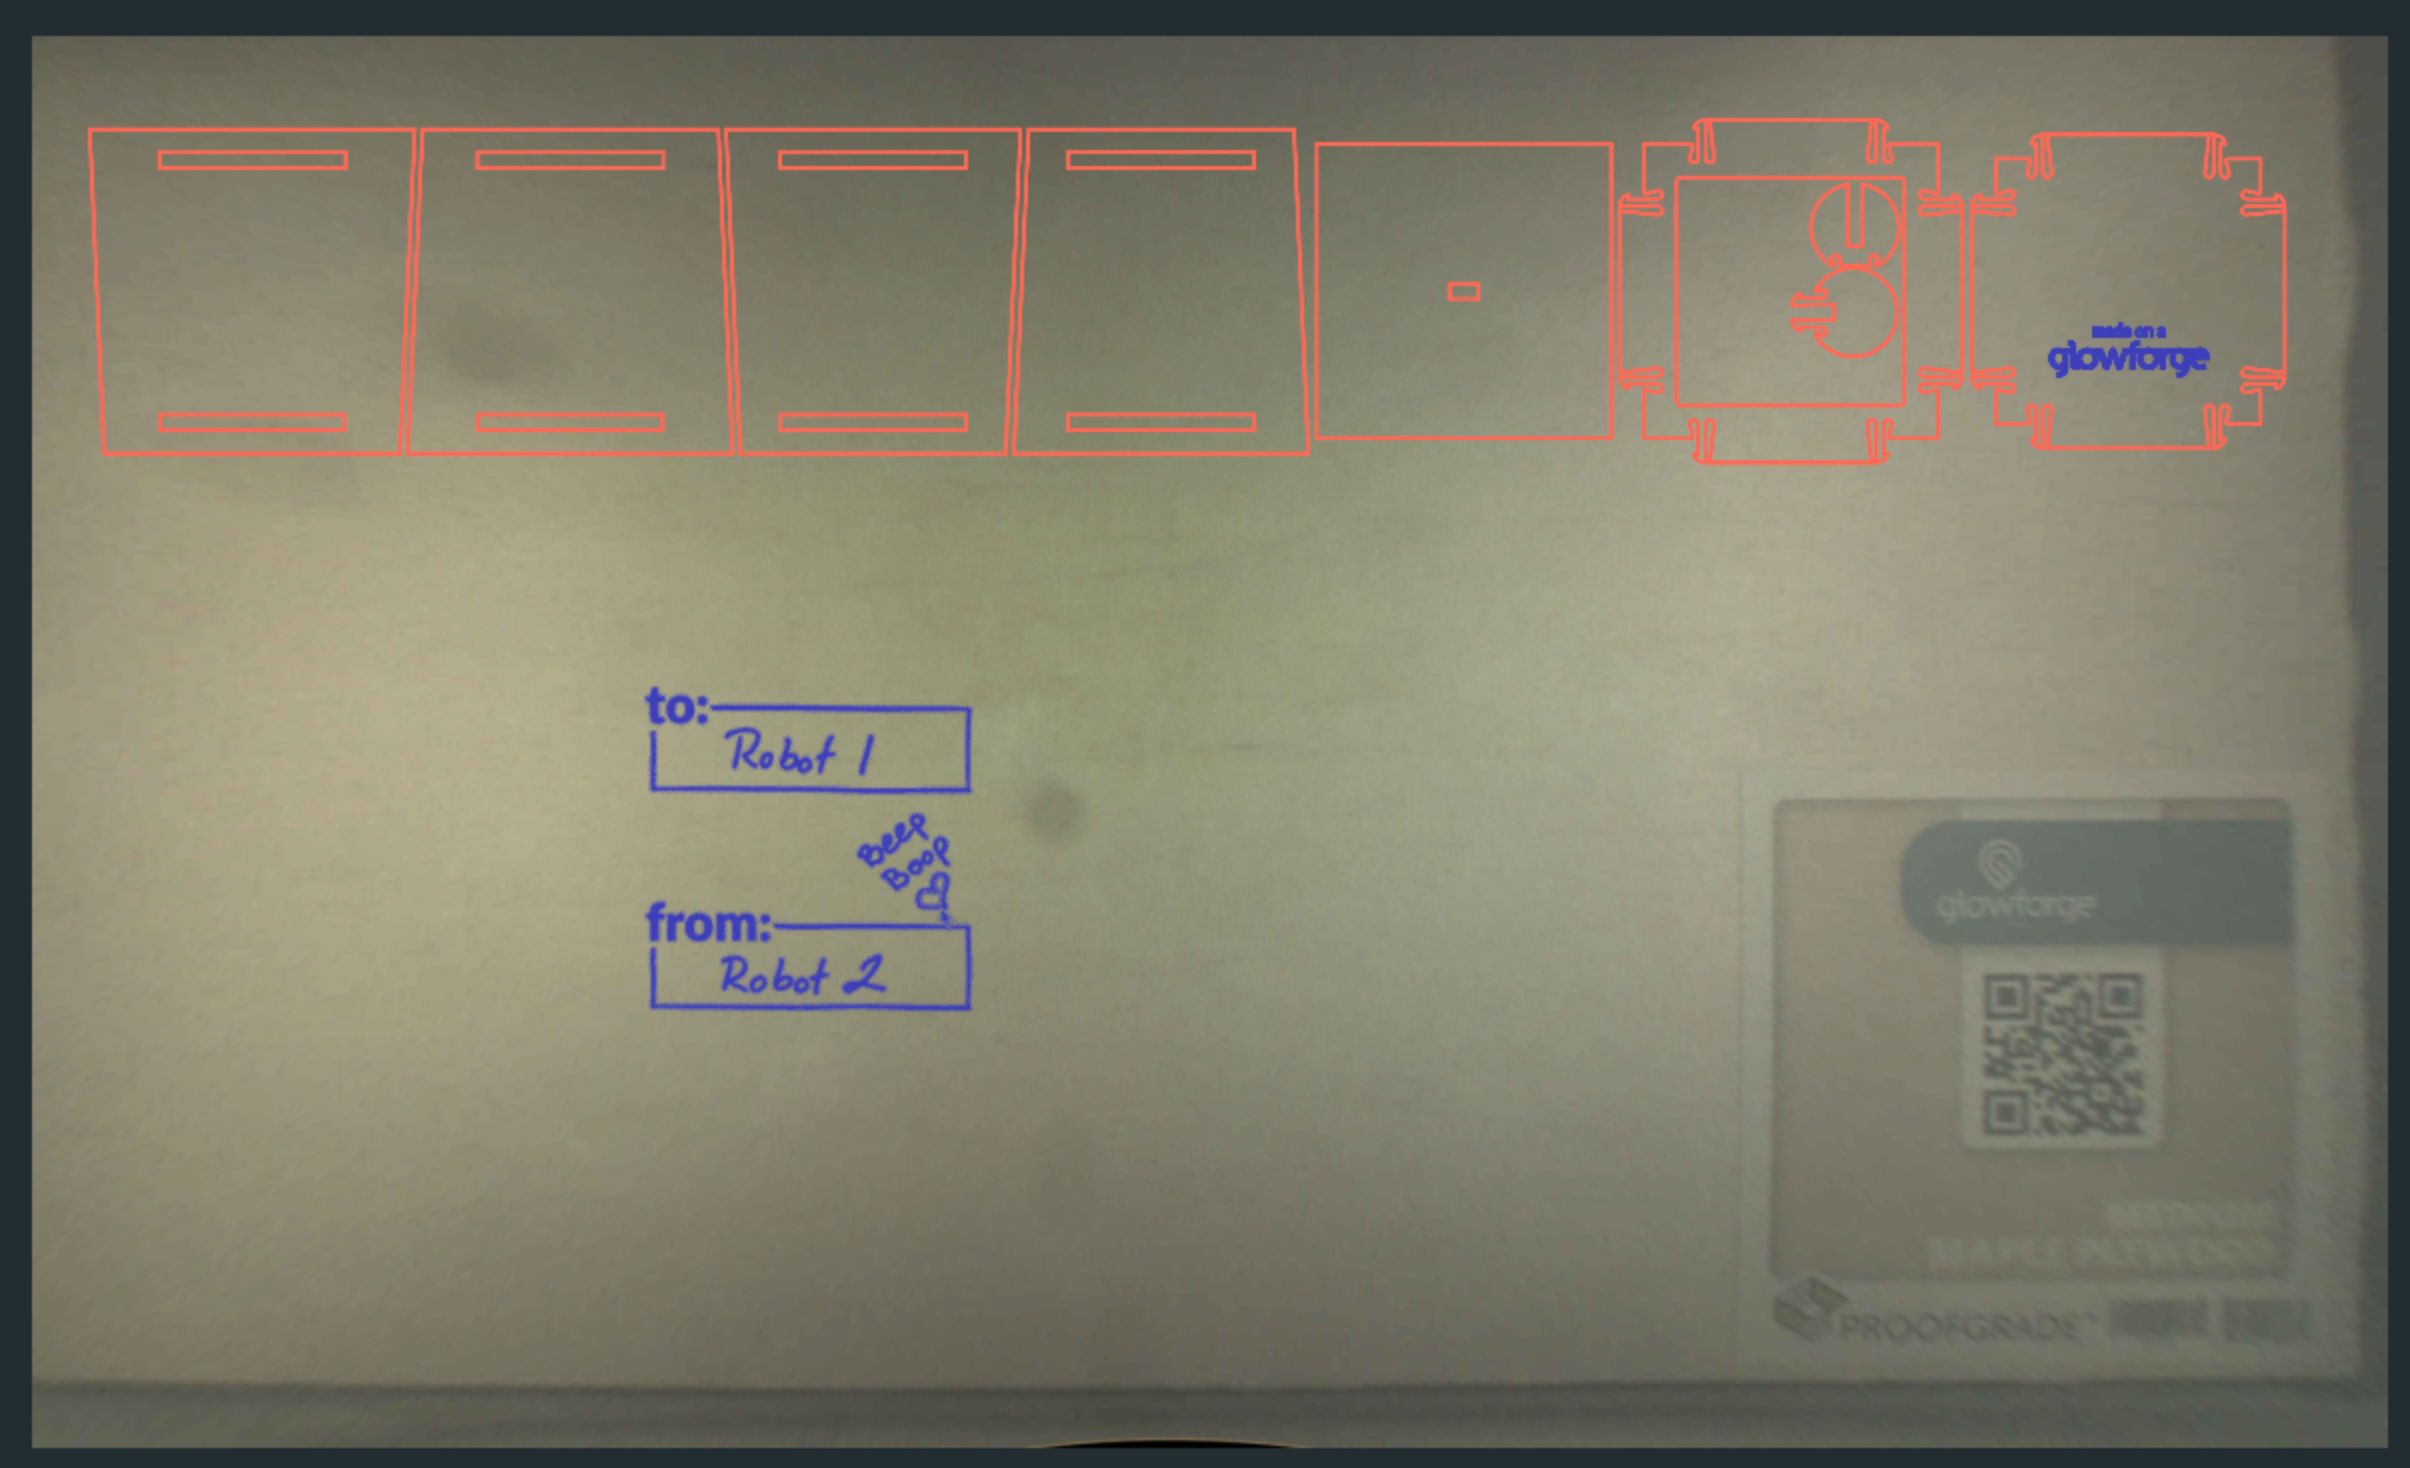
6. Click and drag a square around the artwork that you want to trace. You'll see a preview of what your Glowforge will engrave. Anything in black will be engraved, and nothing else will be. If you want to change your selection, click Undo in the app and try again.

7. If you want to refine the details, click on the item you want to change, and then use keyboard shortcuts to make changes.
9. When you’re happy with your trace, in the upper right, click Place Artwork.
Size your artwork and place it in the design.
-
In the app, the Workspace shows both design and artwork.
-
Drag the box design to where you'd like it.
-
Place your traced artwork within the design — for example, drag the artwork onto the box lid. Click and drag a corner to shrink your artwork to fit where you want to put it. Any artwork outside the outer lines of the box design will be cut off. Be careful not to resize the box design!
- To fine-tune placement, you can nudge selected objects using your arrow keys. To get bigger nudges, hold the Shift key while using the arrow keys.

Print or export

-
Print!
When you are satisfied with your print steps, click Print in the app, and when the button on your Glowforge starts glowing, press it.
-
Watch your Glowforge (always!) while it’s printing.
- When the button stops glowing and the fans stop, remove your print, peel off the protective layer, and get ready to assemble.
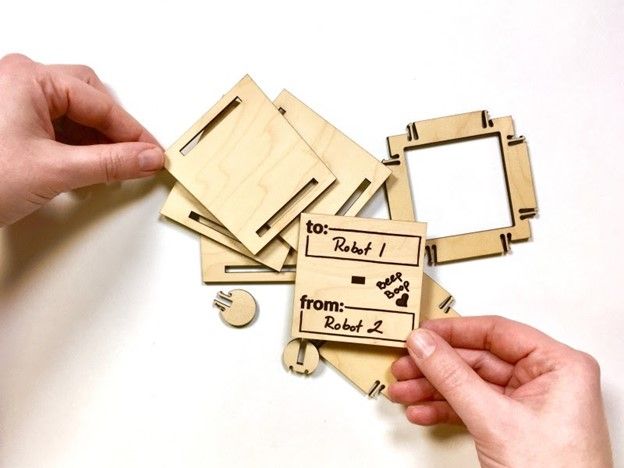
Put it together.
To get the step-by-step instructions to turn that beautiful collection of box pieces into an actual Snap and Store Box:
-
- Go back to your workspace where you were printing the box (if you don’t have the box open on screen - open it again), and click on the 3 dot More options menu.
- Click Design Details, and then the instructions will show on the right.
- Follow the steps, and you’ll be holding your finished box in just minutes!
Learn more about Glowforge Premium