Unboxing & Setting Up Your Glowforge Performance Series Laser
If you’ve read about safety, you now know everything you need to operate your Glowforge safely, and that’s pretty cool. Thank you for your patience. Now it’s time to get your laser creating!
Unboxing shouldn’t take too long, and we can’t wait for you to get started with your first print. In just a few minutes, you’re going to have a working laser in your home (or office, classroom, workshop, or design studio)! Of course, if you encounter any challenges along the way, contact our Customer Success team and we'll get you the help you need.
Before you start, be sure you have a stable surface to put your Glowforge on, where you’ll have nearby access to an electrical outlet and exhaust vent.
Let’s get started, shall we?
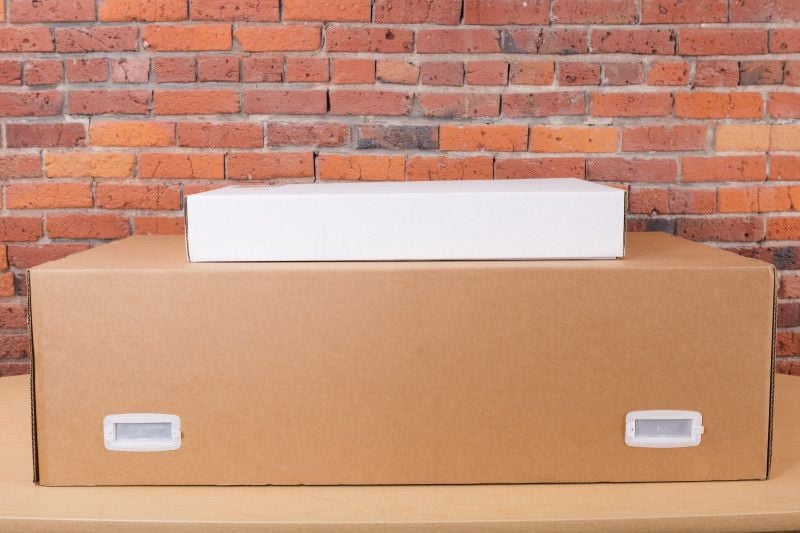
If your Glowforge product arrives visibly damaged, we want to make it right as soon as possible! Send photos of the damage and wait until you hear back from us. If the Glowforge itself is visibly damaged, do not plug it in or attempt to operate it; contact us immediately.
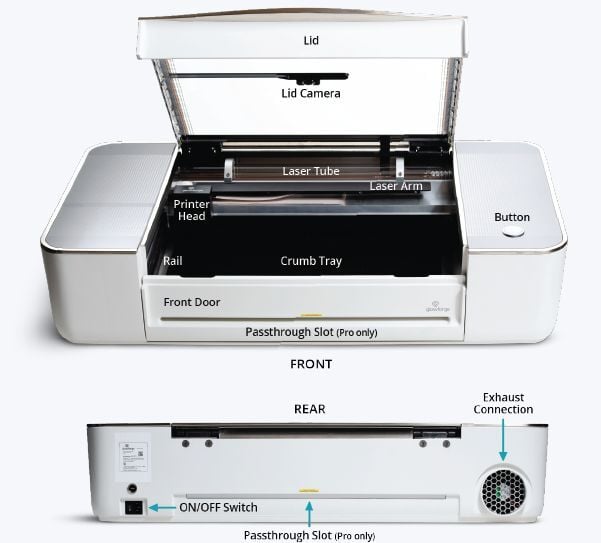
Here’s a quick tour of parts you’ll need to know:
Your shipment arrived in two boxes (plus another one for the Air Filter if you ordered one). The largest box contains your Glowforge printer and (shipped inside your Glowforge for safety) the printer head and power cord. We suggest telling the neighbors the box contains a big microwave, so they don’t pester you all day to use it.
The box is specially designed to protect your Glowforge through all shipments. Be sure to keep the box and packing materials, as you’ll need them if you want to transport your Glowforge again or for any warranty repair.
The box that’s short and wide is your Glowforge accessory pack. It arrives either in the large box with your printer or in a stand-alone package. It contains your Proofgrade® materials and your accessories. Set it aside for just a few minutes.

If your Glowforge box has straps and edge protectors as shown, cut the straps and remove the edge protectors. You do not need to save these with the rest of your packaging.

If your package came with white handles, these instructions explain how to remove and replace them.
Now let's get unpacking!
-
Choose a location
Find a place in a well-ventilated room with a 4“ (10.1 cm) outdoor exhaust vent (the same type used to connect a dryer). The exhaust vent should be at least 3 feet (0.9 m) from property lines and any openings into a building, and at least 10 feet (3 m) from mechanical air intakes. You can also put the hose out an open window, so long as the end of the hose is at least 3 feet (0.9 m) from the window and meets the other criteria above.

-
Prepare a surface
Get a hard, flat, and stable surface ready. If the surface is unstable, uneven, or too small, then you could have inaccurate prints, the doors may not close properly, and the camera might be misaligned. You could even damage your Glowforge.
-
Unseal your Glowforge box
Carefully cut both strips of tape sealing the underside of your Glowforge box.
-
Remove the lid
First peek: that’s your very own Glowforge!
-
Remove the top layer of protective foam
If your accessory pack shipped inside your Glowforge box, you’ll find the protective foam underneath the top pad.
-
Unfold the plastic covering so that you can lift your Glowforge out.
Your Glowforge ships in a protective plastic bag. Unfold the plastic bag without cutting or tearing it, and move it to the sides so you can reach in. Be sure to keep the plastic bag in case you need to ship your Glowforge again.
-
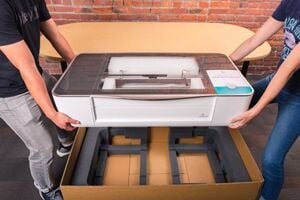
Have two people lift the Glowforge printer out of the box
-
Leave a little room
Leave at least a 1 in (2.5 cm) of clear space in all directions when you place the printer. Do not block the air intake on the bottom right side.
-
Confirm safety equipment
Confirm that your safety equipment meets requirements: Fire Safety and Smoke and Fume Safety.
We’ve secured your Glowforge with two foam blocks and several important orange and red bits. In addition to providing support during travel, the rear foam block also holds the printer head.
-
Remove the tape from the front of your Glowforge then lift the lid & lower the front door
-
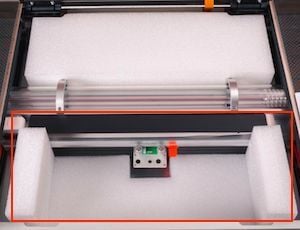
Remove the front foam block
Gently pull out the foam closest to the lowered front door.
-
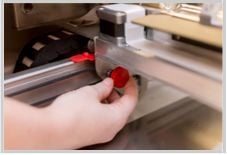
Remove knobs
To the left and right, you’ll find red knobs. Unscrew and pull them out.
-
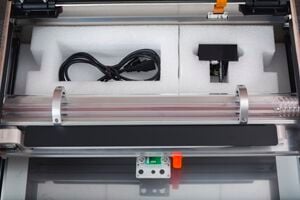
Reveal the printer head
Remove the top layer of the rear foam block to reveal your printer head and lens tool.
-
Remove the rear foam block
Gently remove the rear foam block, including the printer head and lens tool. Set these aside for now. Don’t worry! You’ll power up your Glowforge in just a few minutes.
-
Remove orange tape from the laser arm
Pull the tape from the point farthest away from you towards you, then gently remove it from the wire ribbon.
You don’t need to save the tape!

-
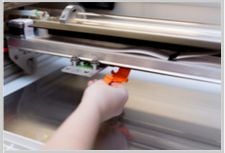
Remove the orange clip
Under the glass tube, you’ll find an orange clip. Push down on it and it will pop off.
-
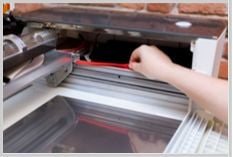
Remove red strips
Push the laser tube back gently, then lift off the two red silicone strips.
Your two Pro Shields arrive installed inside your Glowforge Pro. They finger-screw right into the front and back passthrough slots of your Glowforge Pro to ensure that nothing (material or laser light) comes in or out when the slot is not in use.
The Pro Shields should always be installed except while the passthrough slot is in use. The Laser Safety Officer (LSO) training provided to Pro customers has important information about the Pro Shields. Please re-read it before removing them.
Should you need to remove them, follow these instructions:
-
Turn off your Glowforge
Using the power switch on the back, turn off your Glowforge. The lights and button should be off.
-
Lower the front door and remove the crumb tray
Lift the lid, then lower the front door. Lift the crumb tray slightly and slide it towards you to remove it. Be careful not to tilt the crumb tray up, or it will knock into the laser arm and rails. Leave the front door open.
-
Remove the front Pro Shield from the front door of your Glowforge
With the front door opened, turn the black finger screws on either end of the Pro Shield counterclockwise to unscrew them, then lift the shield away from the front door.

-
Using two hands, gently pull the laser arm to the front of your Glowforge
This will expose the rear Pro Shield so you can easily remove it.
-
Remove the back Pro Shield from the inner back wall of your Glowforge
Turn the black finger screws on either end of the Pro Shield counterclockwise to unscrew them, then lift the shield away from the wall.

-
Reinstall your crumb tray, close the front door, and turn on your Glowforge!
If you need them, double-check the instructions for installing your crumb tray.
It’s time to open your Glowforge accessory pack.
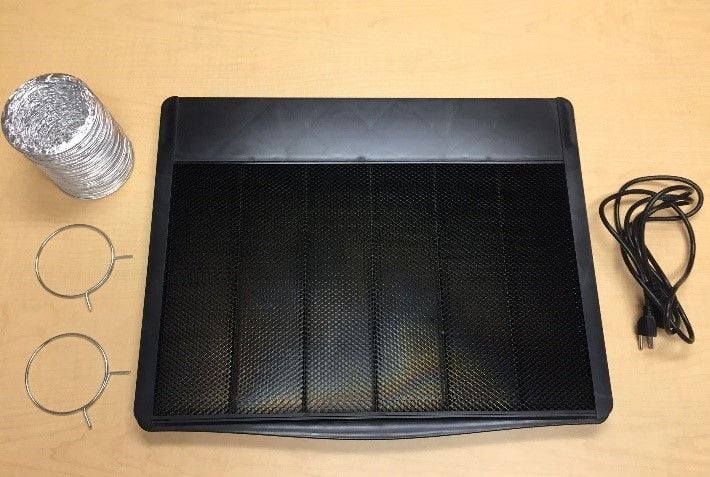
Inside you’ll find your jet-black ferrous steel crumb tray, power cord, exhaust hose, and two ring clamps.
Slide in the crumb tray
The black, metal crumb tray sits inside the bed of your Glowforge, supports the material you place inside, and catches leftover print bits to keep your Glowforge nice and tidy. It has four little feet that rest in four small dimples. The handle goes in front, and the feet go on the bottom.
-
Lift the lid of your Glowforge and lower the front door
-
Gently move the laser Arm
Using two hands, gently push the laser arm away from you until it’s near the back of the printer.
-
Pick up the crumb tray
Pick up the crumb tray, making sure the handle is in the front and the wide black plastic strip is in the back.
-
Slide in the crumb tray
Slide it in until you feel the feet settle into the dimples in the base of the Glowforge printer.
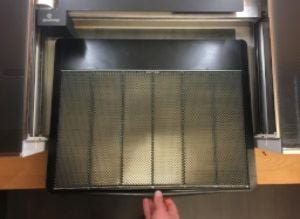
-
Make sure the handle is in front
Double-check that the handle’s in the front, and the wide black part is in the back, just like the picture. Otherwise, you’ll have mysterious printing problems, and feel silly when we ask you if your tray is in backwards.
-
Close the front door
Never connect or disconnect the printer head while the Glowforge is plugged in or you might break something. So before you start, make sure your Glowforge is not plugged in.
-
Position the laser arm and metal plate
Gently slide the metal plate on the laser arm all the way to the right, then push the arm to the back of the printer.

-
Carefully pick up the printer head
Do not touch any part of the printer head that is not flat black metal. Be especially careful of the yellow window on the side of the head. Remove the printer head from the white foam tray and remove the orange foam cylinder from inside the head.

-
Pick up the wire ribbon
Holding only the finished black surfaces of the printer head, pick up the printer head and wire ribbon as shown.
-
Slide the ribbon into the head.
Make sure the tab on the wire ribbon is facing up. Gently slide the ribbon into the head until it clicks.

-
Attach the printer head
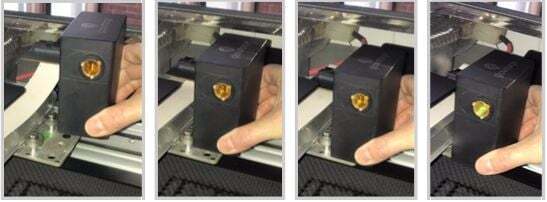
As shown, lower the printer head over the metal plate so that it rests next to the two round posts. Then push it gently away from you until you feel a “click” as magnets pull the printer head to sit snugly atop the metal plate.
-
Make sure the printer head slides freely and move it to the center
Using both hands, gently move the laser arm to the center of the bed. Gently slide the head all the way to the left, then right. If it doesn’t slide easily, make sure that the ribbon cable is a simple loop with no twists, as shown.
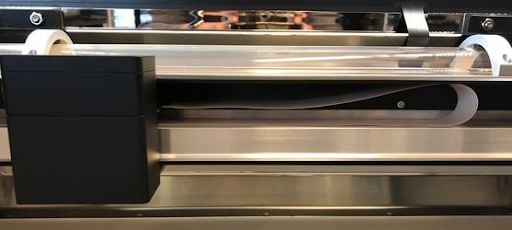
Move the head back to roughly the center of the bed, under the lid camera.
-
Close the front door and lower the lid on your Glowforge
-
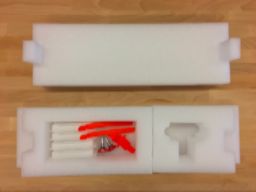
Save everything!
If you need to ship your Glowforge (for warranty service, for example), you’ll need all the original parts: boxes, handle locks, foam, and important orange and red bits. Store them safely; replacement packing materials are $249.
-
Connect the hose to the printer
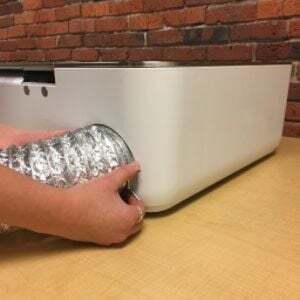
Slide the ring clamp around the silver 4-inch-diameter hose provided. Squeeze the two ends of the clamp together to fit the hose and clamp over the exhaust connection on the back of your Glowforge printer. Let go, then check that the clamp is settled over the white ring around the exhaust and will not come off with a gentle tug.
-
Extend the hose to the outdoors
Extend the other end of the hose to the outdoors through a window or a vent that connects directly outside. Do not use a vent that extends the length of the hose past 8 feet or adds any turns. Keep the hose as straight as you can, with no more than two turns of 90 degrees or less. Make sure the hose isn’t twisted, pinched, kinked, or flattened.
-
Disconnect the hose after use
Changing weather conditions may cause hot, cold, or humid air to enter your Glowforge, potentially damaging it. When your Glowforge is not in use, remove the hose from the vent or window, or disconnect it from your Glowforge.
-
Ensure your Glowforge is off
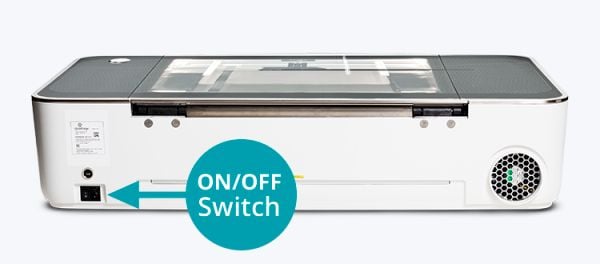
Make sure your Glowforge is turned off (on the rear switch, O is depressed) and then connect the power cable.
-
Plug in your Glowforge
Plug the Glowforge into a grounded wall outlet with 800 watts of power. Make sure you connect the printer directly to a wall outlet and not a surge protector or power strip.
-
Turn on your Glowforge
Turn on your Glowforge by pressing the switch so the “I” side is depressed.
Lights will come on, the head will move, and you might hear a bubbling sound. The printer's button will glow teal. Your Glowforge is on!
To connect your Glowforge to the internet, your Wi-Fi network must be 2.4 GHz b/g/n, using WPA2, WPA, WEP, or open security settings.
To use your Glowforge via the Glowforge App, every user needs their own account. If another user needs an account, contact Glowforge Support to request one. It is a violation of your agreement to allow anyone other than you to use your Glowforge online account.
With the hardware all setup, let's get your Glowforge connected to the internet!
-
Get ready
Find a device that uses Wi-Fi to access the internet, like a laptop computer. Go to community.glowforge.com and make sure the page loads correctly.
-
Begin setup
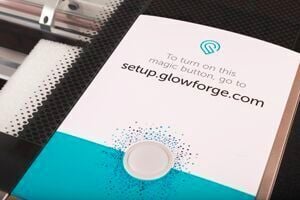
To begin setup, go to setup.glowforge.com
-
Sign in
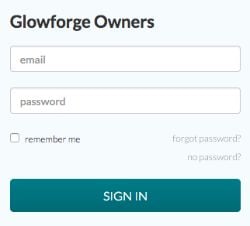
Your username is the email you used when placing your order. If you have not used your Glowforge account yet, you can set up your password by clicking “Forgot password?” You’ll receive an email to help you create or reset your password.
-
Turn on airplane mode
If you are using a phone or other device that can access the internet through the cellular network, turn on airplane mode. Otherwise, it will use the cellular network, and won’t communicate with your Glowforge in the next step.
-
Connect to your Glowforge printer's Wi-Fi
Your Glowforge is now broadcasting a special Wi-Fi channel so you can connect to it and finish setting it up. Follow the onscreen instructions to connect to your Glowforge printer's Wi-Fi. (You won't be able to access the internet again until you either finish, or stop and reconnect to your usual Wi-Fi network.)
If you're using Chrome version 101 or later, you may be prompted to download and run an app to complete Wi-Fi setup. -
Your Glowforge will begin to calibrate
Once you're connected, the printer head will center and begin its calibration process. Once it finishes, the printer head will move the back left corner and stop moving.
-
You're connected!
Congratulations! Your Glowforge is now connected to the internet and ready to print.