Prep a Photo Engrave in Gimp
Your Glowforge makes it simple to engrave images, but most photos need a little adjustment to get the best results.
Gimp is a free, professional-quality photo editor for macOS, Microsoft Windows, and Linux. We can use it to optimize a photo for laser engraving by converting to black and white, adjusting the brightness, and sharpening the image.
-
Download Gimp
The latest version of Gimp can be downloaded for free from this link.
-
Open and scale your image
- From the menu bar, click File > Open , select your photo, and click Open.
- From the menu bar, click Image > Scale Image and lock the Width and Height to each other by clicking the chain link to the right side of the text fields so it looks like an unbroken chain. From the Interpolation drop down menu, choose Cubic.
- Increase the X and Y resolution of your file to at least 300, and modify either the Width and Height fields to approximately the same size as (or larger than) the print you’re going to run. Making a change to one will automatically adjust the other without stretching your image. Click Scale when you’re done to resize your image or Reset to start again.
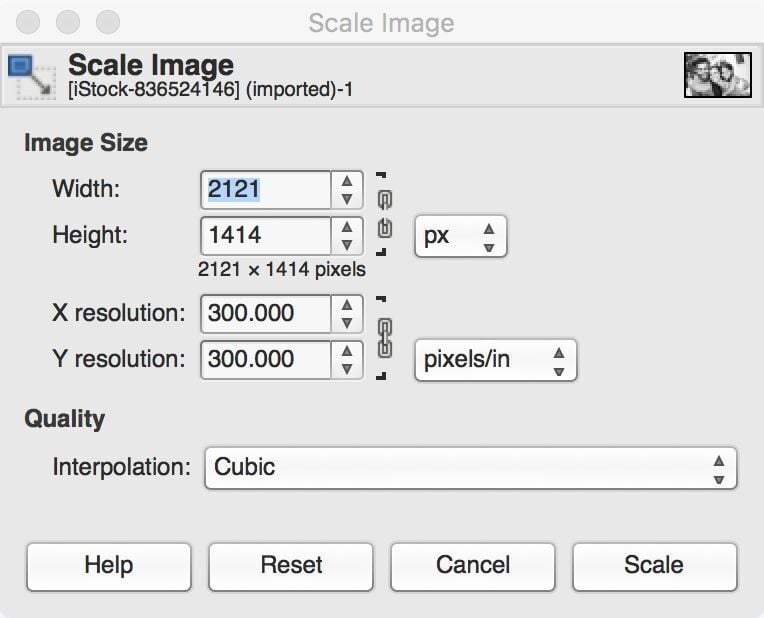
Begin by uploading an image that’s as big as, or bigger than you want your finished print to be.
-
Convert to black and white
- From the menu bar, click Color > Components > Channel Mixer, and ensure Monochrome, Preview, and Preserve Luminosity are checked. Adjust the sliders until you’re happy with the black and white version of your image. Pay careful attention to areas of high detail such as hair and grass, and make sure your adjustments don’t cause these areas to blend or blur together. Some sliders may not look like they’re doing anything; that’s ok, as each slider affects only certain colors in your source image.
- Once you’re happy with the result, click OK to apply your changes or reset to start again.
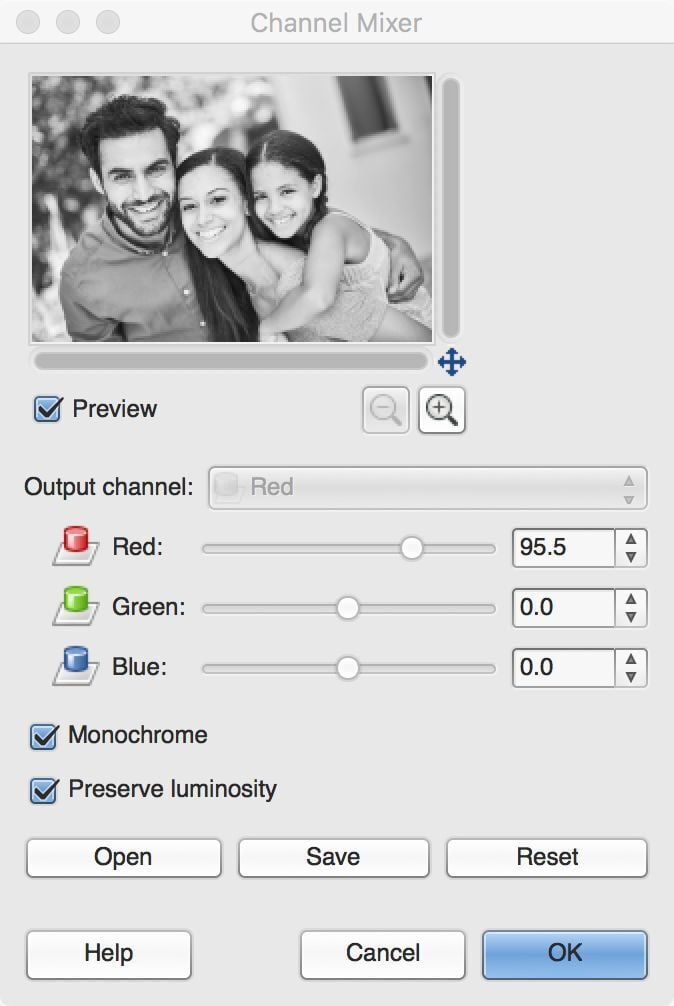
Converting your image to black and white is subjective, so experiment with the sliders until the end result looks good to you. Each image is different and will need a slightly different adjustment to look its best.
-
The histogram
-
Open the histogram by clicking Colors > Info > Histogram from the menu bar at the top of the screen.
The histogram displays the amount and distribution of light and dark areas, which helps us understand how to adjust the brightness for best results.
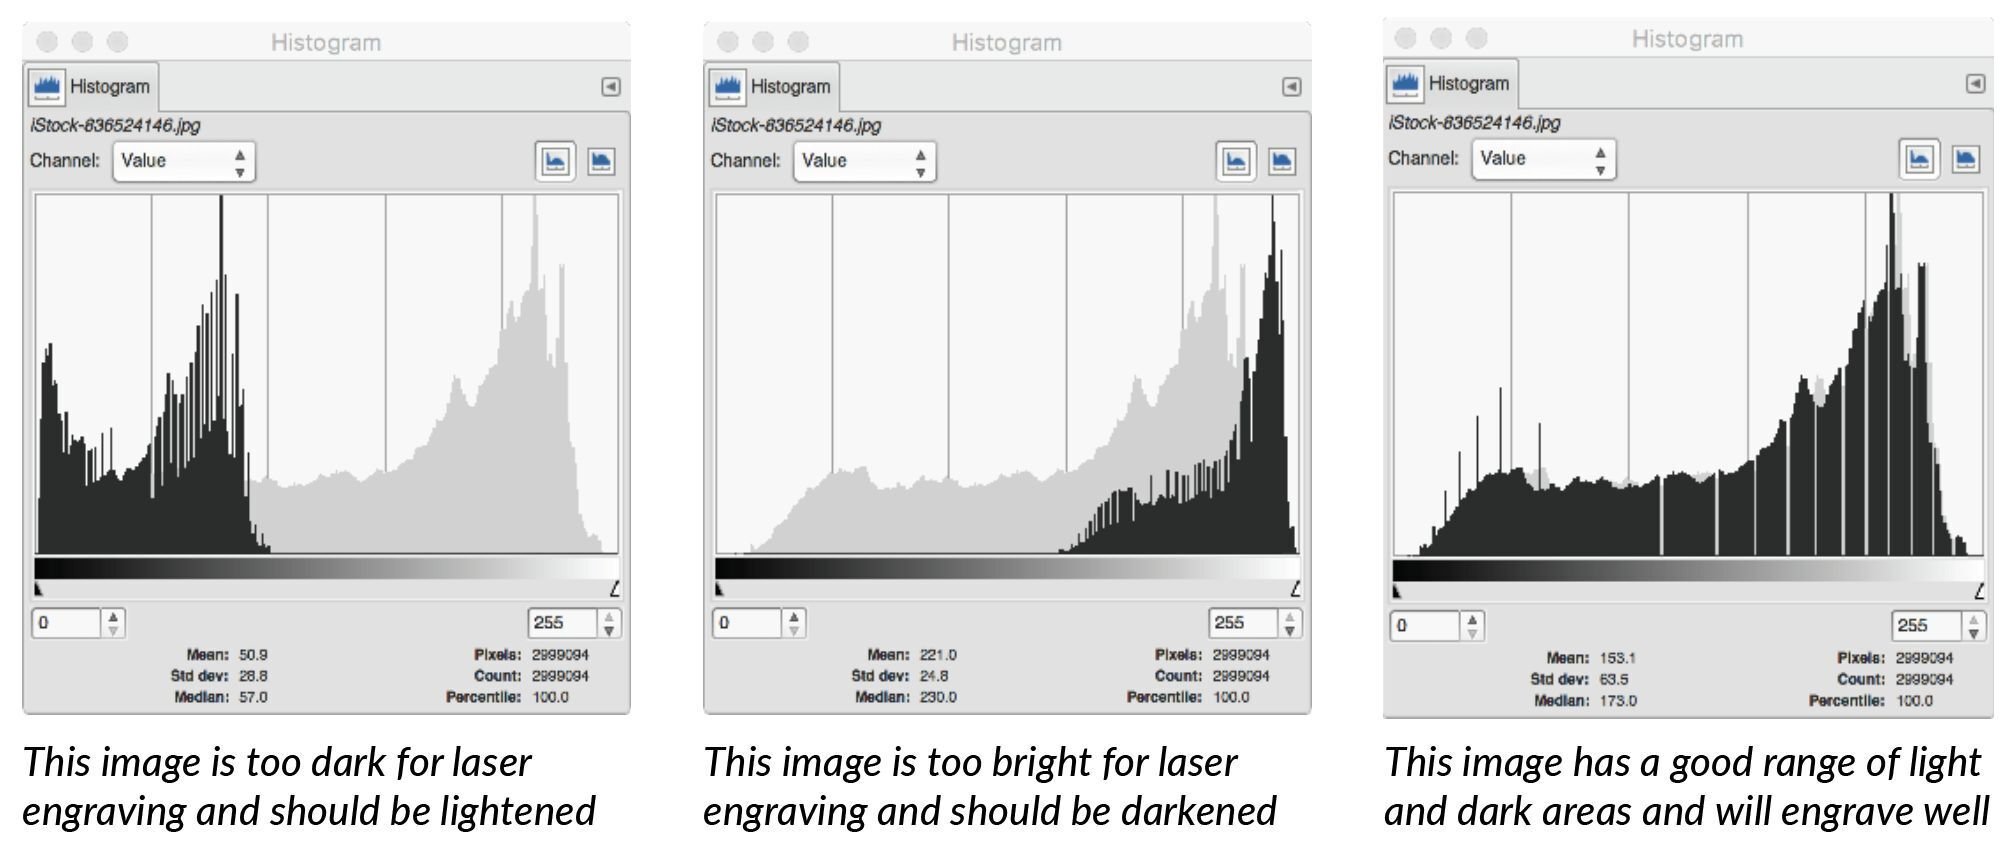
The histogram is unique to each image so don’t worry if yours doesn’t look the same as these examples.
-
-
Optimizing exposure
-
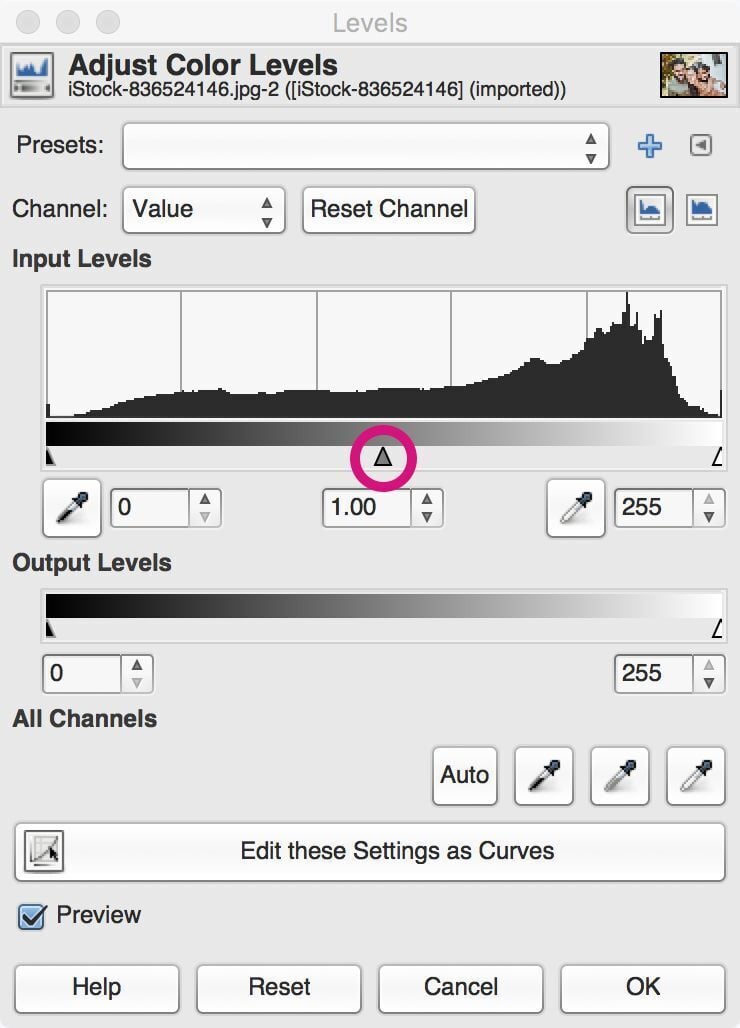
Open the Levels Tool by clicking Colors > Levels from the menu bar at the top of the screen.
-
Adjust the Gamma Slider to alter your histogram until the majority of the data (illustrated by the black mountainous shape) is roughly centered within the window.
- Here’s an example of an image and its histogram before and after the adjustment.
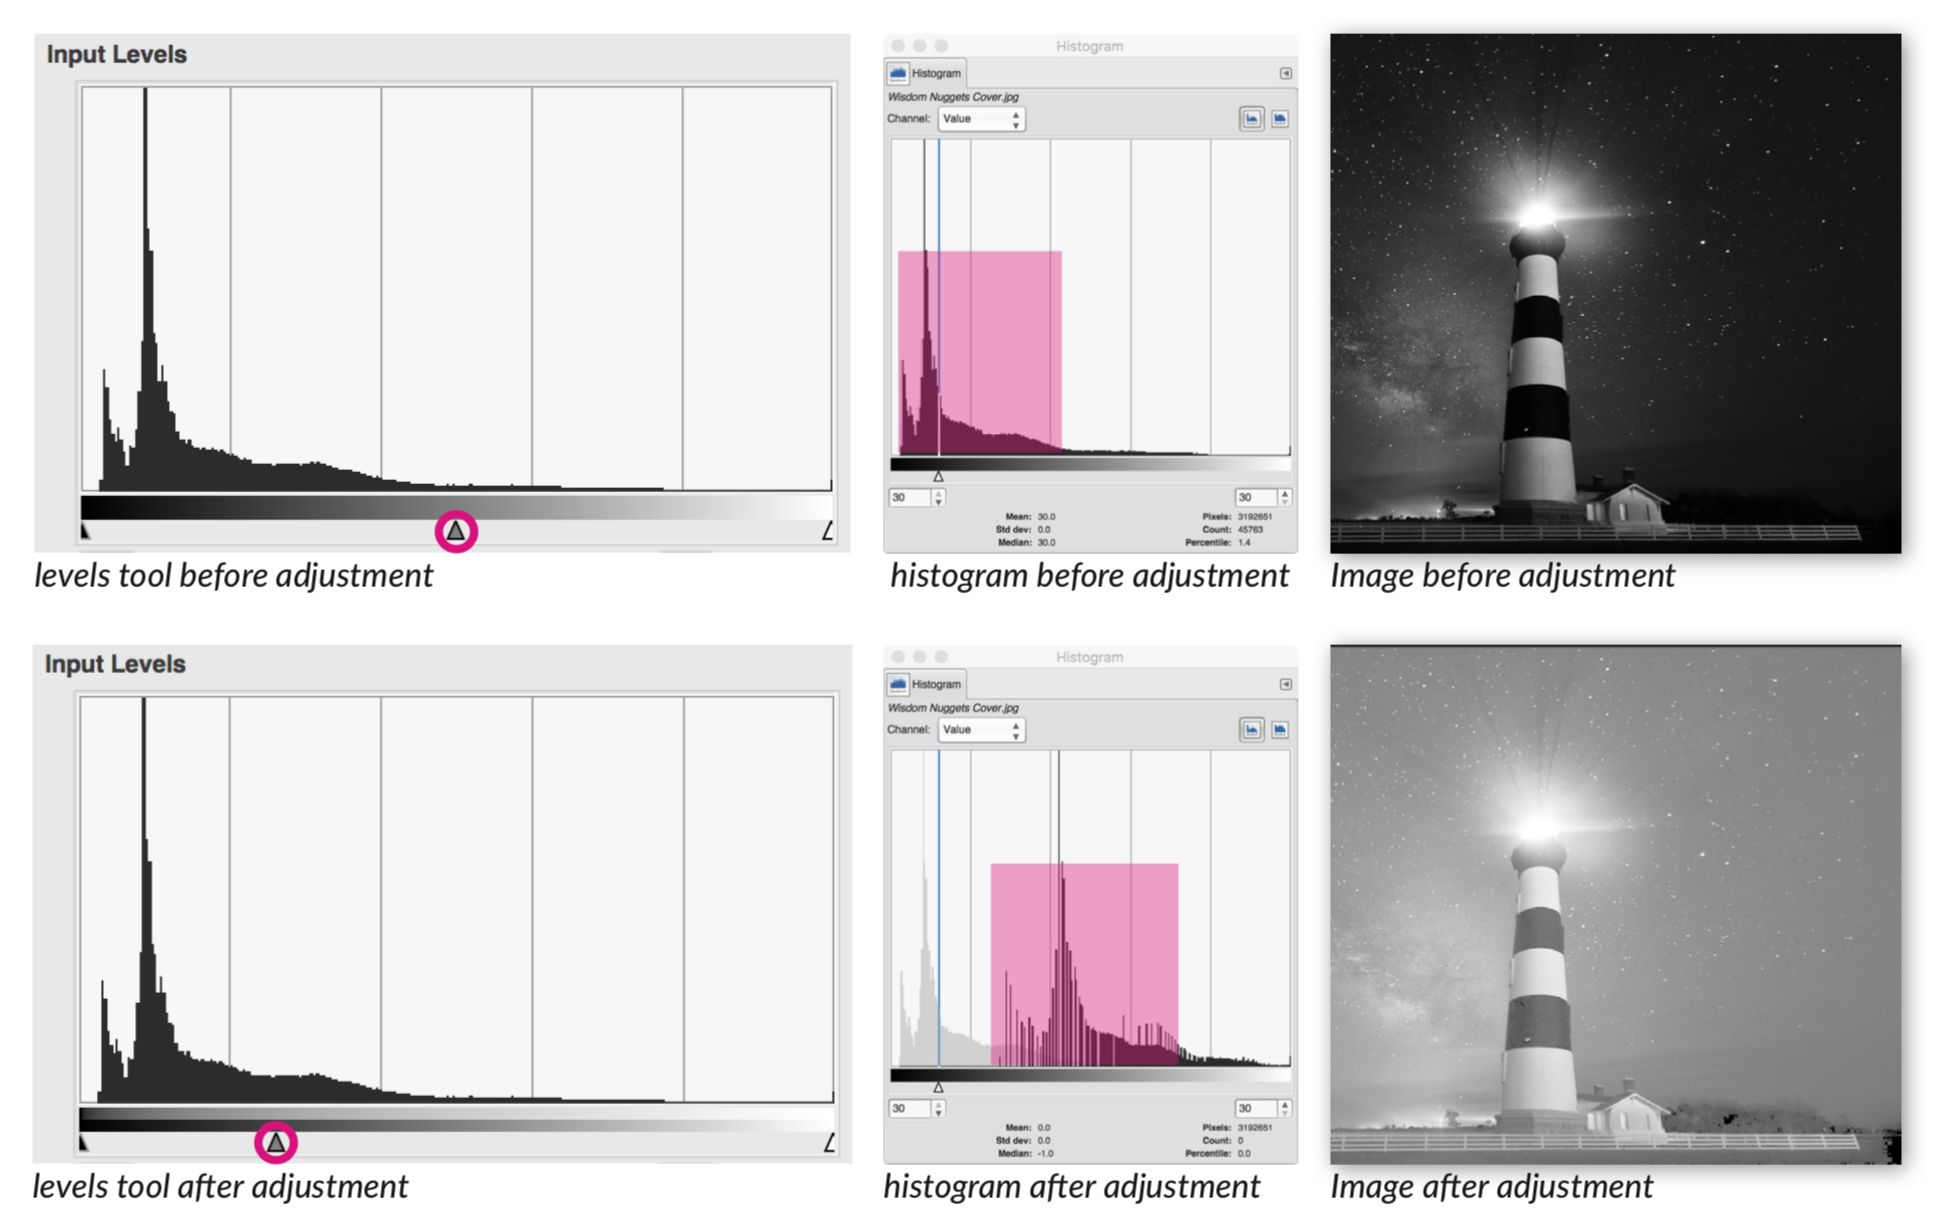
Images that have been cut from a background may affect the shape of the histogram. In these cases, use the Rectangle Selection Tool to create a histogram of a small area. To learn more about the Rectangle Selection Tool, visit the Gimp support pages here.
-
-
Clipping the histogram
-
Open the Histogram and the Levels Tool by clicking Colors > Info > Histogram and Colors > Levels from the menu bar at the top of the screen.
-
If the main portion of your histogram doesn’t fill the width of the box, use the light and dark Input Level sliders in the Levels Tool to clip away the lightest and darkest pixels. Click and drag the sliders under the histogram toward the center until they frame the main body of the histogram.
-
In this example, we’re clipping away the magenta areas. You may need to clip away more or less, depending on the shape of your histogram.
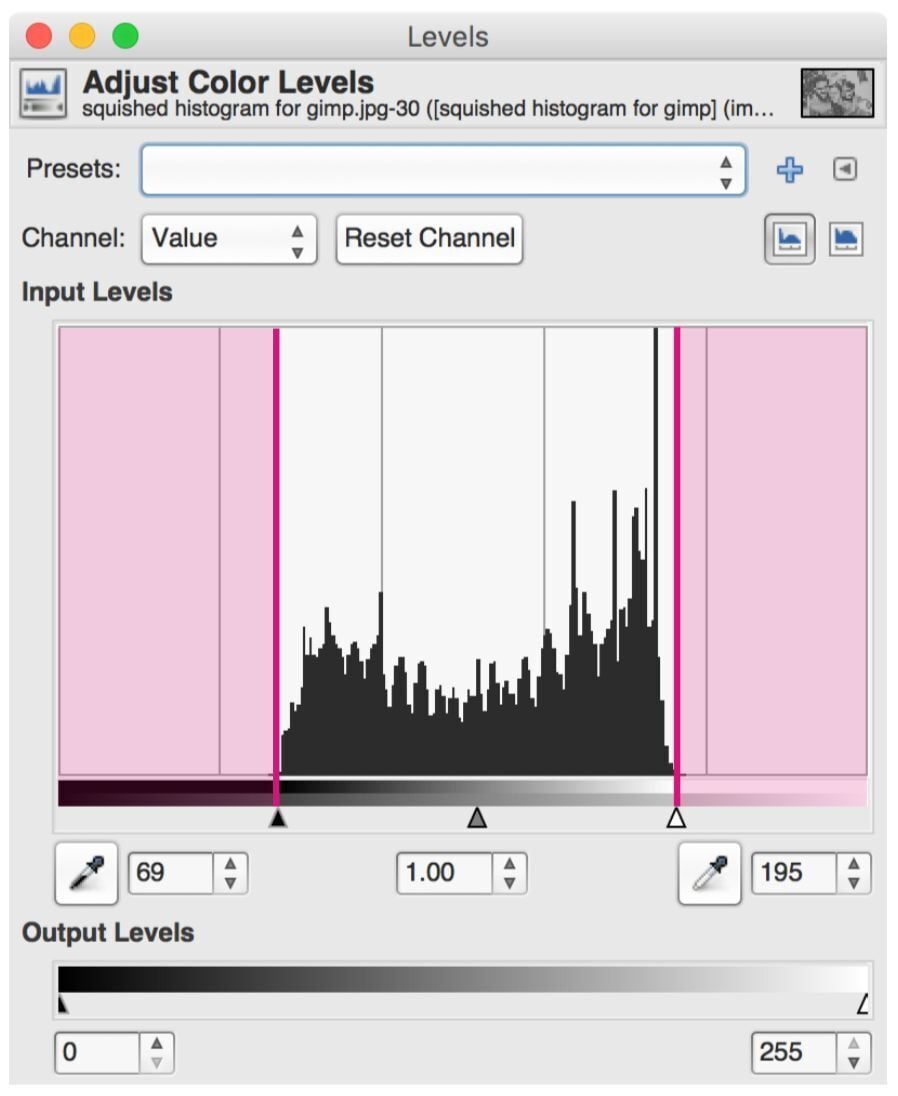
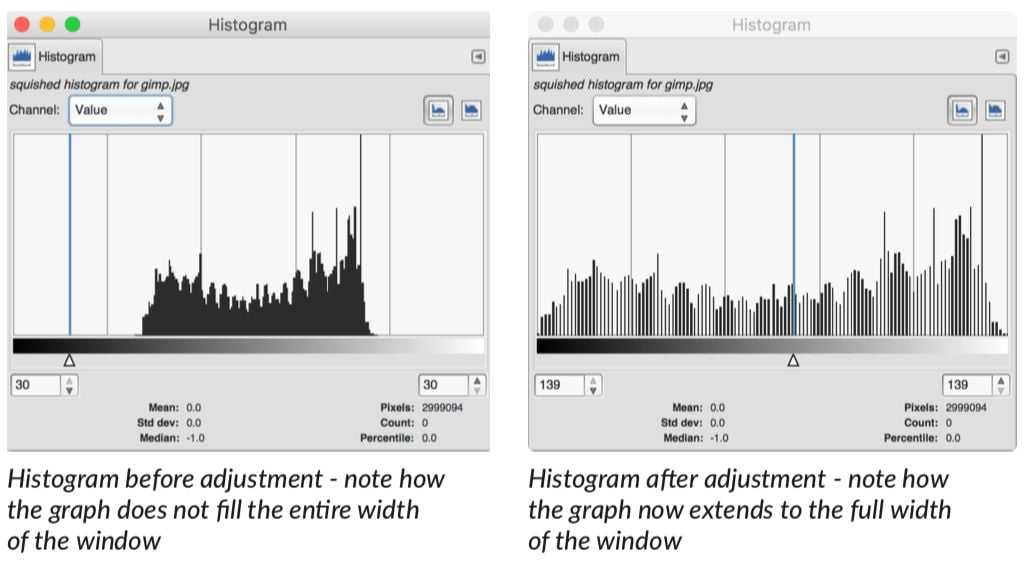
If your histogram already spans the full width of the window you can skip this step.
-
-
Boosting contrast
-
Upping the contrast slightly on your image can also help improve engrave results. Do this with the Curves Tool in the menu bar under Colors > Curves.
-
Open the Curves Tool, and using your cursor, click and drag slightly up and down at the points indicated in the example below. This will introduce a gentle ‘S’ curve to the graph, pushing the middle grey tones lighter and darker.
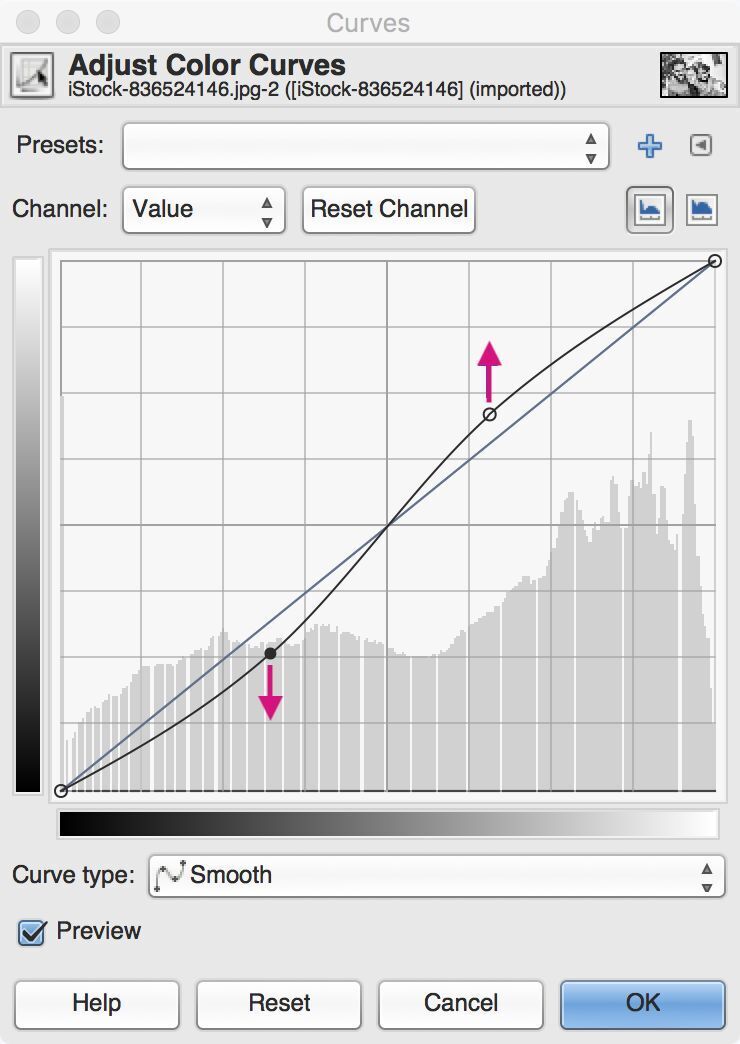
Although the recommended adjustment to the curves tool is subtle, try experimenting by making more extreme changes to different points on the graph. Understanding how this tool works will be useful to you in both laser engraved and printed photography.
-
-
Applying sharpening
-
From the menu bar, click Filters > Enhance > Unsharp Mask, and set all the sliders to 0, or the lowest possible value.
-
Drag a corner of the dialog box to make it bigger, and use the four-way cursor (found at the bottom right corner of the preview image) to move the preview to an important part of your image or an area of high detail like faces, hair, leaves, or flowers.
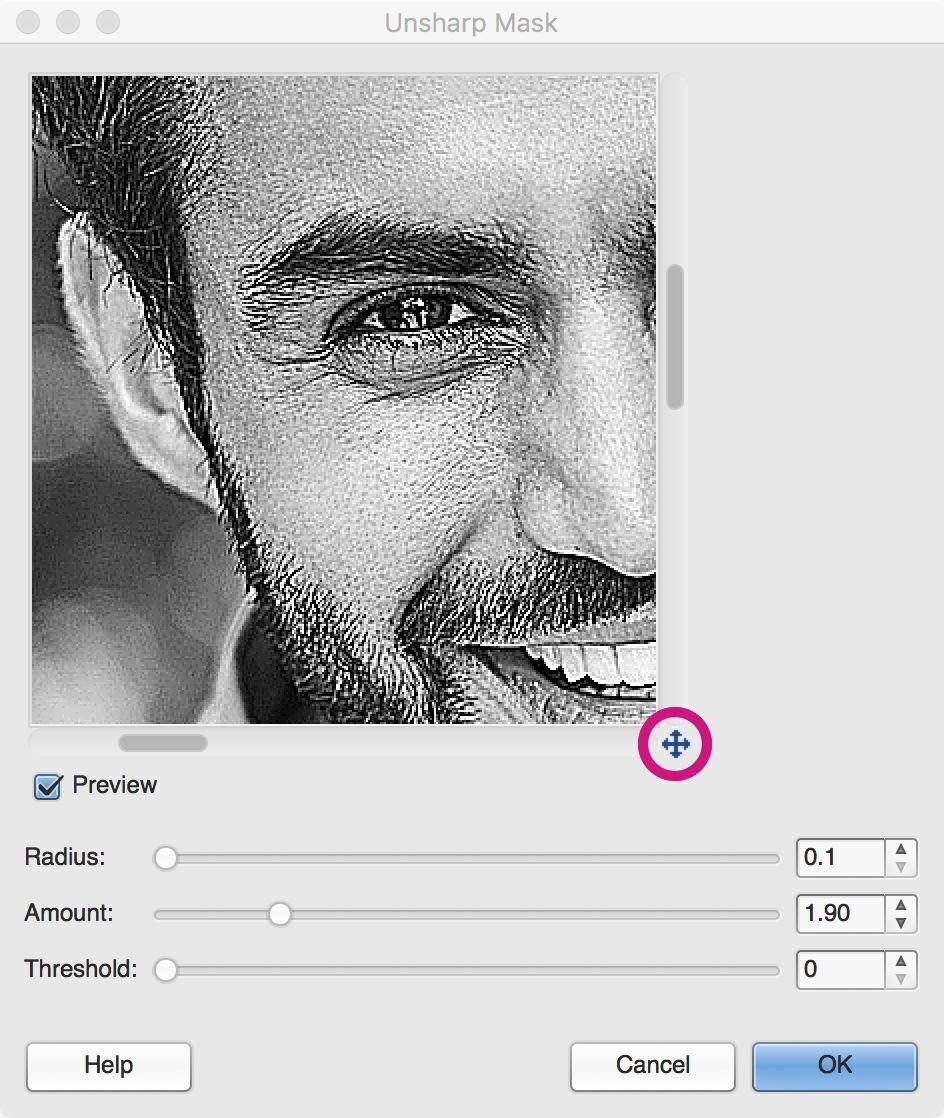
Adjusting the size of the image preview
-
Start to increase the Amount slider until the details in your image look well defined, crisp, and slightly unnatural.
-
Jump to the next step for some examples of how much sharpening to apply.
In this image, a value of between 1.5 and 2 created the most suitable result. You may need to apply a different amount of sharpening when preparing your image.
-
-
How much sharpening should I use?
As a general rule when laser engraving photos, apply more sharpening than if you were printing on paper.
- No sharpening. Looks a little soft and blurry.
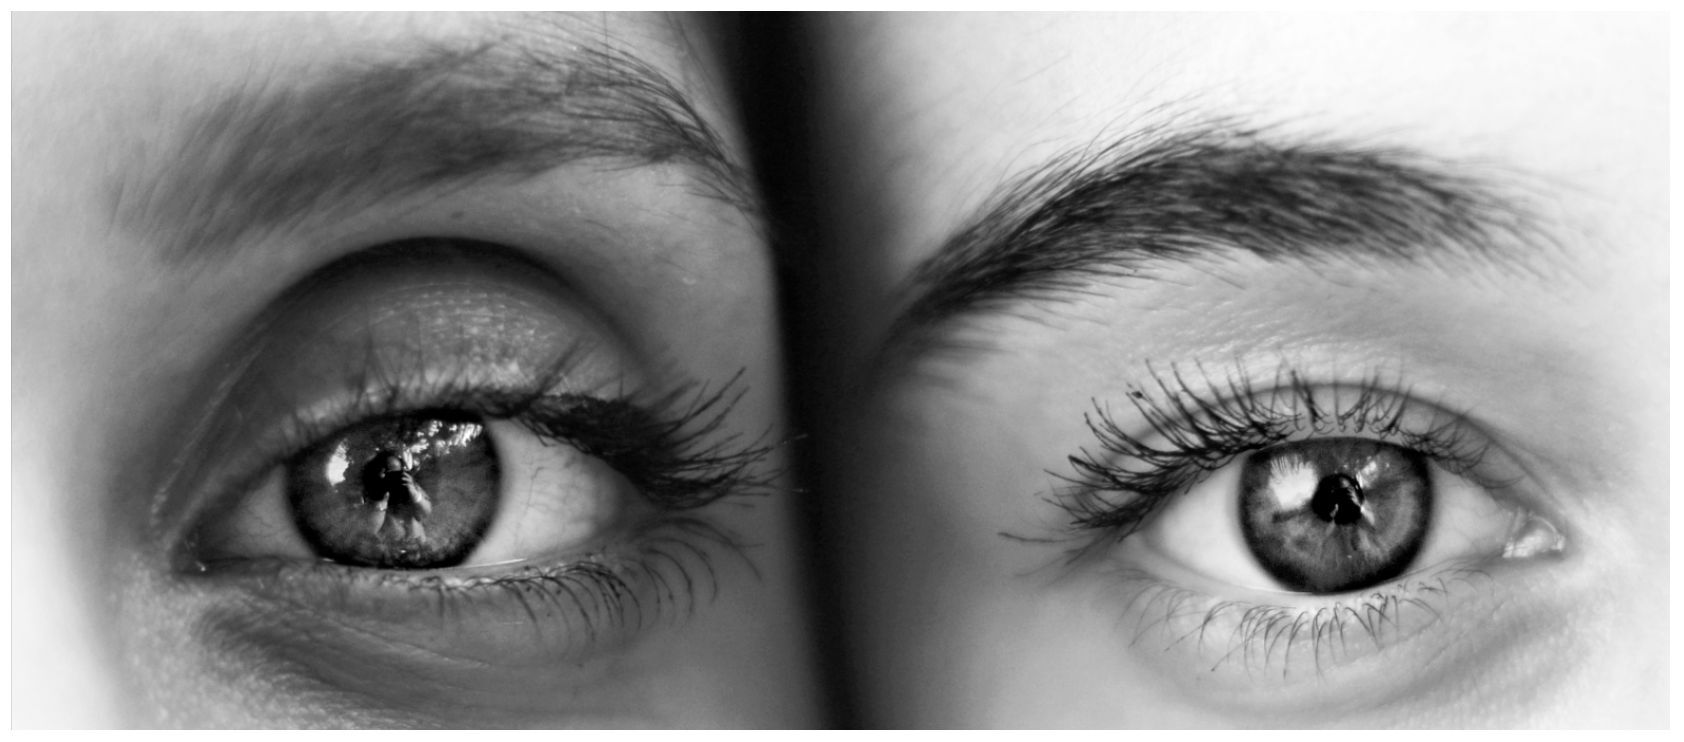
- A small amount of sharpening. This would look great printed with ink.
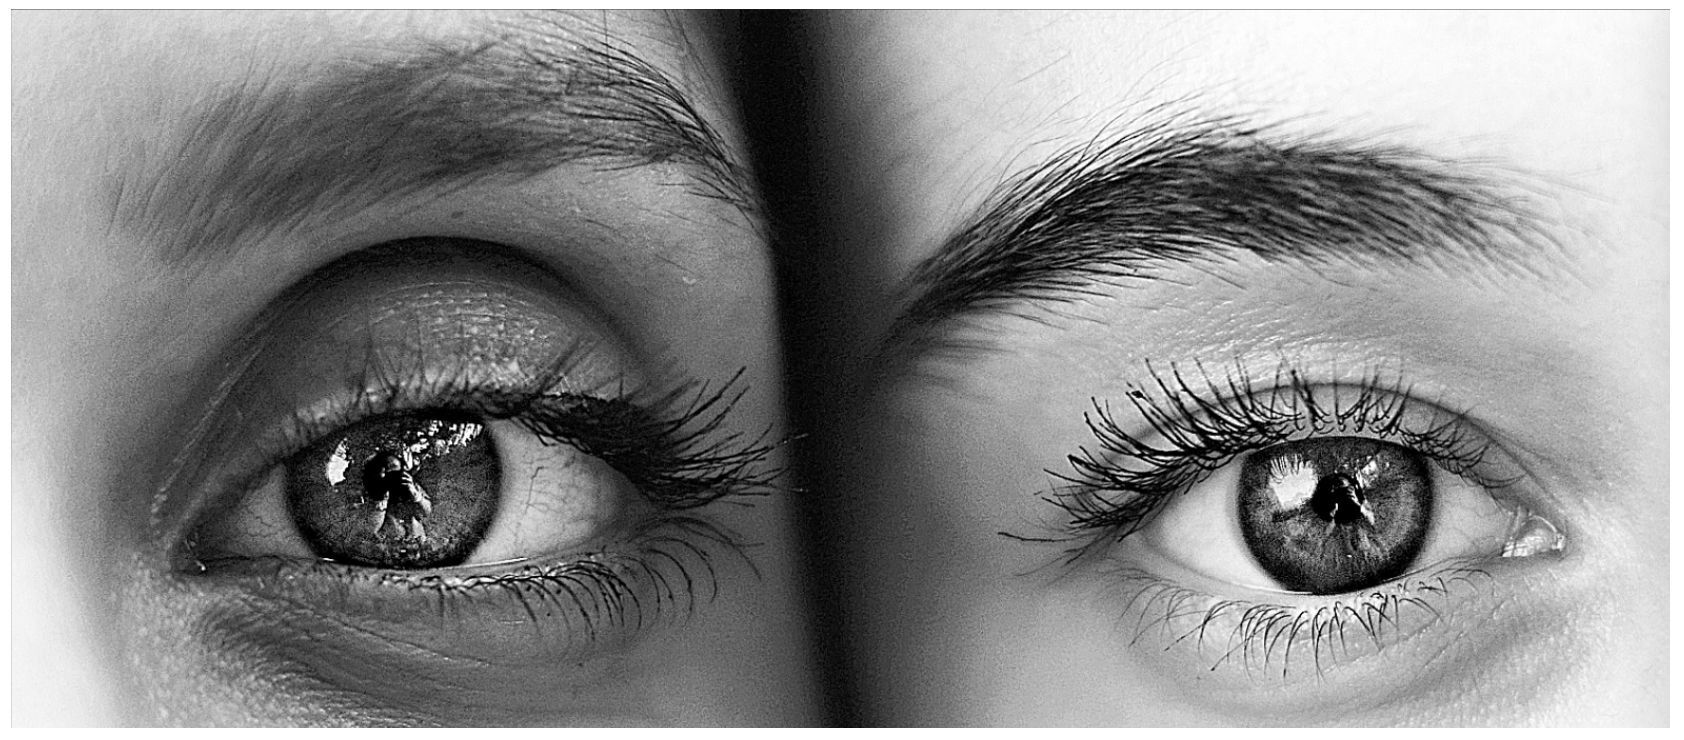
- Slightly more sharpening than above. This photo would engrave very well on the Glowforge.
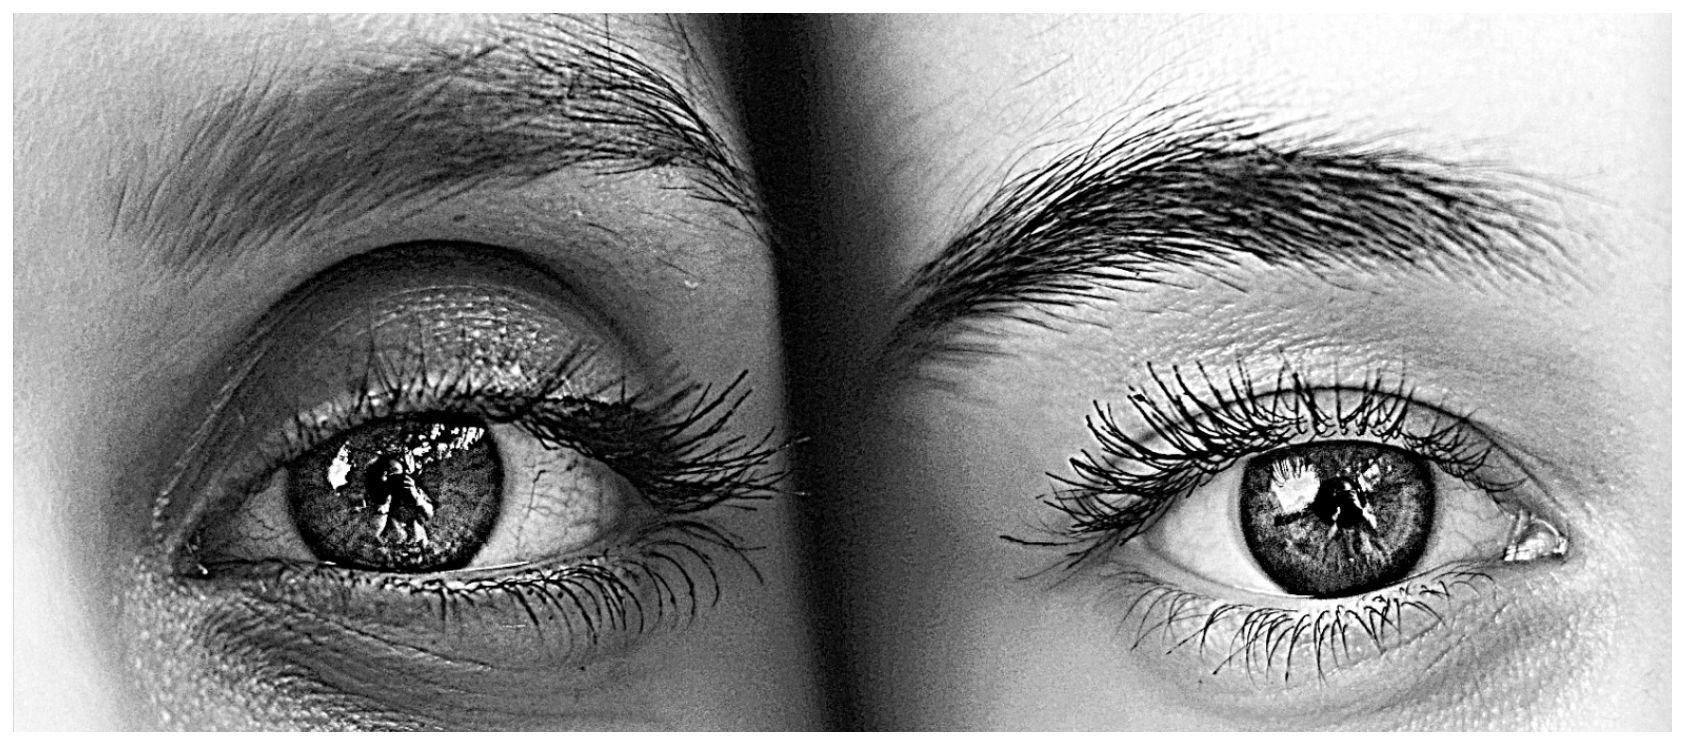
- This photo shows too much sharpening for a great engrave.
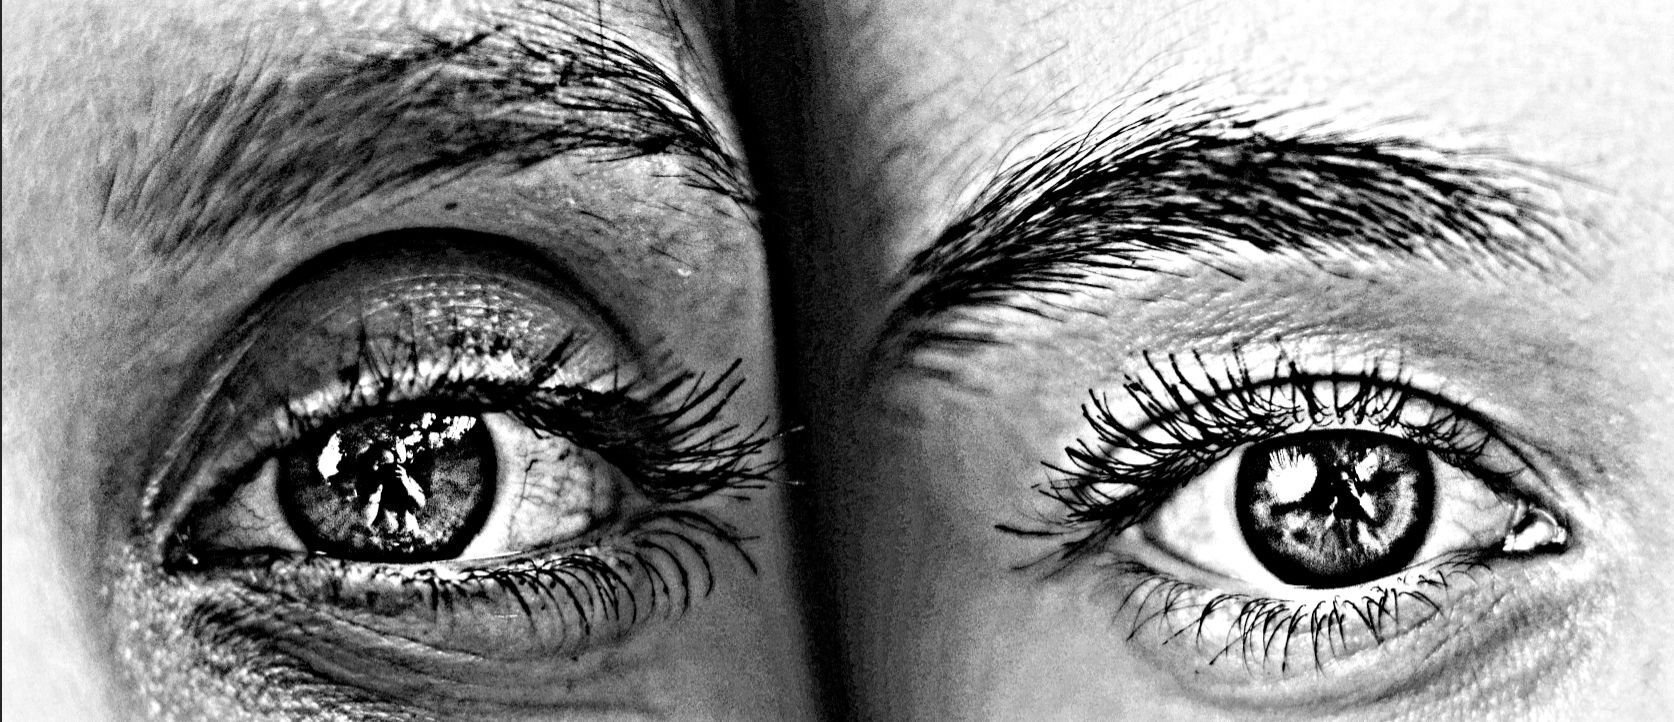
Each image may benefit from different sharpening amounts. Go ahead and experiment!
-
Printing!
Before pressing print, consider these other factors that can affect engraving quality:
-
Material - Printing on light-colored materials provides the best photo results because of the dark mark that’s made when the laser hits the surface.
-
Size - To maximize detail in your engraving, make your print as large as possible and crop away any unimportant parts of your image.
-
Invert Colors - Some materials like black acrylic become lighter when they’re engraved. After processing your image but before uploading it, click Colors > Invert from the menu bar to create a version of your print that looks like a film negative. This might look strange on screen, but looks great engraved.
-
Draft or HD? - The Draft Photo Proofgrade® setting is typically 2.5 times faster than HD Photo, and shows high contrast but less detail. HD photo engraves are slower, with more subtle marks and smoother gradients, which can be useful for portraits.
-