Unexpected print results can take many forms: the cut didn't go all the way through your material, the engrave is distorted, the print didn't land in the right spot on the material, and so on. There are lots of moving parts in your Glowforge Aura that work together to make the perfect print, and to troubleshoot poor print results, you'll want to focus on the following areas.
- Material Flatness
- Rails and Bushings
- Exhaust and Filter
- Overhead Lighting
- Laser Head Movement
You can expect good print results every time you use Proofgrade material and default settings. If your print isn't cutting through, or not turning out the way you expected, it may be a good idea to check the settings first.
- You can follow the steps in this article to perform a quick test print that will establish a baseline for print results on your Aura using Proofgrade settings and material.
Flat and even material is crucial for good print results. If you material is warped, uneven, or tilted, the laser may not be able to focus on it properly. This can cause cut through issues, distorted prints and other issues.
- Follow these instructions to clean your cutting tray. It should lay flat in its slot, and there should not be any buildup on top of the cutting tray that could prop up your material.
- If you are using the Passthrough slot on your Aura to feed material, it's easier for material to tilt inside the printer. Be sure to check that the material is lying flat on the cutting tray and isn't tilted.
- Hold-down pins and painter's tape are two common options to ensure flatness of material on the cutting tray.
Buildup on the silver laser rails, and the bushings where the rails slide through the magnetic dock, can produce misaligned prints, double images, and other issues related to the movement of the laser head.
- Follow these instructions to clean your rails and bushings every ten hours of printing.
- If you are printing on material that produces a lot of dust, you may need to clean more often. For example, five hours of scoring 20lb copy paper may not lead to a problematic amount of build-up, but five hours of cutting tokens out of plywood may.
If dust and buildup accumulates inside your Aura faster than you'd expect, you might find yourself cleaning more often to address print issues. If this happens, check your exhaust setup, and the state of your filter cartridge.
- If you're using a Glowforge Personal Filter with your Aura, make sure that the filter cartridge does not need replacing.
- If venting out of a window, make sure the hose is positioned correctly to allow for good airflow.
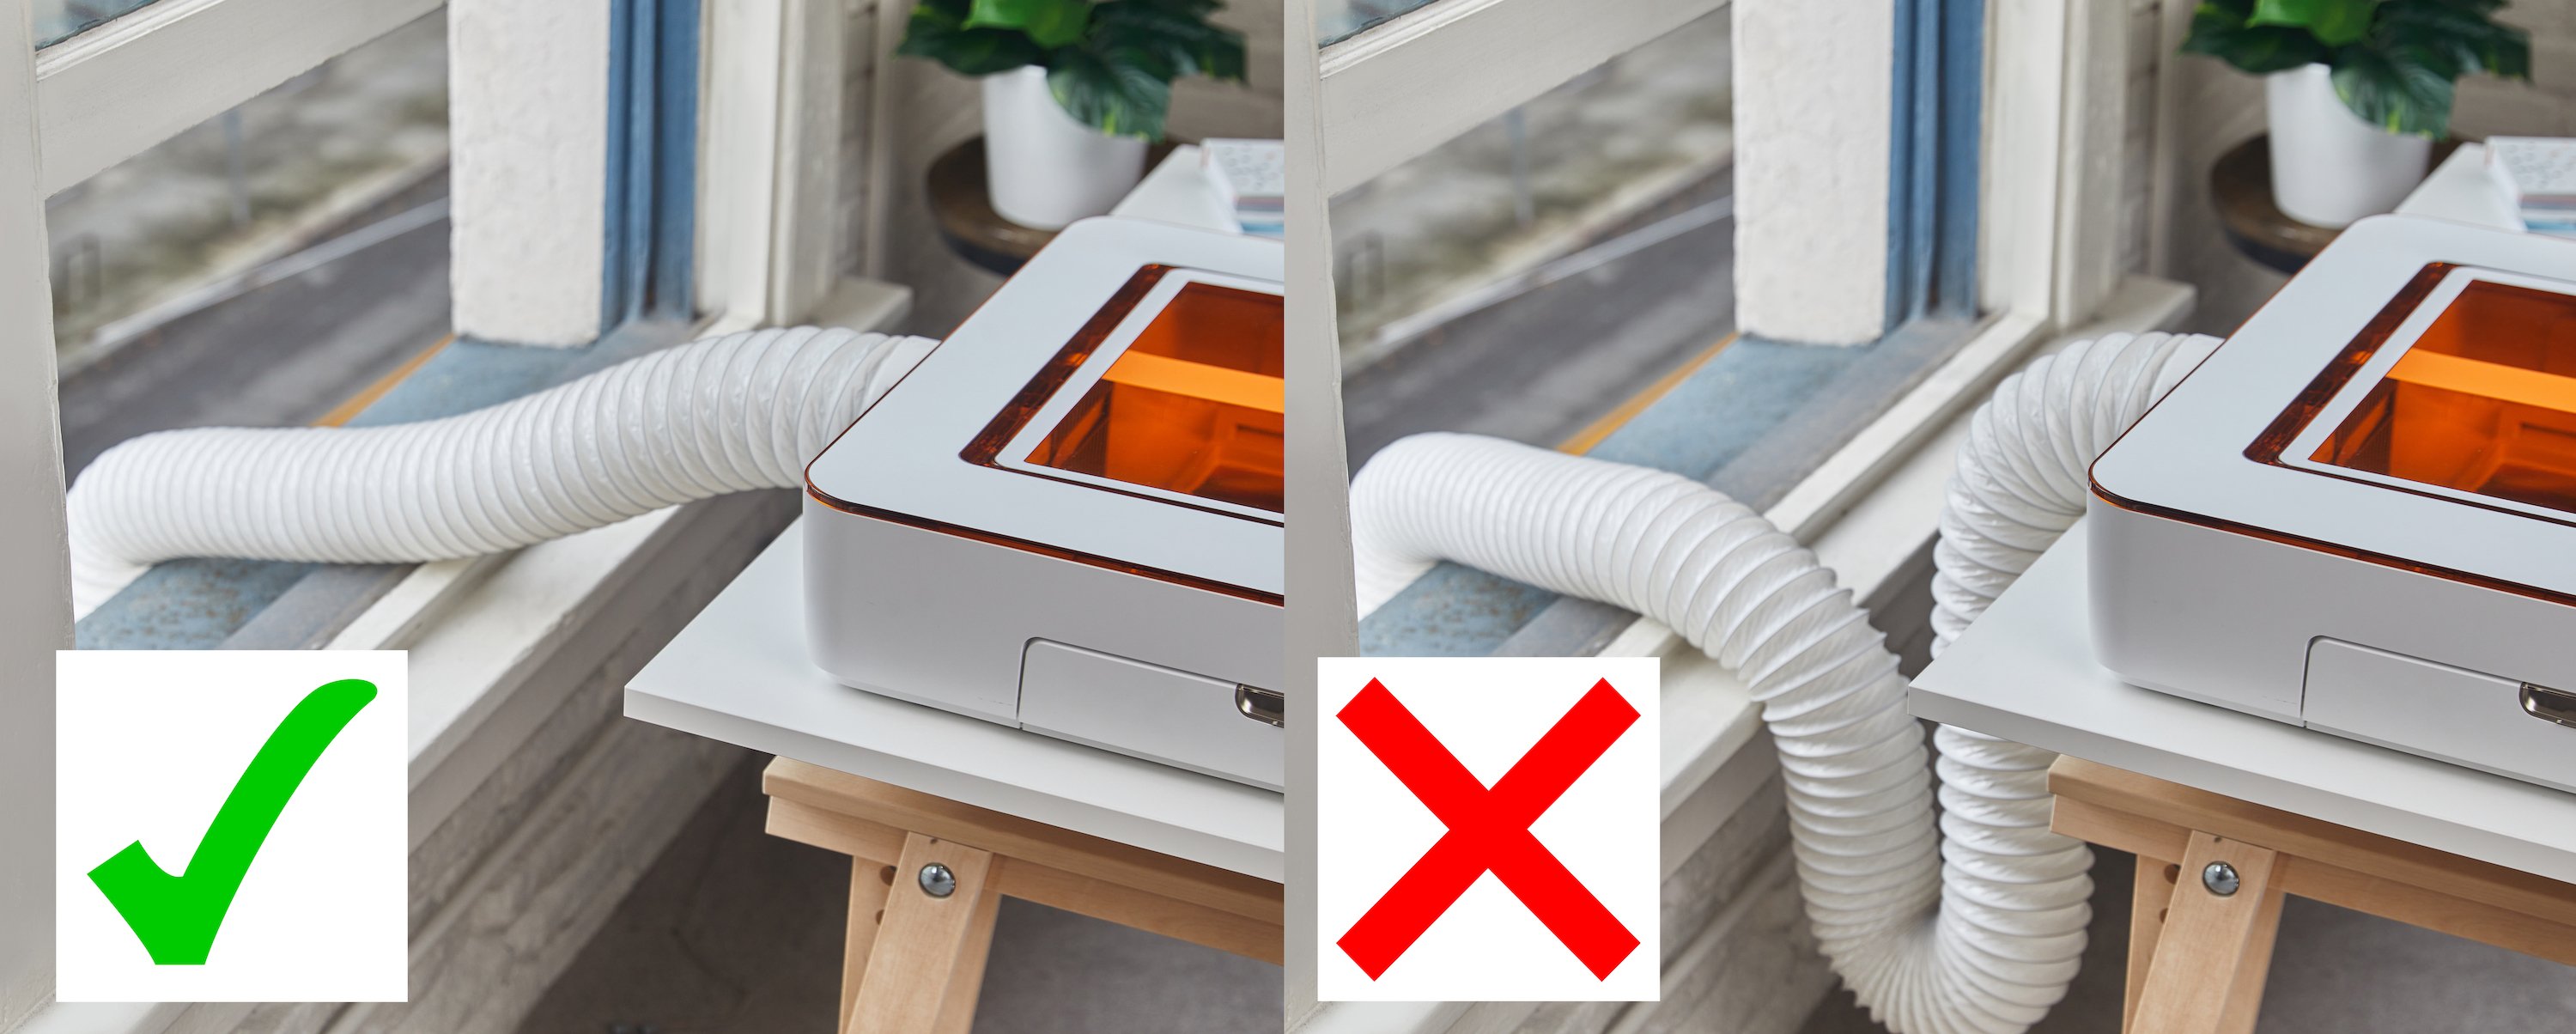
The example on the left shows correct exhaust hose setup. Avoid multiple bends in the hose where possible.
It may not be obvious, but lighting can make a difference! If there is excessively bright overhead light hitting your Aura, it may have trouble focusing on your material properly.
- Dim or minimize bright overhead lighting before trying again. If bright natural light is directly above your Aura, try a temporary curtain or shield to put the Aura in shade.
The Laser Head in your Aura needs to travel smoothly from left to right, with no obstructions. If the head has any trouble moving, it can impact print results.
- Follow these instructions to check the position of your laser head cable, as well as the head's movement along the laser rails.
If you're still experiencing unexpected print results after checking everything above, please reach out to our team with the following details:
- The date and time of the print
- Photos of the print