Checking your Craft Series Laser Head Cable
The laser head is like the beating heart of your Glowforge Aura. To keep everything in working order, it's important to keep an eye on the things that help the laser head do its job, such as a laser head cable.
This article will show you what to check, and how to make sure your laser head cable and connection are good to go. We suggest checking this when you're cleaning your Glowforge Aura, and when troubleshooting poor print results.
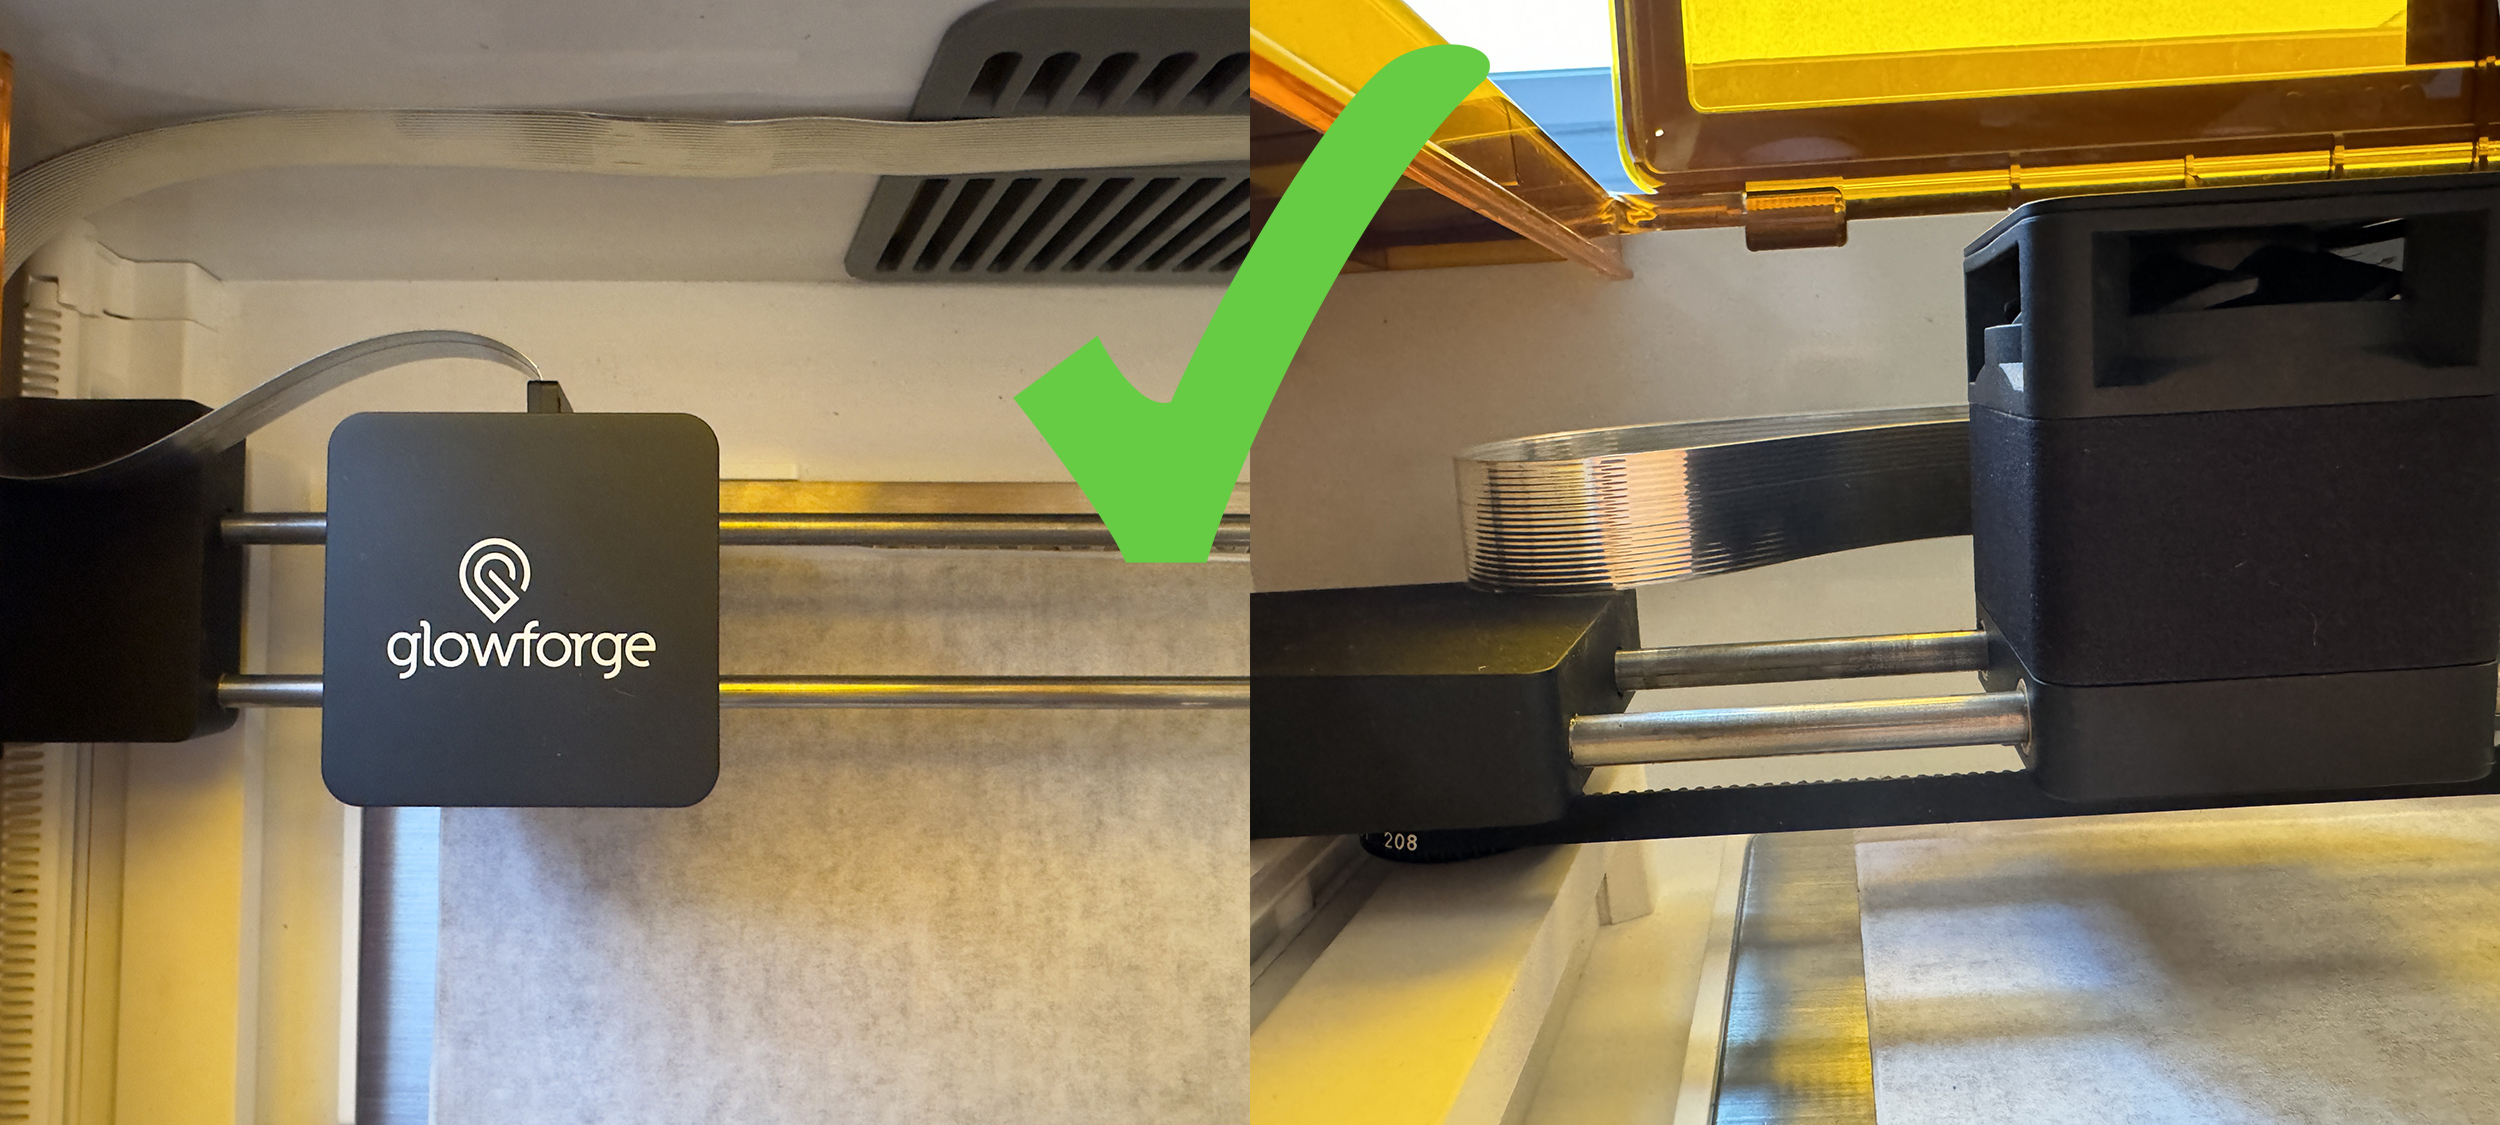
Check for Cable BindingWhen the laser head is installed on the magnetic dock, the Glowforge logo should read from left to right, with the laser head cable connected behind the head. Like so:

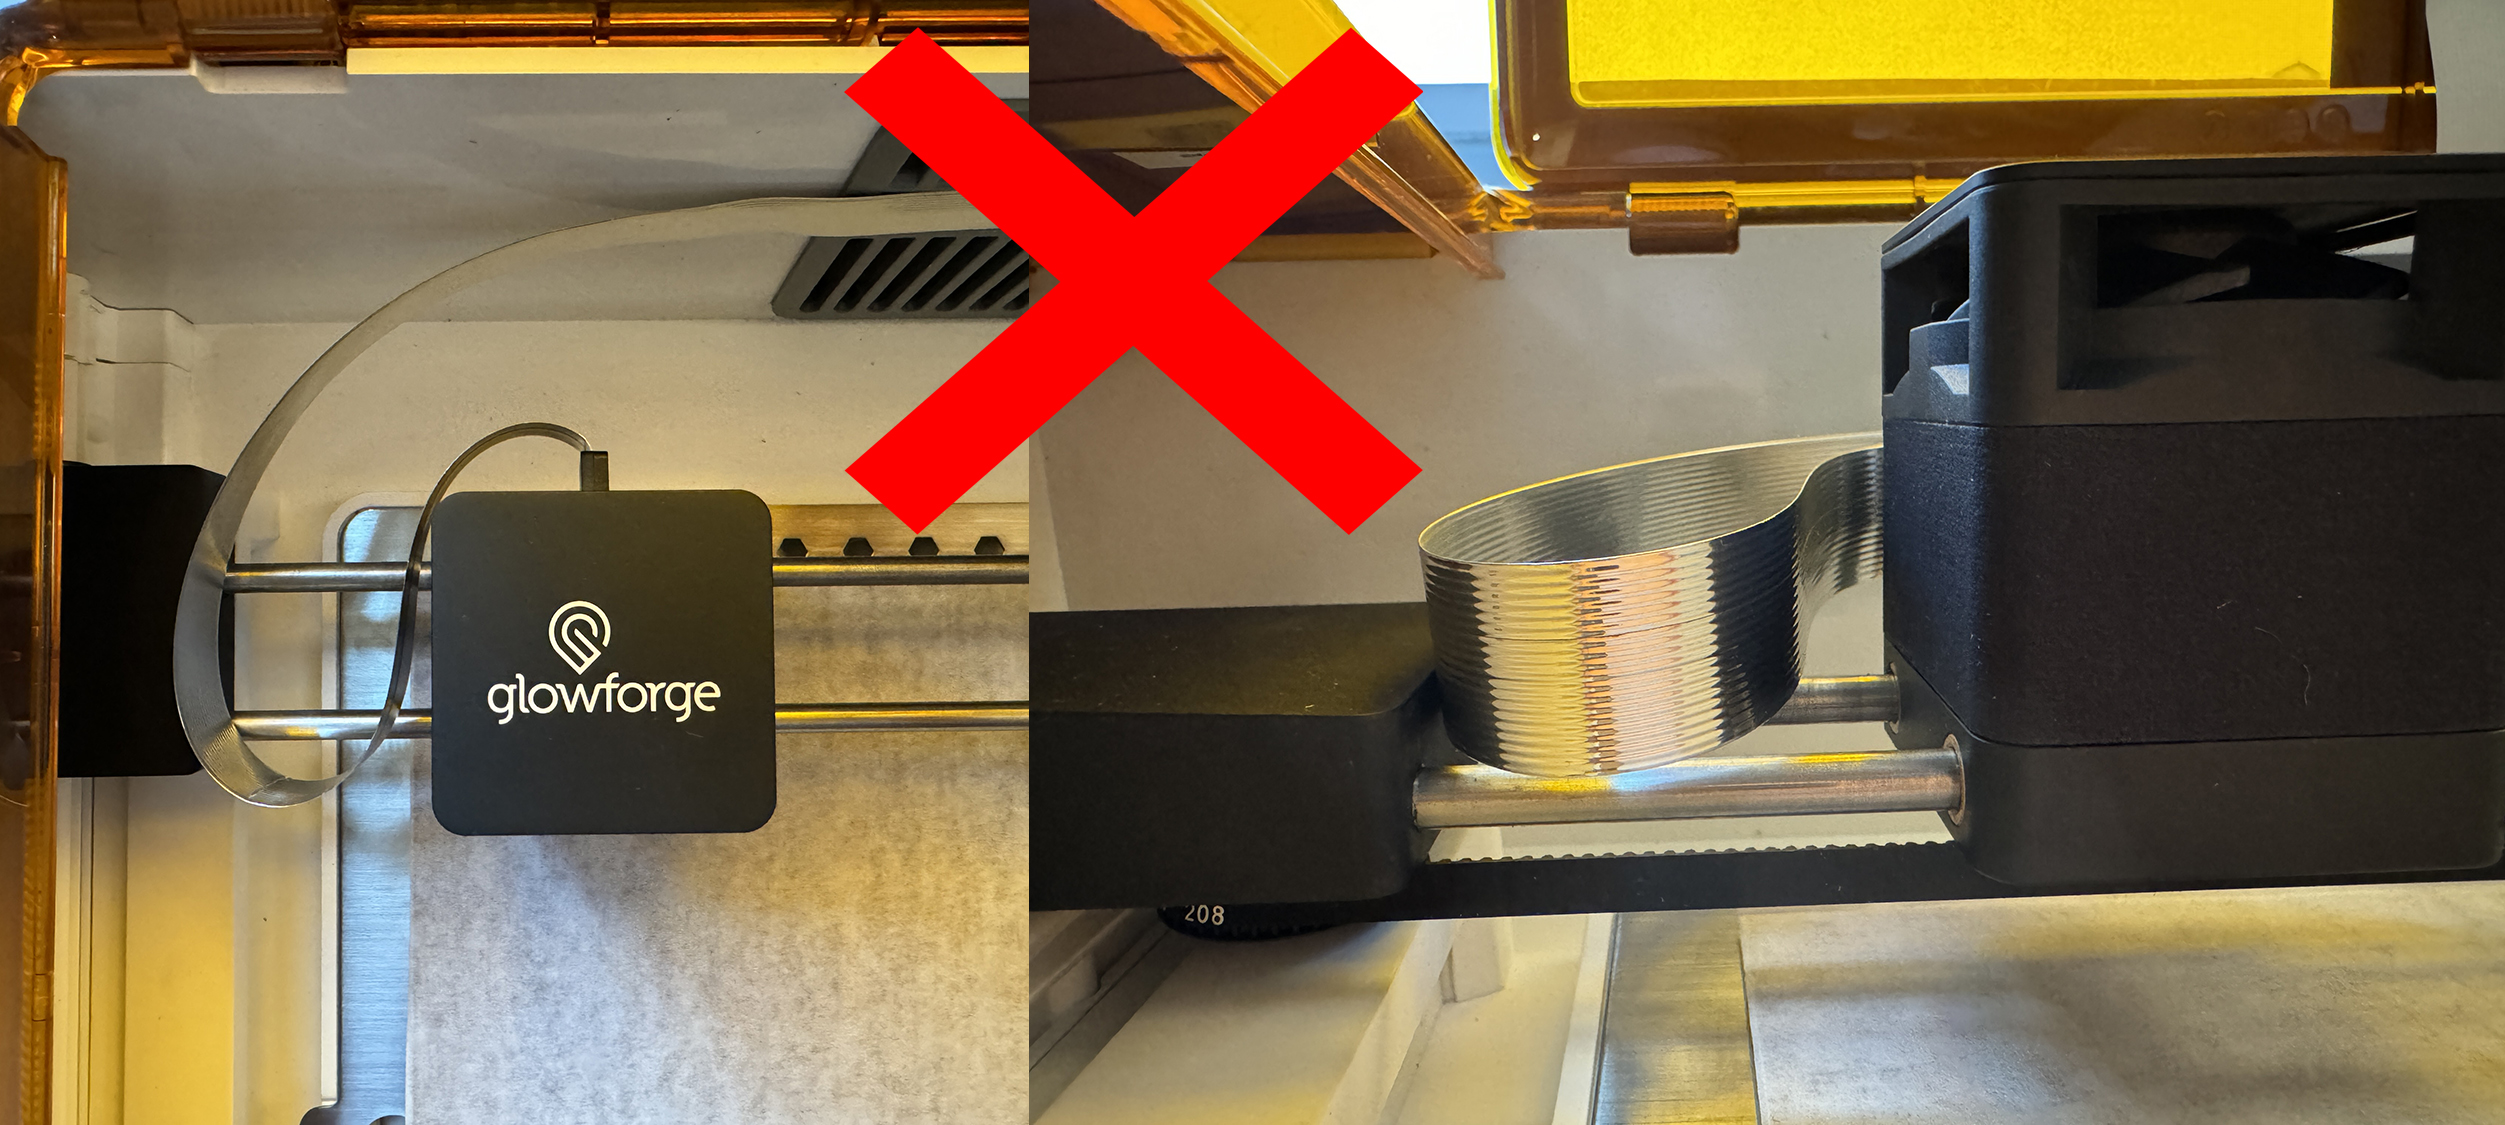
The cable is flexible enough that it should remain behind the laser head even near the rear of the printer bed. Though it's rare, it's possible for the cable to get caught between the laser head and the gantry end cap on the left hand side. Take a look at these photos for examples.

An example of good laser head cable position. The cable has cleared the gantry end cap to the left of the laser head.

An example of poor laser head cable position. Notice the binding of the cable against the gantry end cap, and how the cable loops between the head and the end cap.
When the cable is bound between the gantry end cap and the laser head, it will restrict movement of the laser head in the upper left of the print area. If the head keeps moving to the left, it can cause the cable to suddenly “spring” over the end cap, resulting in poor print results in that area as the laser head moves suddenly to the left.
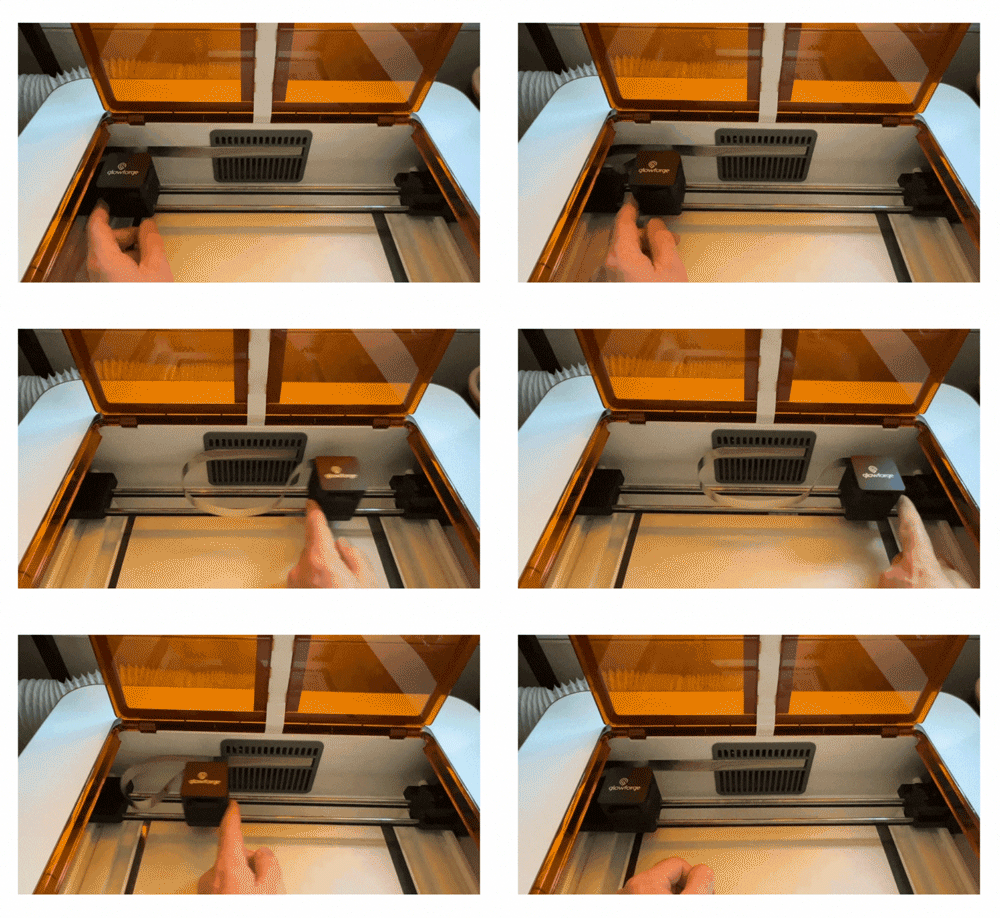
Adjust the Cable PositionIf you notice binding occurring when the laser head moves to the upper left, follow these steps.
- Open the lid and move the Laser Head to the center of the rails and about 6 inches from the rear of your Aura.
-
Lift up on the Laser Head ribbon cable from the underside, as shown in the photo below.

-
Hold the cable in this position for about 30 seconds. Don't be afraid to apply a bit of upward pressure!
-
Move the laser head to the far left side of the rails.
-
Move the laser head from side to side, watching to ensure the ribbon cable no longer bunches or loops against the gantry end cap on the left side.

-
If the cable is still binding, please repeat the steps one more time.
If you continue to have trouble after following these steps, please reach out to our team letting us know what happened. We're here to help!