Setting the Order of Your Print Steps
When creating a design Glowforge app, each color becomes a different step in the printing process. This lets you change their print settings and the order in which they’re printed.
Sometimes cutting an object before you engrave it can cause the object to move slightly. Other times, you may want to start the print with a complex engraving, and interrupt it if you’re not happy with the results. This guide walks through the process of ordering your print steps.
As a general rule, it’s best to start with the elements closest to the center of your design and then work outward when cutting. When a shape is cut out, it’s possible for the following to happen:
- The position of the material which has been cut out might shift due to the material dropping down after being cut out.
- The edges of the material may curl if printing on something flexible like Proofgrade Leather or Veneer.
In either of the above examples, if an engrave or score were to take place on the material after its position or shape has changed slightly after being cut out, this could lead to areas of the finished print being slightly misaligned or out of focus. (While we’re talking about materials, you can read about Materials Safety here.)
Changing the Order of Print Steps Manually
The simplest way to set up the order of your print is to adjust the steps in the app. Here’s an example using the following design for a picture frame:
The design has text and multiple closed paths, all using the same color. For the purpose of this example, the text is to be engraved, the border around the photo is to be scored, and the holes in the corners, the opening for the photo and the border are all to be cut.
The following print step order would help to ensure that all steps have the best focus and positioning:
- Engrave the text
- Score the outline path
- Cut the corner holes and photo opening
- Cut the outer border
If everything in this design is left the same color, they will all be one step. To make it into separate steps and arrange the print order:
- Assign each element of the print a corresponding color:

- Save the SVG so it can be uploaded to the Glowforge app.
- Upload the file to the app. You will see the separate steps.

- Click and drag each step shown on the left to rearrange the order in which the steps will print. In the following image, this print has now been set up to engrave, score and then cut in a specific order.

- Print! When this design is sent to be printed, it will print in the order shown from to bottom. First it will engrave the text, next it will score the border line around the photo, then it will cut out the photo area and corner holes and finally it will cut out the outline of the frame.
Creating Designs With Automatically Ordered Steps
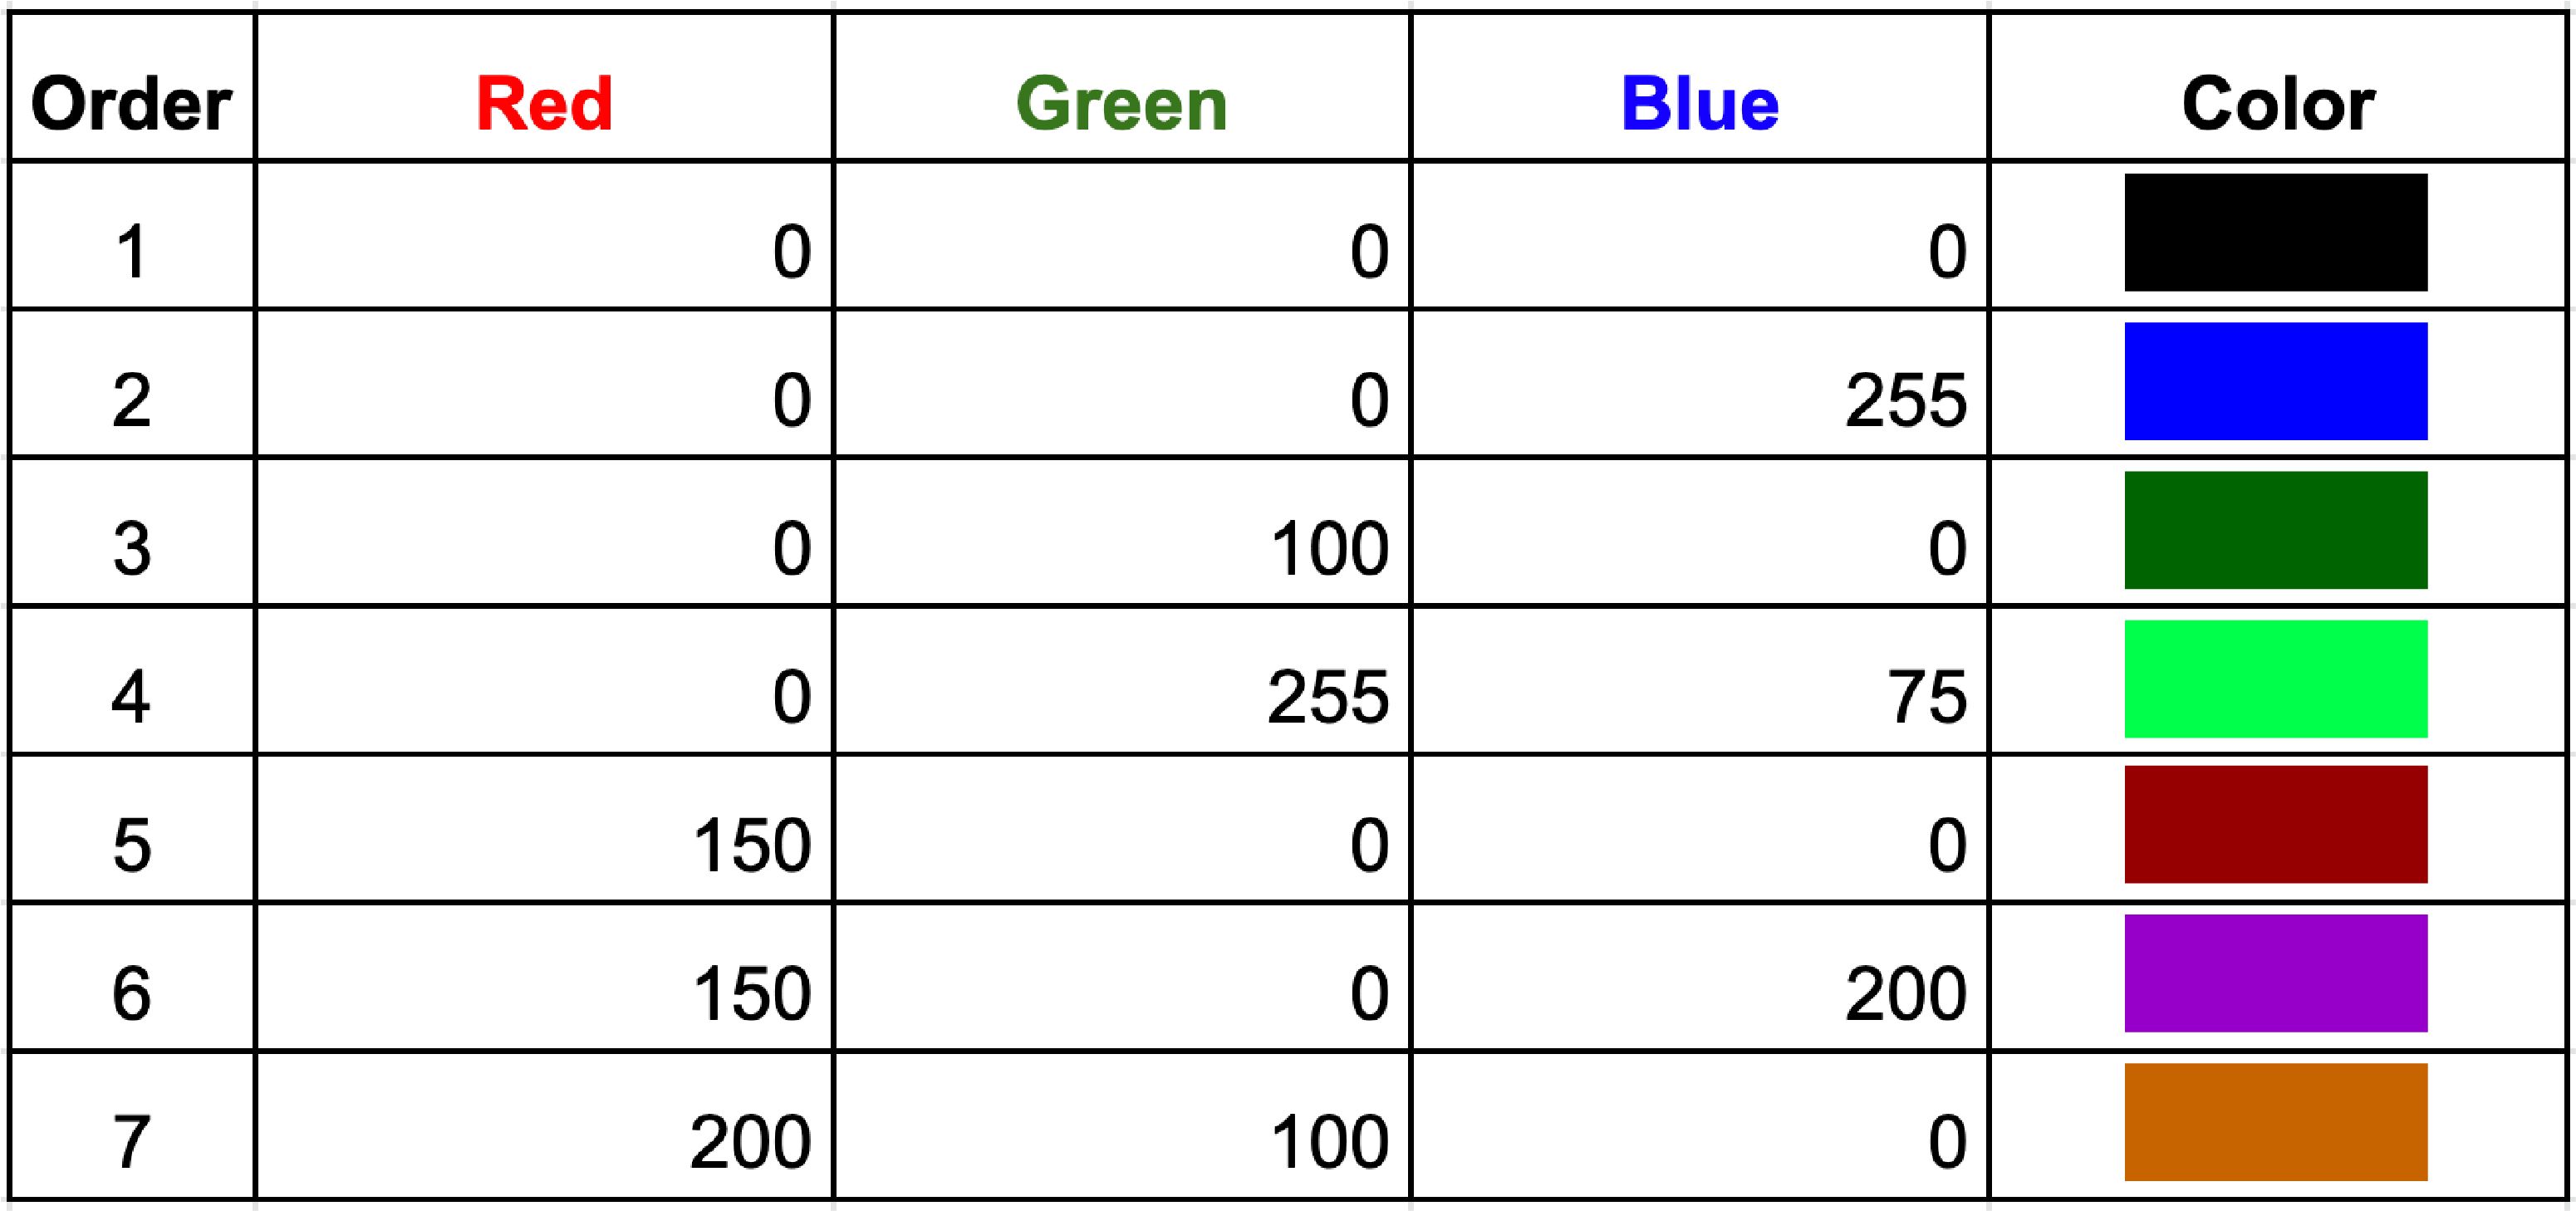
Designs can be created so that they will automatically upload into the Glowforge app in a desired order. When a vector design is loaded in the app, certain colors are always loaded before others.
Here is a handy chart containing a list of colors and their RGB values showing the order in which they’ll show up in your print steps:
In the left image below, each number has been set to its corresponding color from the chart above. The right image demonstrates how the elements appear when the file is uploaded into the app.

We can use the same photo frame shown earlier in this article to demonstrate using colors 1, 2, 3 & 5 from the chart: 
- With the colors used in this example, the design will automatically load with four steps.

- When this file is uploaded, it immediately shows the same order we achieved by clicking and dragging the steps earlier in this guide.