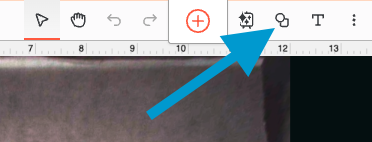
Insert a Shape
The building blocks of design - lines and shapes - can be added directly to your design in the Glowforge Design Workspace using the Insert Shape tool.
Using the Insert a Shape Tool- Go to Glowforge Print (app.glowforge.com), and sign in.
- Open the design you want to use, or create a new blank design.
- In the Design Workspace, click the "Insert Shape" button. It looks like a circle laid over a square.

- Choose the shape you want to add from the options: line, square, circle, star, or polygon.

- The shape will be generated in the Design Workspace. If you inserted a Square, Star, or Polygon, an options menu will appear when you select the new shape. The Shape options will change depending on what shape you inserted. You can choose how sharp you want your star to be, round the corners of a square, add points to a polygon, and more!

Want a triangle? Insert a Square, then change the number of points in the menu to 3!
That's all there is to it! You can change the dimensions of your new shape using the Scale tools. Experiment with the Insert Shape tool to speed up your workflow by adding cut-outs on your engraved photos, holes in your earrings and ornaments, and much more!