Unboxing & Setting Up Your Glowforge Craft Series Laser
Let's get Started
If you’ve read about Safety and know how to operate your Glowforge Craft Laser, it’s time to start creating!
In just a few minutes, you’re going to have a working laser in your home (or office, classroom, workshop, or design studio)!
Of course, if you encounter any challenges along the way, contact our Customer Success team and we'll get you the help you need. Let’s get started!
Any damage?
Once the seal on your Glowforge Craft Laser’s box has been broken, you can’t return it to the retail store. We’re here to help, though!
If any part of your Glowforge Craft Laser is visibly damaged out of the box, we want to make it right as soon as possible! Send photos of the damage to support@glowforge.com and wait until you hear back from us. If the printer itself is visibly damaged, do not plug it in or attempt to operate it; contact us immediately.
Prepare Your Area
Before you set up, make sure you have a stable surface on which to place your Glowforge Craft Laser printer, and nearby access to an electrical outlet.
Getting acquainted
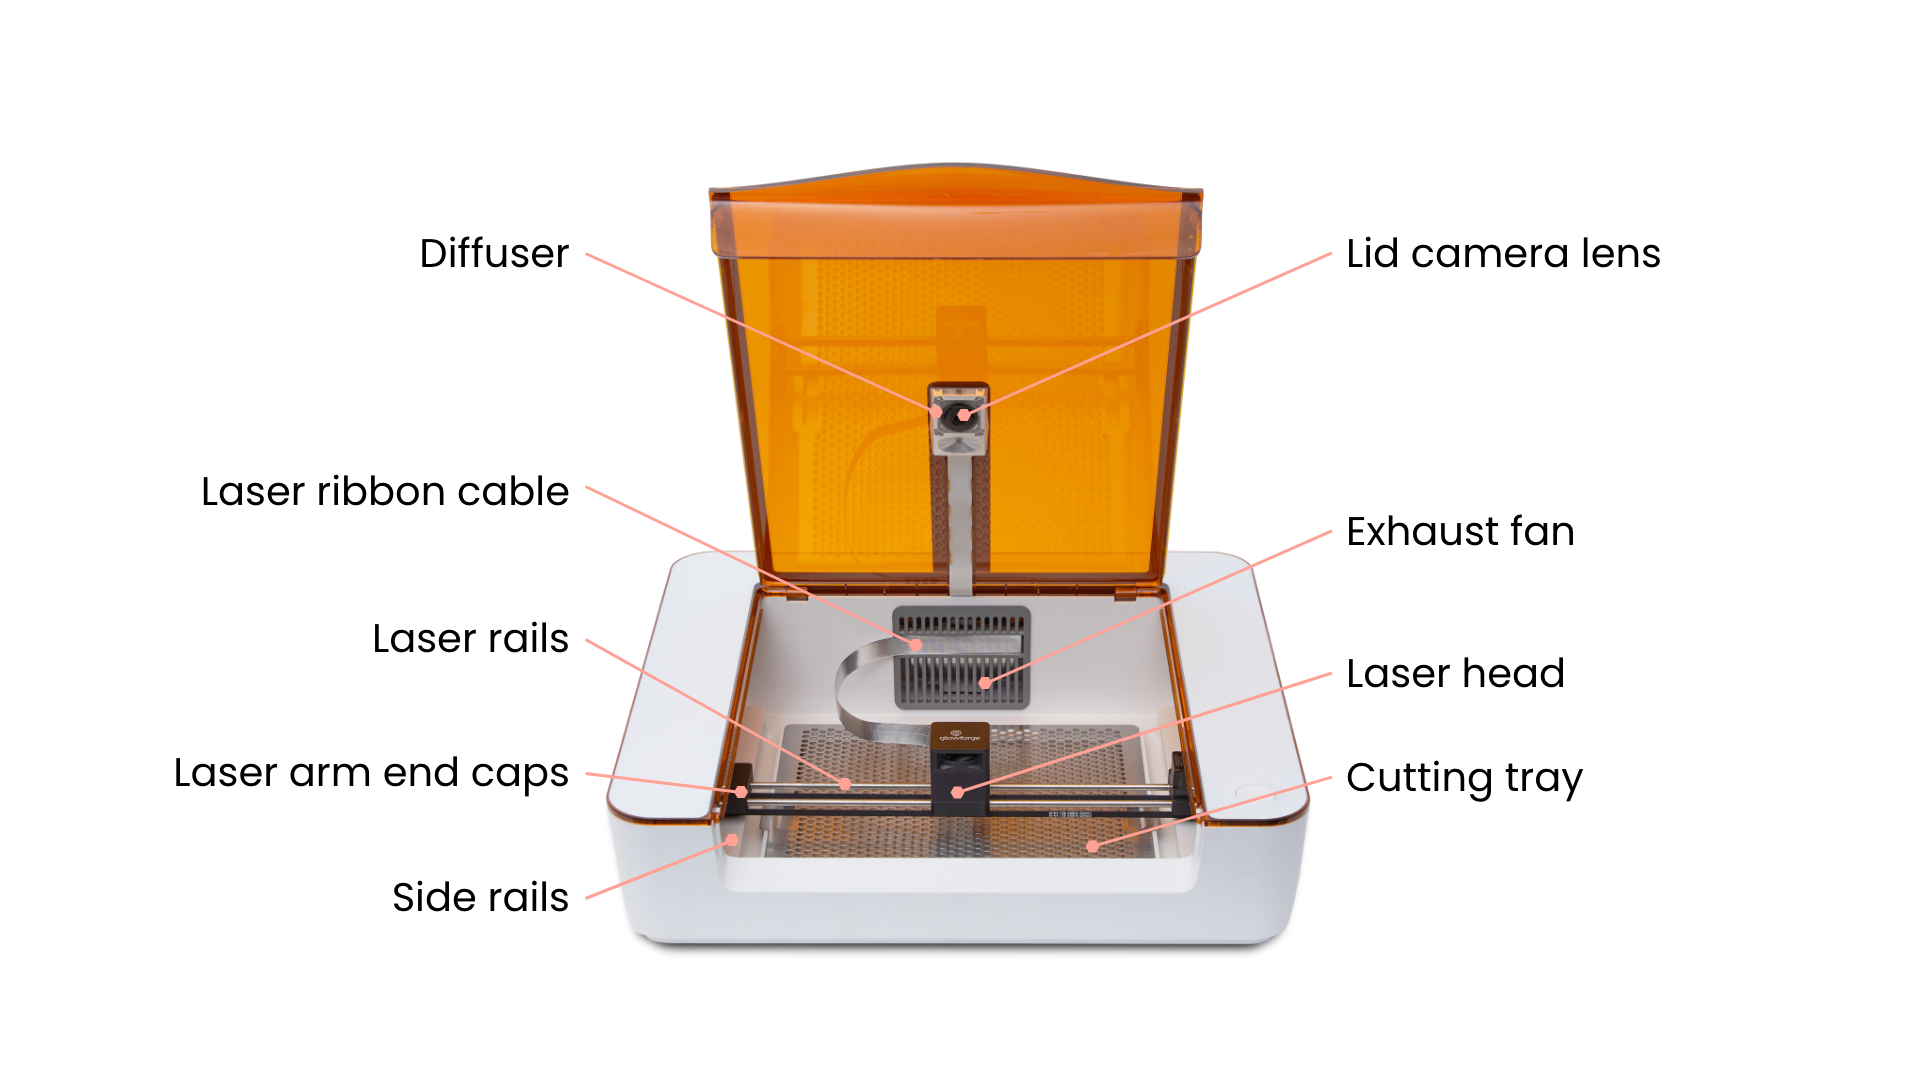
Here's a quick tour of the parts you'll need to know.


- Gently place the Glowforge Craft Laser box on the floor or large flat surface. Open it.

- Using two hands, remove the top foam piece from the box, and voila! You’ve revealed your Glowforge Craft Laser printer.
- Lift your printer out of the box and place it on your stable surface. Remove the clear plastic bag.

- In the box where your printer was you’ll find a cardboard sleeve containing your cutting tray. Remove this sleeve from the box and set it aside — you’ll need it shortly!

- Open the lid to reveal more boxes containing the laser head, power cable, and vent hose.

- Open the cardboard package closest to the front of the printer bed. Remove the exhaust hose and power cord and set them aside. You can also remove the bottom cardboard piece.

- Next, you’ll set up the laser head. It’s packed snugly in the black foam cube in the top left area of the printer bed. The laser head is already attached to your printer with a laser ribbon cable, so take care not to disconnect it.
- Remove the foam cover from the laser head and lift the whole foam block gently up and out of the cardboard holder.

- Carefully lift the laser head out of the foam block. Take care not to pull or twist the laser ribbon cable.

- Hold the laser head in one hand and remove the rest of the cardboard insert from the printer bed.

- Next you’ll place the laser head on the magnetic dock. It’s the black square mounted on the two silver laser rails. Set the laser head on the dock with the laser ribbon cable at the back and the Glowforge logo reading left to right. You’ll feel it magnetically snap into place.

- You may find some foam pieces tucked under the rails on the left and right side. Gently remove them by pulling out, then up, and store them with your other packaging.

- Once you’ve attached the laser head, it’s time to align the rails! It’s most likely that your laser arm is already sitting perfectly straight, but just in case there’s any skew there, these steps will take care of it.
- Place your hands on the black end caps on either side of the laser arm. Gently pull the laser arm all the way to the front. Apply a bit of pressure to make sure both end caps are flush with the front. If the laser arm was skewed at all, you’ll feel it snap into place.

- Now, still holding on to the end caps, gently push the laser arm all the way to the back. Again, apply some pressure to make sure both end caps are flush with the back.

- Remember that cardboard sleeve you removed earlier? Open the sleeve and remove the cutting tray.
- Slide the cutting tray into your Craft Laser. The handles on the left and right sides will slide into the notches on either side of your printer. You should have a snug fit.


- Almost done! Your printer should look like this.

- Save everything! If you need to move your Craft Laser, or ship it (for example, for warranty service), you’ll need all the original parts: boxes, foam, plastic covering, cardboard inserts. Store them safely.
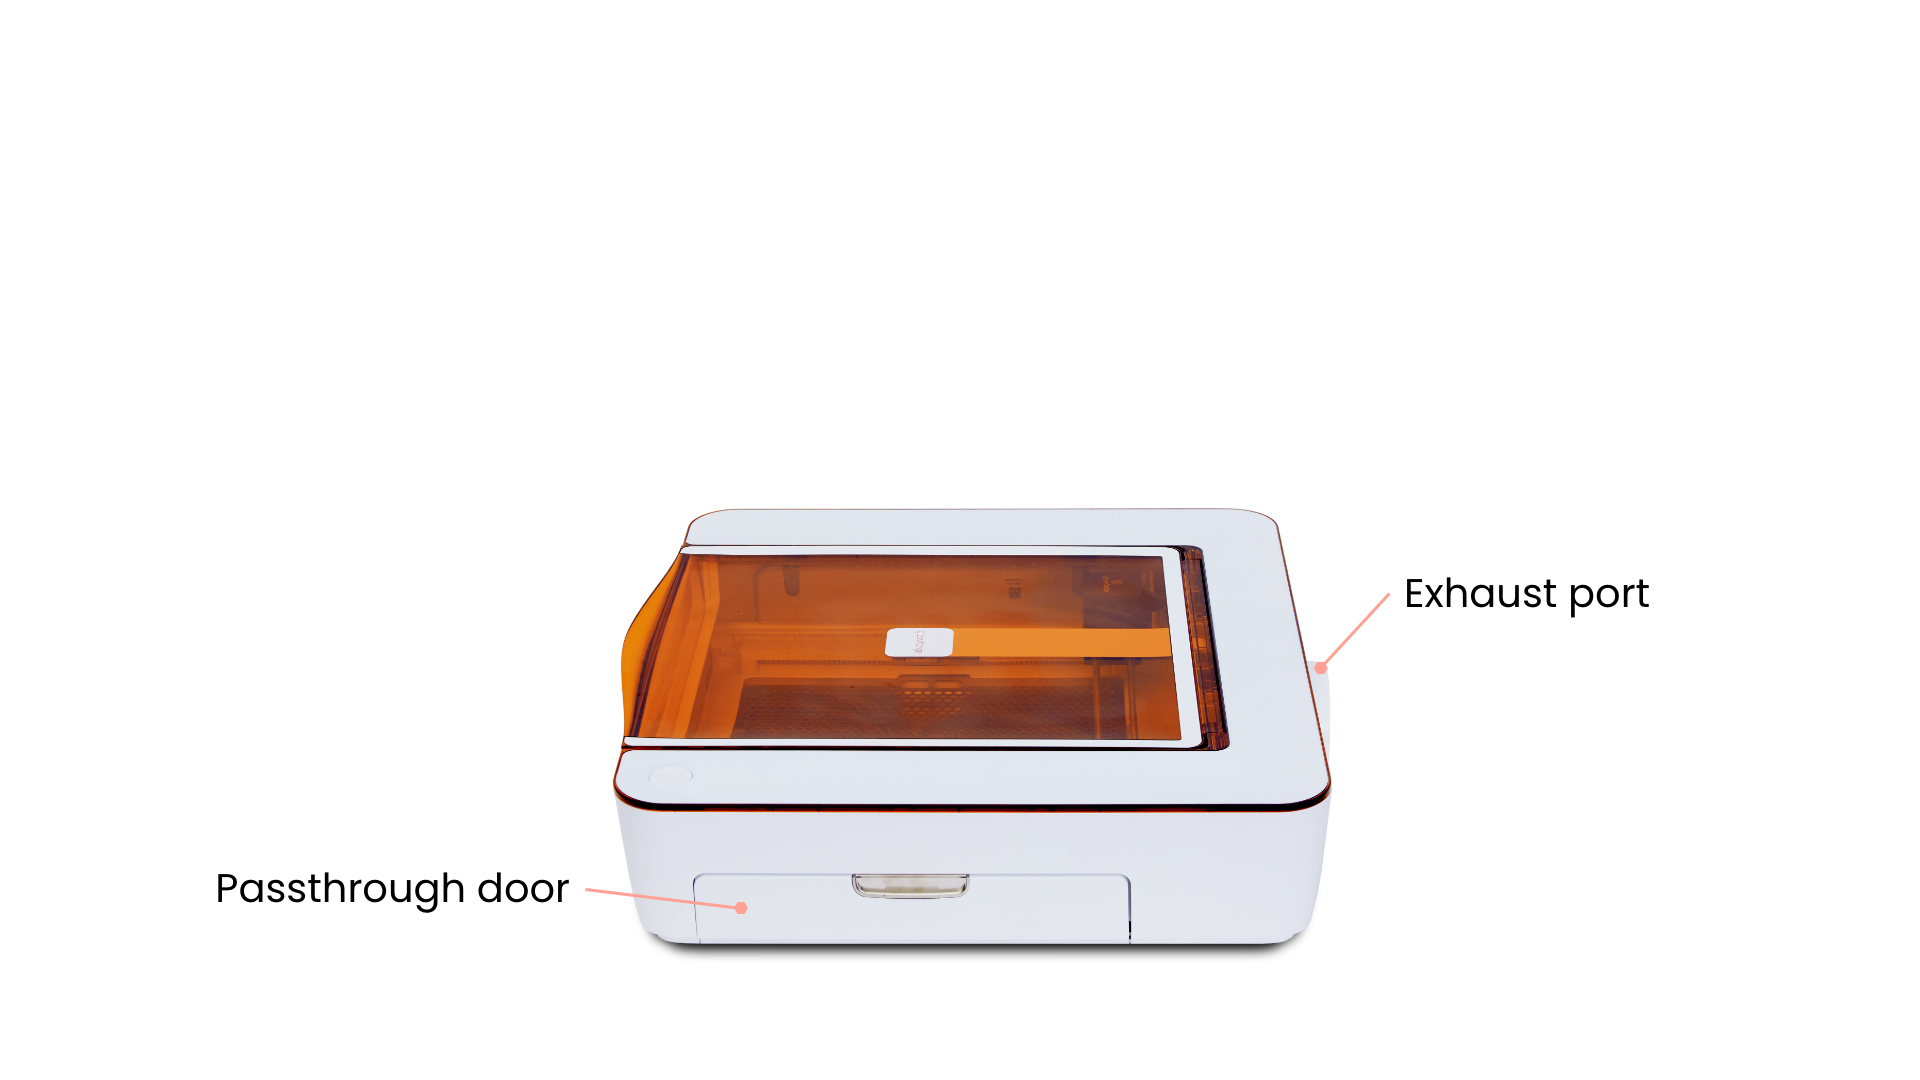
- Connect your exhaust hose to the back of your printer by sliding the rubber ring over the exhaust connection. Push it on as far as it will go. It should be a snug fit around the entire flange, and should not come off with a gentle tug.

- If you’re using a Glowforge Personal Filter, connect the other end of the hose to the lip on the top, and refer to the Glowforge Personal Filter Manual to complete setup.
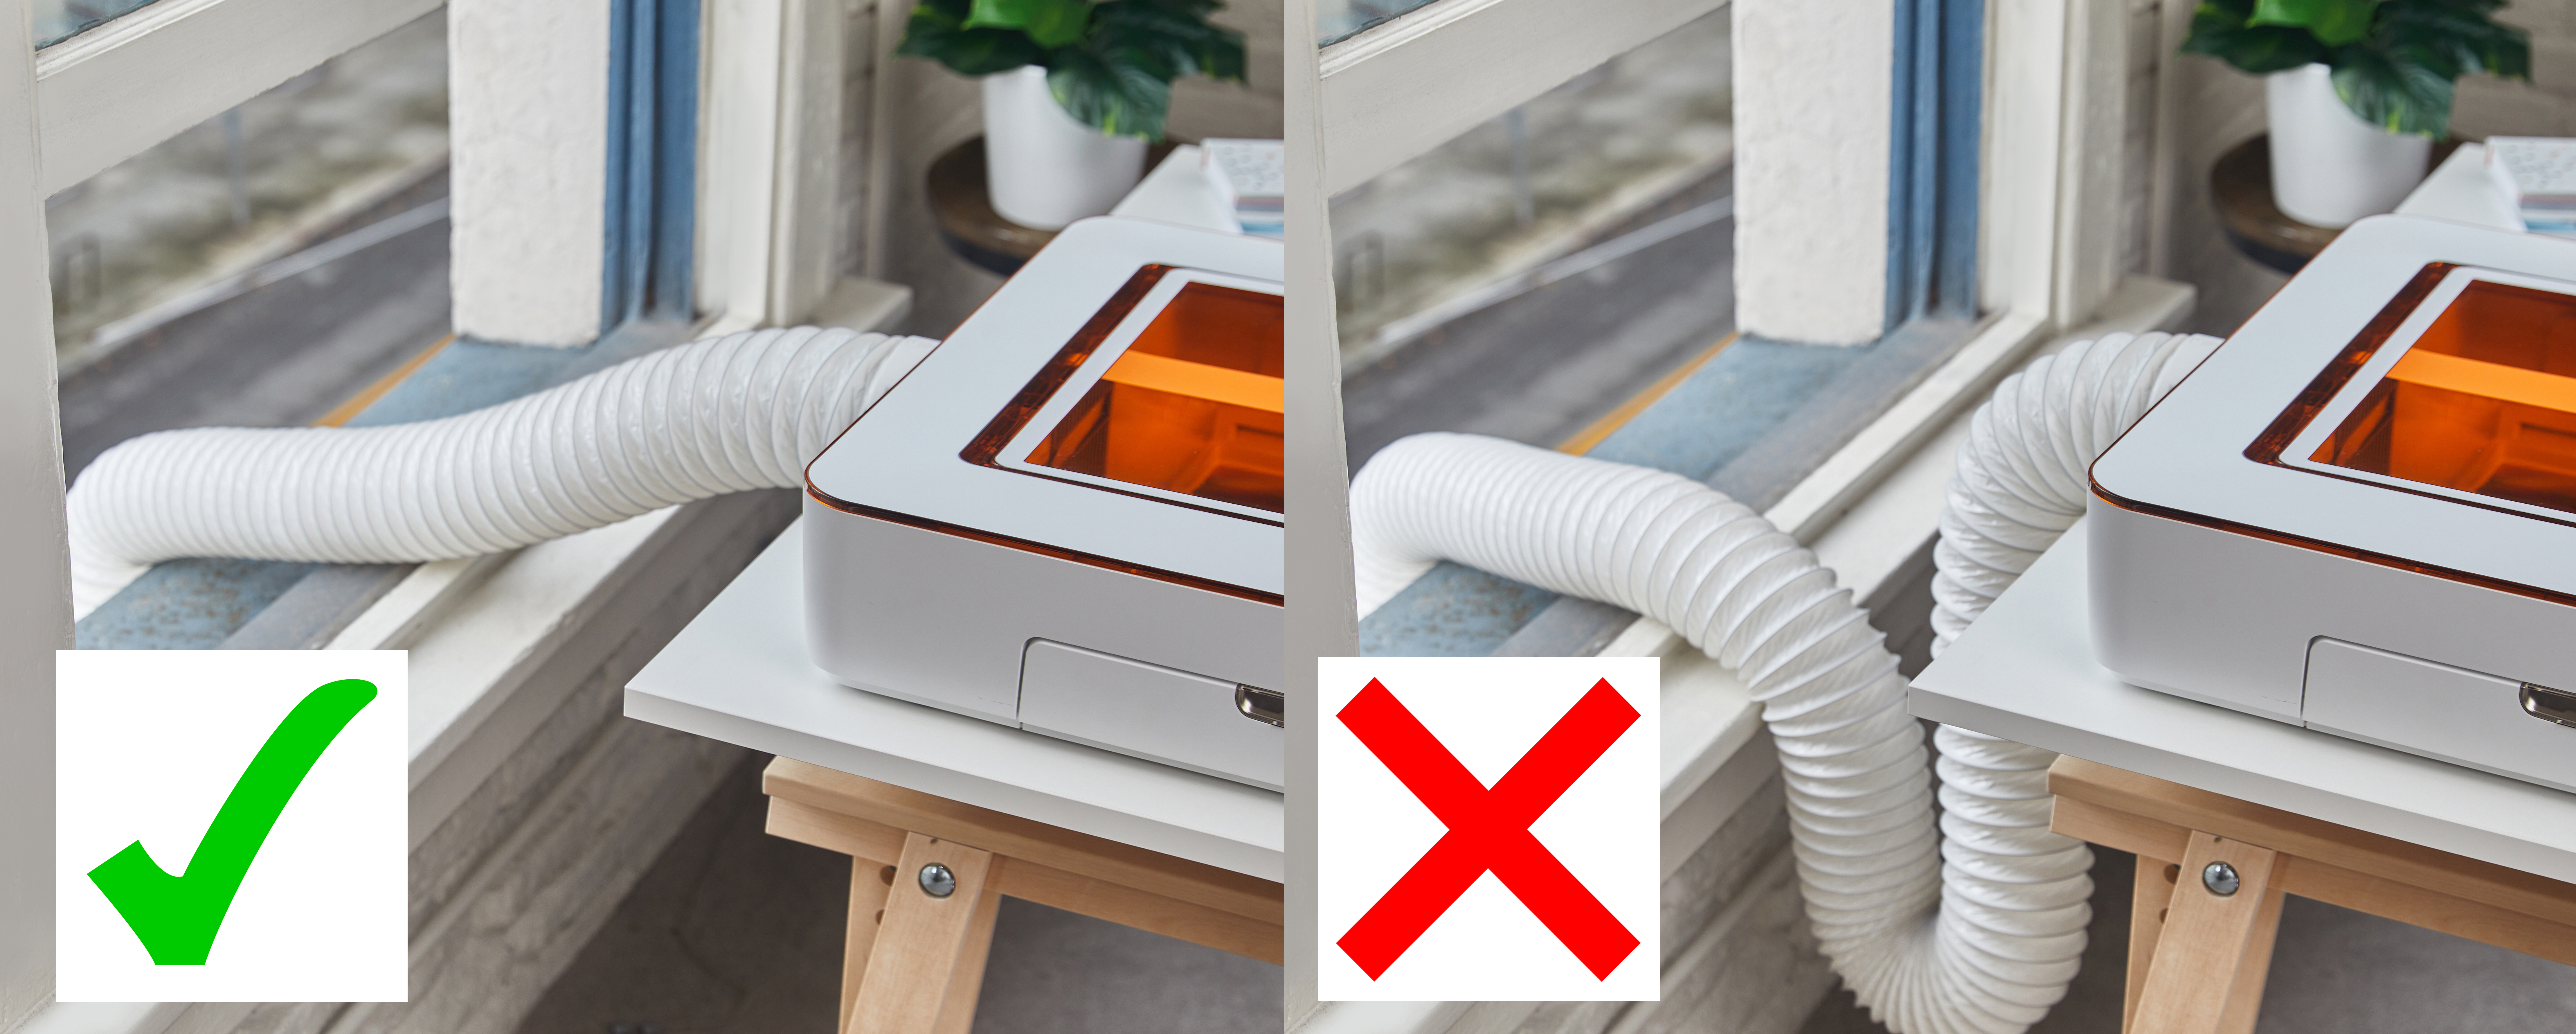
- To vent outdoors, connect the other end of the hose to the outdoors through a window or a vent that connects directly outside. Do not use a vent that extends the length of the hose past 8 feet (2.4384 m) or adds any turns. Make sure the hose isn’t twisted, pinched, kinked, or flattened.

- If you are venting outdoors, disconnect the hose after use. Changing weather conditions may cause hot, cold, or humid air to enter your Glowforge Craft Laser that could damage it. When your Glowforge Craft Laser is not in use, remove the hose from the vent or window, or disconnect it from your Glowforge Craft Laser.
- Finally, connect the power cord to the back of the printer and plug it into an outlet.

- To turn your printer on or off, simply turn on and off the power at the outlet. Or, you can leave it plugged in and it will automatically enter a rest mode after 30 minutes of inactivity.
- Using a web browser, go to glowforge.com/create-account and follow the instructions on screen to create your Glowforge account.
- After creating your account and logging in, navigate to setup.glowforge.com to finish setting up your Glowforge Craft Laser.
- Depending on your computer and browser, you may be prompted to download the Glowforge Setup app. If prompted, download and install it (this should take less than a minute). Open the Glowforge Wifi Setup app and log in with your Glowforge account email address and password. You’ll see the “Let’s Get Started!” page first. Scroll to the bottom of this page and click on “7. Connect to Wi-Fi”.
- Follow the steps onscreen to get connected.
- When you connect successfully, the laser head will center and begin its calibration process before completing and moving back to the printer’s back left corner.
- Your Glowforge is now connected to the internet and ready to print!