Create Assembly Instructions for Glowforge Catalog Designs
You’ve designed something magical, and our creators can’t wait to print it. Thoughtful designers like you make it easy to print and assemble designs by creating step-by-step assembly instructions.
How do I know if I need to provide instructions?If creators need to put together three or more parts after printing, you'll need to provide assembly instructions. Follow this guide to make them.
Before you start, check out these examples of well-written instructions:
To see instructions, you will first need to add the design to your Dashboard. Then open the design, and the instructions will appear in a window on the right.
What you’ll need- A camera to take your step-by-step instructions. You can use a professional camera or your cell phone.
- An uncluttered surface: You’ll photograph each step in the assembly process. We recommend a clean, uncluttered table or a clean sheet of white poster board.
- Great lighting: You can use professional lighting equipment or a space with great natural lighting. There are some great tips about how to take good photos in the Glowforge Catalog Photography Guide.
- A tripod (optional): A tripod helps keep your camera (or phone) stable, especially for overhead shots.
- The instructions template: Make a copy of the Assembly Instructions Template, then fill in the template as you write your instructions.
You will need to provide two types of photographs with your instructions.
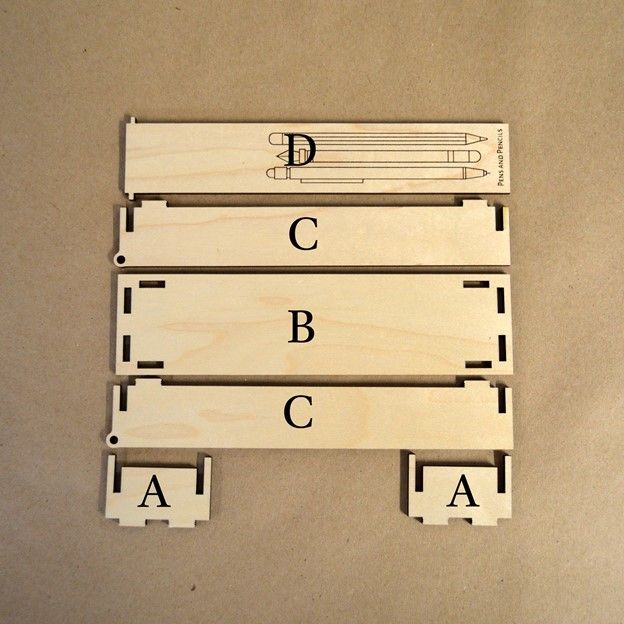
- Overhead photograph: Start with an overhead photograph of all your pieces.

-
- Arrange each piece just as they are positioned in the app (or in your printer before you take your print out).
- Clearly label each piece. These labels show your customers which parts are used in each step.
-
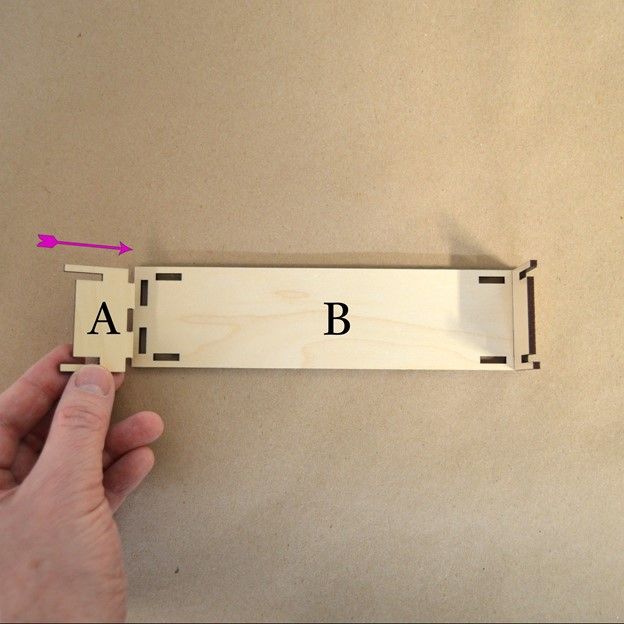
- Process photographs: For each step where your customer joins two parts, you should provide a photograph and description of what they need to do.

- Clearly label which parts your customer should be interacting with.
- Clearly show the action you expect your customer to take with the labeled parts. You can add a red arrow or a square for emphasis.
- For each process step, add a descriptive subtitle that explains what you intend your customer to do. For example: Firmly push both parts A into the end slots of part B as indicated.
- Position your phone or camera directly above the surface, looking straight down at the center of the action.
- Anything you write in words should be demonstrated in a photo. Most customers will rely more heavily on photos than on words.
- Watch for the shadows of your hands or off-camera things that might cast across your work surface.
- Crop each image so the action is centered. Keep the aspect ratio consistent at 1:1 or 4:3.
- Add arrows or other indicators to help your customer understand what they are expected to be doing. We recommend using Preview or Adobe Illustrator to mark up the photos.
Now you’re ready to get the template and write your instructions.